Questa versione può contenere modifiche errate. Passa all'ultima istantanea verificata.
Cosa ti serve
-
Questo passaggio è privo di traduzione. Aiuta a tradurlo
-
With the device turned upside down, use your index fingers to push the battery latches in towards each other.
-
-
Questo passaggio è privo di traduzione. Aiuta a tradurlo
-
Gently grasp the battery and pull it back away from the device and yourself.
-
-
Questo passaggio è privo di traduzione. Aiuta a tradurlo
-
Close the laptop and lay it down with the bottom facing up.
-
Using a size #00 Phillips screw drive remove the screw holding in the optical drive.
-
-
Questo passaggio è privo di traduzione. Aiuta a tradurlo
-
Grip the optical drive and gently pull it out.
-
-
Questo passaggio è privo di traduzione. Aiuta a tradurlo
-
Remove the 11 screws holding the body of the laptop together with a size #00 Phillips screwdriver.
-
-
Questo passaggio è privo di traduzione. Aiuta a tradurlo
-
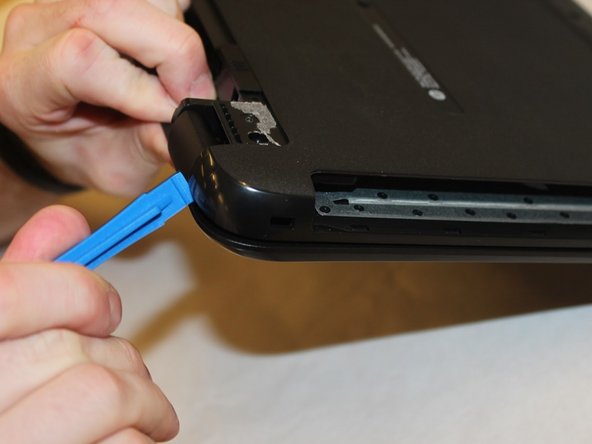
Use the spudger to press the tabs in the back of the computer. Carefully remove the back of the laptop by prying around the sides using the plastic opening tool.
-
-
Questo passaggio è privo di traduzione. Aiuta a tradurlo
-
Undo the clips holding the RAM in place using the plastic opening tool.
-
-
-
Questo passaggio è privo di traduzione. Aiuta a tradurlo
-
Carefully pull out the RAM from the motherboard.
-
-
Questo passaggio è privo di traduzione. Aiuta a tradurlo
-
Remove the highlighted screws holding the body of the laptop together with a size #00 Phillips screwdriver.
-
-
Questo passaggio è privo di traduzione. Aiuta a tradurlo
-
Using the spudger, push in the tabs in the back that hold the body together. Carefully pry the body apart by working the spudger around the body.
-
Pull the back cover off.
-
-
Questo passaggio è privo di traduzione. Aiuta a tradurlo
-
Pry up on the clamp holding the SATA power ribbon using the plastic opening tool.
-
Pull out the SATA power ribbon using the tweezers.
-
-
Questo passaggio è privo di traduzione. Aiuta a tradurlo
-
Remove the highlighted screws holding the hard drive to the body using the Philips #00 screwdriver.
-
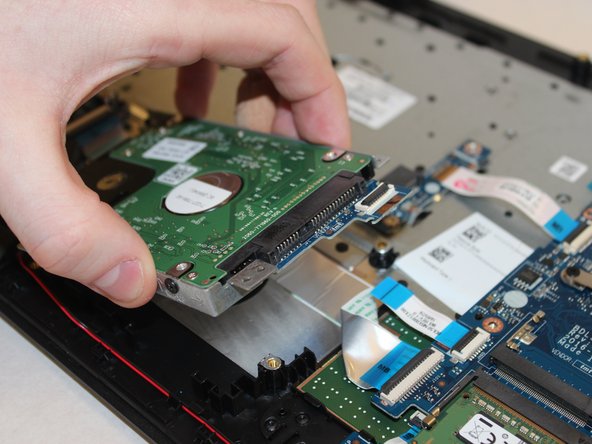
Remove the hard drive.
-
-
Questo passaggio è privo di traduzione. Aiuta a tradurlo
-
Remove the 4 screws holding the hard drive to the hard drive cage using the Philips #00 screwdriver.
-
-
Questo passaggio è privo di traduzione. Aiuta a tradurlo
-
Remove the 11 screws holding the body of the laptop together with a size #00 Phillips screwdriver.
-
-
Questo passaggio è privo di traduzione. Aiuta a tradurlo
-
Using the spudger, push in the tabs in the back that hold the body together. Carefully pry the body apart by working the spudger around the body.
-
-
Questo passaggio è privo di traduzione. Aiuta a tradurlo
-
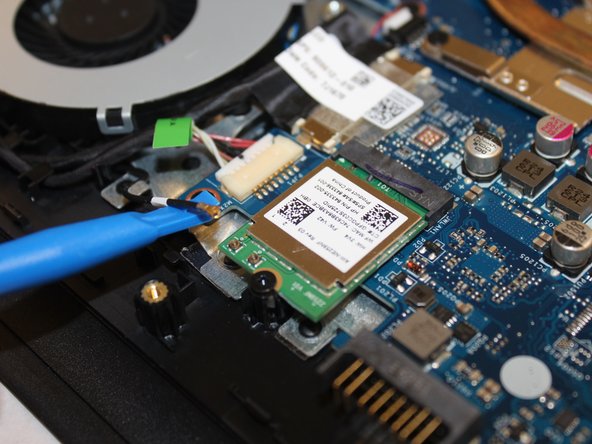
Using the spudger, carefully pry the wire connecting the wireless card to the motherboard off of it.
-
-
Questo passaggio è privo di traduzione. Aiuta a tradurlo
-
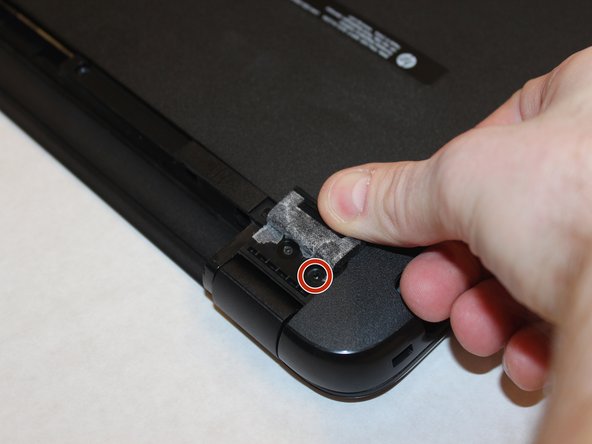
Using the size #00 Phillips screwdriver remove the single screw holding it in place.
-
-
Questo passaggio è privo di traduzione. Aiuta a tradurlo
-
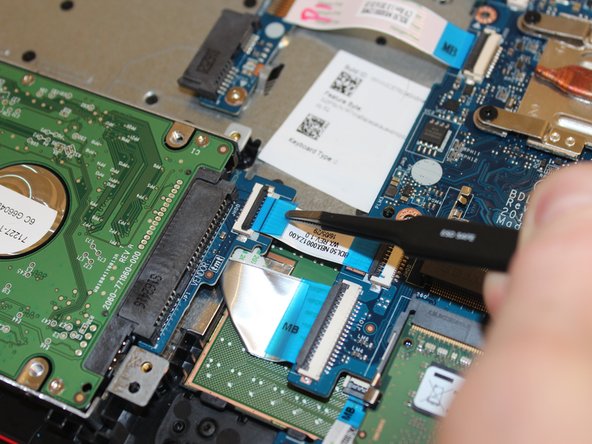
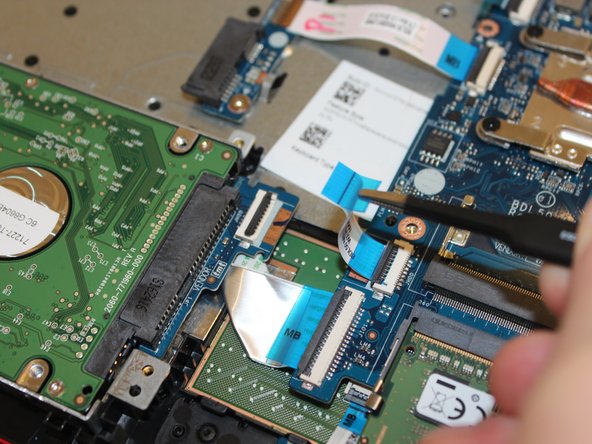
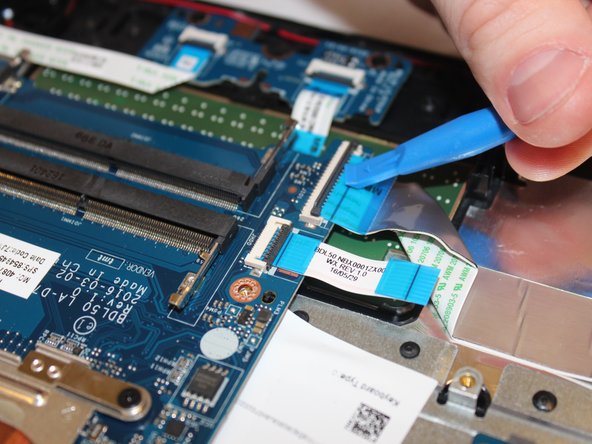
Disconnect all ribbon connectors by flipping up the black tabs and gently pulling them out.
-
Disconnect the speakers by gently pulling the connector out.
-
Disconnect the Fan by gently pulling the connector out.
-
Disconnect the power by gently pulling the connectors out.
-
-
Questo passaggio è privo di traduzione. Aiuta a tradurlo
-
Unscrew the five screws securing the motherboards.
-
-
Questo passaggio è privo di traduzione. Aiuta a tradurlo
-
Gently lift the motherboard up and out of the casing.
-


Annulla: non ho completato questa guida.
Altre 2 persone hanno completato questa guida.
Team

Washington State, Team S1-G4, Phelps-Hillen Fall 2017 Membro di Washington State, Team S1-G4, Phelps-Hillen Fall 2017
WSU-PHELPS-HILLEN-F17S1G4
6 Membri
7 Guide realizzate