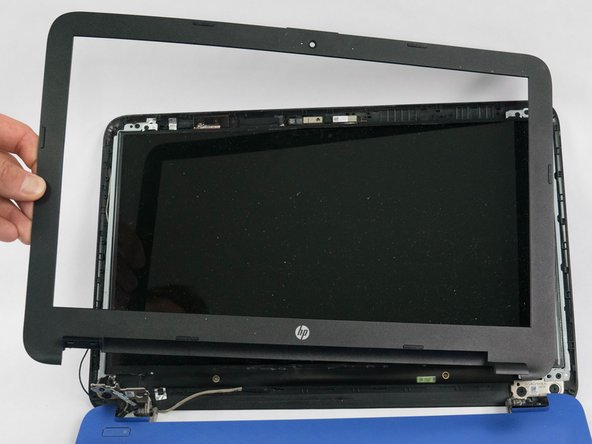
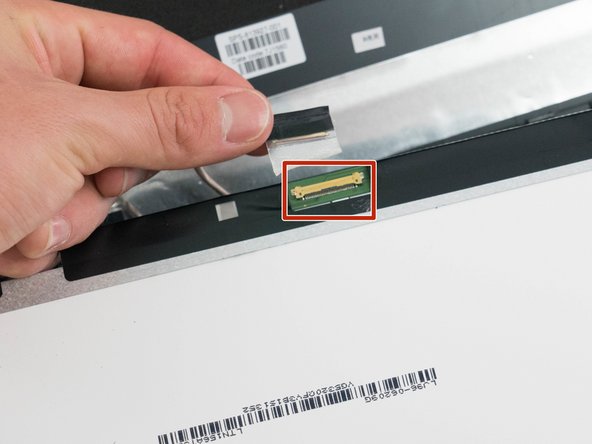
Salta al contenuto principale

HP 15-af013cl Screen Replacement

Cosa ti serve

  1. HP 15-af013cl Screen Replacement, Battery: passo 1, immagine 1 di 1
    • Start off by flipping the laptop on its back.

  2. HP 15-af013cl Screen Replacement: passo 2, immagine 1 di 3 HP 15-af013cl Screen Replacement: passo 2, immagine 2 di 3 HP 15-af013cl Screen Replacement: passo 2, immagine 3 di 3
    • Push the two spring-loaded tabs inward.

    • Once unlatched, pull the battery out of its compartment.

  3. HP 15-af013cl Screen Replacement, Screen: passo 3, immagine 1 di 1
    • Flip the laptop over and have it open as you normally would.

  4. HP 15-af013cl Screen Replacement: passo 4, immagine 1 di 3 HP 15-af013cl Screen Replacement: passo 4, immagine 2 di 3 HP 15-af013cl Screen Replacement: passo 4, immagine 3 di 3
    • Using a pry tool, unclip the entire outer plastic cover from the front of the screen.

    • Gently remove the front plastic cover.

  5. HP 15-af013cl Screen Replacement: passo 5, immagine 1 di 1
    • Remove the two 2.5mm × 3.0mm Phillips screws from each corner of the display.

  6. HP 15-af013cl Screen Replacement: passo 6, immagine 1 di 2 HP 15-af013cl Screen Replacement: passo 6, immagine 2 di 2
    • Carefully lift the display out of the laptop shell and flip it on its front.

    • Disconnect the single cable from the back of the display.

Conclusione

To reassemble your device, follow these instructions in reverse order.

Un'altra persona ha completato questa guida.

Team

Cal Poly, Team S8-G6, Banghart Fall 2017 Membro di Cal Poly, Team S8-G6, Banghart Fall 2017

CPSU-BANGHART-F17S8G6

5 Membri

6 Guide realizzate

0 Commenti

Aggiungi Commento

Visualizza Statistiche:

Ultime 24 Ore: 1

Ultimi 7 Giorni: 2

Ultimi 30 Giorni: 10

Tutti i Tempi: 992