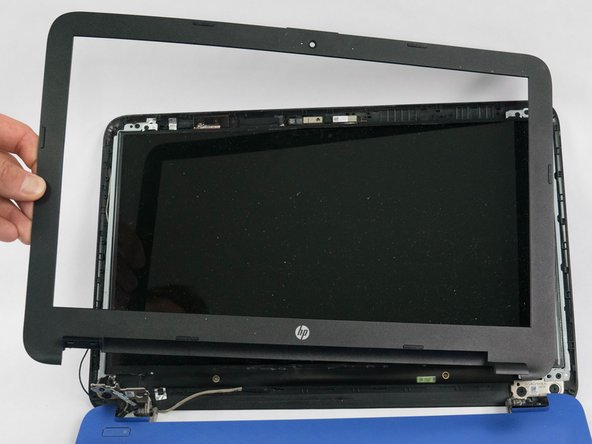
Salta al contenuto principale

HP 15-af013cl Front Facing Camera Replacement

Cosa ti serve

  1. HP 15-af013cl Front Facing Camera Replacement, Battery: passo 1, immagine 1 di 1
    • Start off by flipping the laptop on its back.

  2. HP 15-af013cl Front Facing Camera Replacement: passo 2, immagine 1 di 3 HP 15-af013cl Front Facing Camera Replacement: passo 2, immagine 2 di 3 HP 15-af013cl Front Facing Camera Replacement: passo 2, immagine 3 di 3
    • Push the two spring-loaded tabs inward.

    • Once unlatched, pull the battery out of its compartment.

  3. HP 15-af013cl Front Facing Camera Replacement, Screen: passo 3, immagine 1 di 1
    • Flip the laptop over and have it open as you normally would.

  4. HP 15-af013cl Front Facing Camera Replacement: passo 4, immagine 1 di 3 HP 15-af013cl Front Facing Camera Replacement: passo 4, immagine 2 di 3 HP 15-af013cl Front Facing Camera Replacement: passo 4, immagine 3 di 3
    • Using a pry tool, unclip the entire outer plastic cover from the front of the screen.

    • Gently remove the front plastic cover.

  5. HP 15-af013cl Front Facing Camera Replacement: passo 5, immagine 1 di 1
    • Remove the two 2.5mm × 3.0mm Phillips screws from each corner of the display.

  6. HP 15-af013cl Front Facing Camera Replacement: passo 6, immagine 1 di 2 HP 15-af013cl Front Facing Camera Replacement: passo 6, immagine 2 di 2
    • Carefully lift the display out of the laptop shell and flip it on its front.

    • Disconnect the single cable from the back of the display.

  7. HP 15-af013cl Front Facing Camera Replacement, Front Facing Camera: passo 7, immagine 1 di 2 HP 15-af013cl Front Facing Camera Replacement, Front Facing Camera: passo 7, immagine 2 di 2
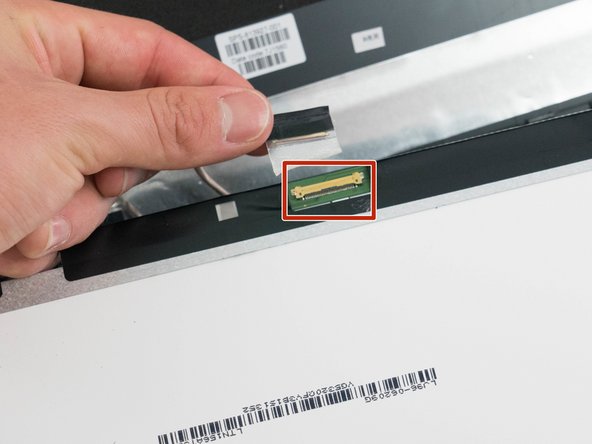
    • The front camera is held in by light adhesive. Pry gently on the back of the camera in order to remove it.

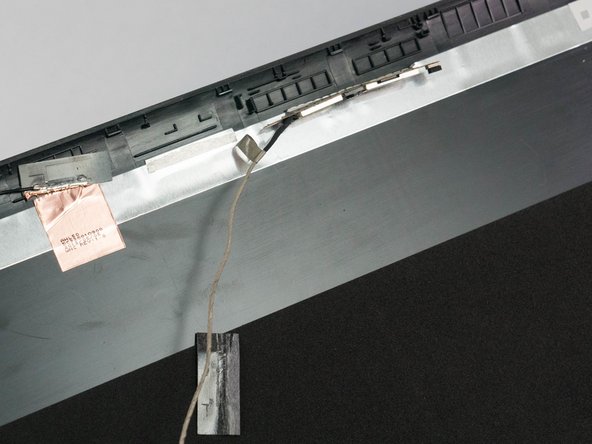
    • Remove the cable from under the metal foil.

  8. HP 15-af013cl Front Facing Camera Replacement: passo 8, immagine 1 di 1
    • Flip the laptop back over.

    • Using the Phillips P0 screwdriver, remove the 9 M2.5mm x 6.5mm screws from the bottom of the laptop.

    • Remove the additional 2 M2.0mm × 1.5mm Phillips screws located in the battery compartment.

  9. HP 15-af013cl Front Facing Camera Replacement: passo 9, immagine 1 di 2 HP 15-af013cl Front Facing Camera Replacement: passo 9, immagine 2 di 2
    • Remove the optical disk drive from the side of the laptop.

  10. HP 15-af013cl Front Facing Camera Replacement: passo 10, immagine 1 di 1
    • Lift off the bottom cover, exposing the motherboard and other components underneath.

  11. HP 15-af013cl Front Facing Camera Replacement: passo 11, immagine 1 di 1
    • Disconnect the display ribbon cable from the motherboard.

Conclusione

To reassemble your device, follow these instructions in reverse order.

Team

Cal Poly, Team S8-G6, Banghart Fall 2017 Membro di Cal Poly, Team S8-G6, Banghart Fall 2017

CPSU-BANGHART-F17S8G6

5 Membri

6 Guide realizzate

0 Commenti

Aggiungi Commento

Visualizza Statistiche:

Ultime 24 Ore: 0

Ultimi 7 Giorni: 0

Ultimi 30 Giorni: 5

Tutti i Tempi: 409