Questa versione può contenere modifiche errate. Passa all'ultima istantanea verificata.
Cosa ti serve
-
Questo passaggio è privo di traduzione. Aiuta a tradurlo
-
Locate the CD Compartment panel and gently slide it out.
-
-
-
Questo passaggio è privo di traduzione. Aiuta a tradurlo
-
Remove the back of the laptop by unscrewing the screws shown.
-
Also remove the other 5 Phillips screws lining the back cover.
-
-
Questo passaggio è privo di traduzione. Aiuta a tradurlo
-
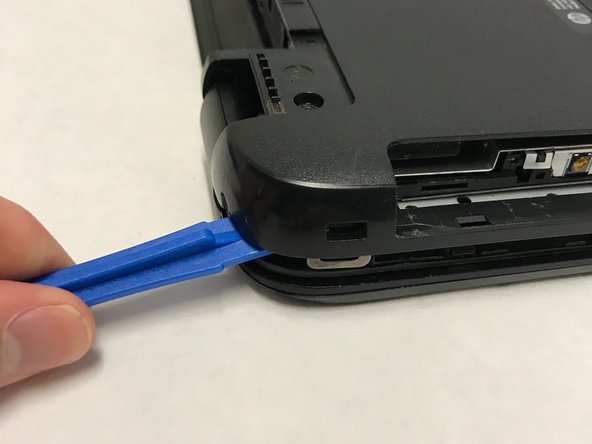
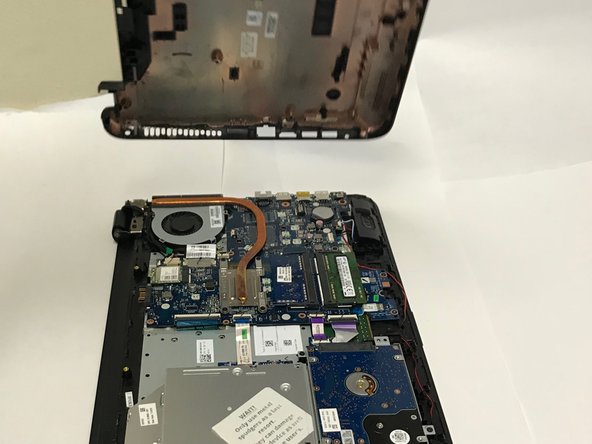
Using the prying tool, wedge it underneath the back of the laptop and do the same all around until the back comes off.
-
Dont forget to unscrew 2 screws under 2 plastic tabs (one on each hing). The lid will not come off without them being removed!
-


Annulla: non ho completato questa guida.
Altre 3 persone hanno completato questa guida.
Team

Baylor, Team S1-G2, Johnson Spring 2018 Membro di Baylor, Team S1-G2, Johnson Spring 2018
BU-JOHNSON-S18S1G2
3 Membri
6 Guide realizzate