Salta al contenuto principale

Greist Buttonholer Button Template Replacement

  1. Greist Buttonholer Button Template Replacement, Preparing the Buttonholer: passo 1, immagine 1 di 2 Greist Buttonholer Button Template Replacement, Preparing the Buttonholer: passo 1, immagine 2 di 2
    • Turn the adjusting knob to the right until the cloth clamp is extended as far as it can go.

  2. Greist Buttonholer Button Template Replacement, Open the Retainer Plate: passo 2, immagine 1 di 2 Greist Buttonholer Button Template Replacement, Open the Retainer Plate: passo 2, immagine 2 di 2
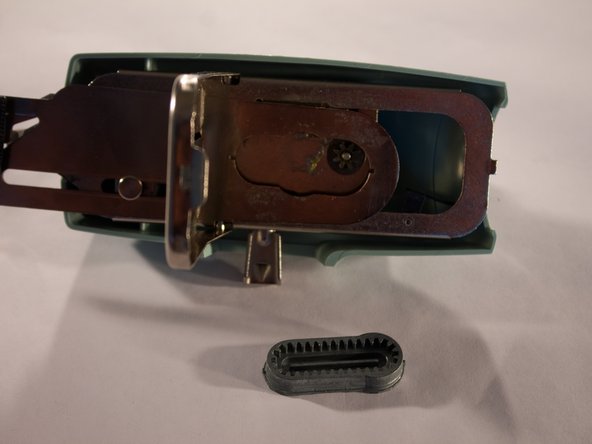
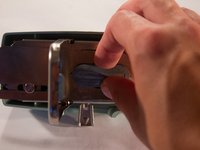
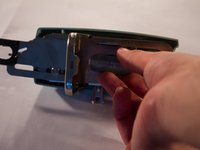
    • Located on the bottom, pull the lip of the retainer plate away from The Buttonholer, and then open the plate.

  3. Greist Buttonholer Button Template Replacement, Remove the Template: passo 3, immagine 1 di 2 Greist Buttonholer Button Template Replacement, Remove the Template: passo 3, immagine 2 di 2
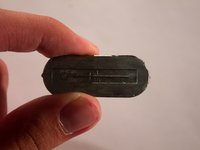
    • Since the clamp is extended as far as it can go, the template should come out easily.

  4. Greist Buttonholer Button Template Replacement, Choose a New Template: passo 4, immagine 1 di 2 Greist Buttonholer Button Template Replacement, Choose a New Template: passo 4, immagine 2 di 2
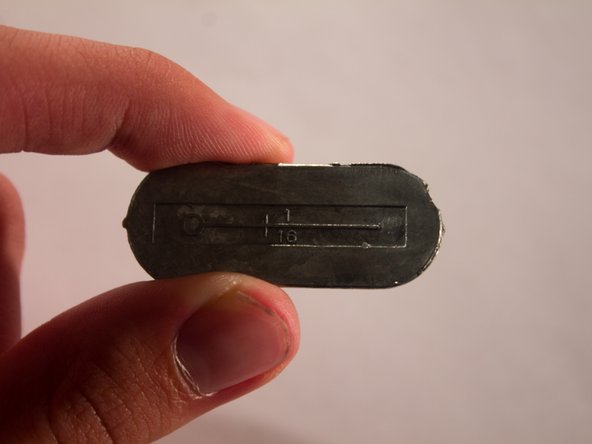
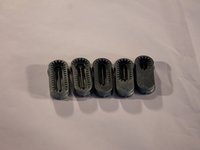
    • 4 additional templates are included with The Buttonholer. Each template creates a different size button hole.

    • If you are unsure which template is right for your project, check the back of each template for the diameter of the holes that they make.

  5. Greist Buttonholer Button Template Replacement, Insert the New Template: passo 5, immagine 1 di 2 Greist Buttonholer Button Template Replacement, Insert the New Template: passo 5, immagine 2 di 2
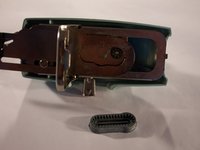
    • Place the template into The Buttonholer, and then close the retainer plate.

Conclusione

To reassemble your device, follow these instructions in reverse order.

Un'altra persona ha completato questa guida.

Michael Sykes

Membro da: 10/06/14

552 Reputazione

5 Guide realizzate

Team

USF Tampa, Team 3-6, Brown Fall 2014 Membro di USF Tampa, Team 3-6, Brown Fall 2014

USFT-BROWN-F14S3G6

5 Membri

8 Guide realizzate

Un commento

I had to use the reduction knob so the fabric holder was not fully extended to open the plate. So play with it. Better lighting on the unit once it was upside down and dark would have been helpful. But I did manage with this and the booklet. thank you.

Marcy - Replica

Aggiungi Commento

Visualizza Statistiche:

Ultime 24 Ore: 0

Ultimi 7 Giorni: 1

Ultimi 30 Giorni: 5

Tutti i Tempi: 384