Questa versione può contenere modifiche errate. Passa all'ultima istantanea verificata.
Cosa ti serve
-
Questo passaggio è privo di traduzione. Aiuta a tradurlo
-
Use the iFixit opening tools or a metal spudger to pry the rubber covers off the back of your Pixelbook.
-
Peel the linings off completely until the back of the Pixelbook looks bare.
-
-
Questo passaggio è privo di traduzione. Aiuta a tradurlo
-
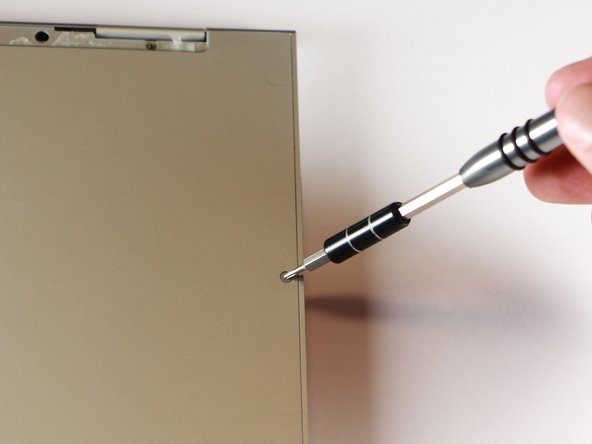
Remove the two yellow 2.0mm screws by using a T3 Torx screwdriver.
-
-
Questo passaggio è privo di traduzione. Aiuta a tradurlo
-
Remove the seventeen 3.0mm T5 Torx screws from the bottom panel.
-
-
Questo passaggio è privo di traduzione. Aiuta a tradurlo
-
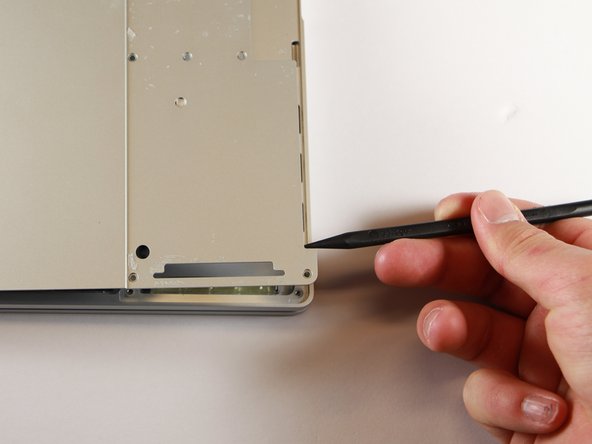
Use the nylon spudger to pry the edge of the Pixelbook up until you can grab the edge with your fingers.
-
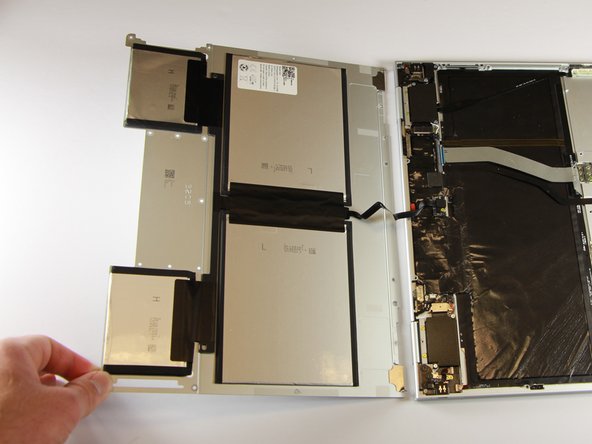
Open the back panel completely and lay it flat so you see the whole inside of the computer.
-
-
-
Questo passaggio è privo di traduzione. Aiuta a tradurlo
-
Remove the yellow 2.0mm screw from the middle of the panel by using the T3 Torx screwdriver to turn the screw counterclockwise.
-
-
Questo passaggio è privo di traduzione. Aiuta a tradurlo
-
Remove the small, black casing by using the spudger to lift it up from its place.
-
-
Questo passaggio è privo di traduzione. Aiuta a tradurlo
-
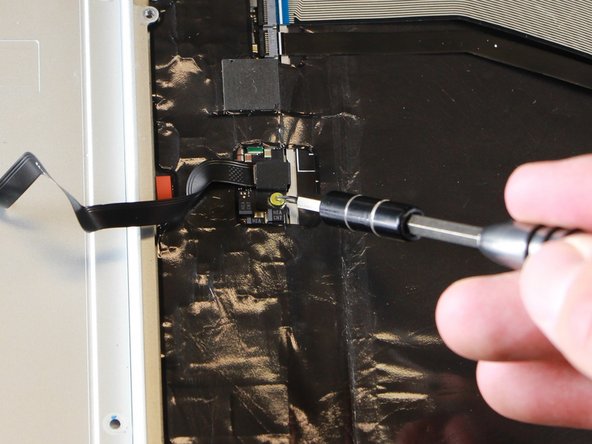
Disconnect the flat, black cord from the main component by using a spudger to push it out of the slot, or by using your hand to carefully pull it out.
-
Your back panel is now free from the main component.
-
-
Questo passaggio è privo di traduzione. Aiuta a tradurlo
-
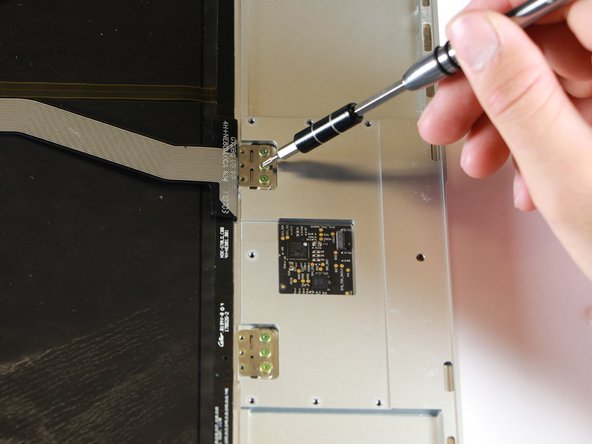
Once the back panel is out of the way, use the T3 Torx screwdriver to turn both the 2.0mm and large 3.0mm gold screws from the touchpad.
-
-
Questo passaggio è privo di traduzione. Aiuta a tradurlo
-
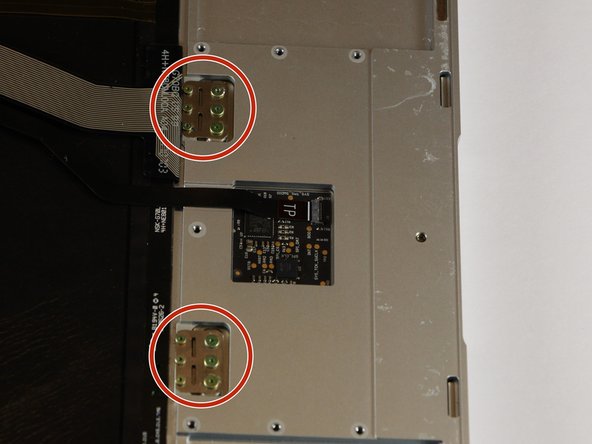
Gently pull out the ribbon connector either by using tweezers or your fingers to pull the cord out and up.
-
-
Questo passaggio è privo di traduzione. Aiuta a tradurlo
-
Use the nylon spudger to push the touchpad out of the laptop by inserting the point into the hole near the edge of the laptop.
-
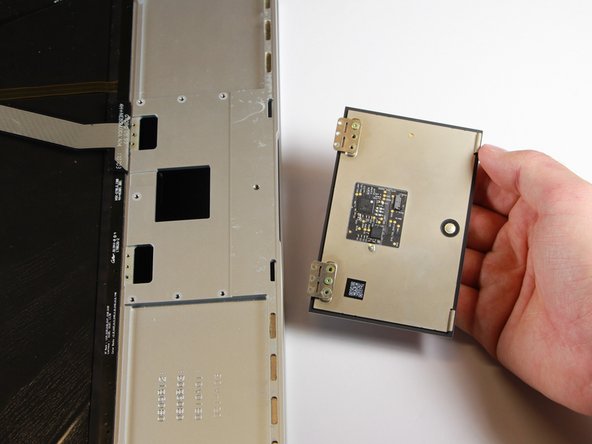
As the metal plates with the screws tilt upwards, use your hand to catch the falling touchpad and remove it.
-


Annulla: non ho completato questa guida.
Altre 3 persone hanno completato questa guida.
Team

Cal Poly, Team S18-G1, Livingston Winter 2018 Membro di Cal Poly, Team S18-G1, Livingston Winter 2018
CPSU-LIVINGSTON-W18S18G1
4 Membri
7 Guide realizzate
6 Commenti
Hello, I followed this guide and no the pixelbook will no longer power on. I reassembled exactly as described here. No light is coming on when I plu in the official charger, have tried other chargers as well. Any suggestions? I’ve been holding refresh + power and ESC but no change. Thanks…
What I read after the fact is that if you don’t do a full power off (hold refresh and power for 5 seconds until it is completely off) then the process here could short the motherboard. Which in my case it did. And I really wish these instructions had included something about that.
Ah I see! I just performed it last night actually, I did a regular shutdown via the “shutdown” button in the settings, everything went just fine luckily. Check out the corrosion that was causing my issue! http://imgur.com/gallery/cCfuGh2
In my settings under "devices" I didn't even have an option named “trackpad" - and that would be why,