Salta al contenuto principale

Google Pixelbook Sound Card Replacement

Cosa ti serve

  1. Google Pixelbook Sound Card Replacement, Battery (Back Panel): passo 1, immagine 1 di 3 Google Pixelbook Sound Card Replacement, Battery (Back Panel): passo 1, immagine 2 di 3 Google Pixelbook Sound Card Replacement, Battery (Back Panel): passo 1, immagine 3 di 3
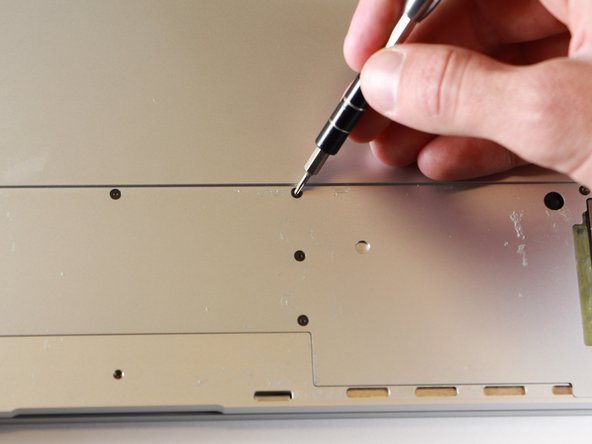
    • Use the iFixit opening tools or a metal spudger to pry the rubber covers off the back of your Pixelbook.

    • Peel the linings off completely until the back of the Pixelbook looks bare.

    After using the spurger to start lifting the rubber like cover at a corner, a two inch wide paint scrapper proved to be an easy way to continue. Using the scrapper at roughly a 30 degree angle (with respect to the laptop rectangle) allowed progressive lifting of the cover. Ripping of the cover tended to occur if only the narrow spurger was used.

    Marvin Stodolsky - Replica

    Please i need to buy the motherboard

    This my email chikaubah33@yahoo.com

    chika ubah - Replica

    The narrow rubber foot at the base of the display is supported by bendable metal. Be careful how evenly you remove it as uneven motions will result in a more bent and harder to re-apply piece.

    Meta Data - Replica

  2. Google Pixelbook Sound Card Replacement: passo 2, immagine 1 di 2 Google Pixelbook Sound Card Replacement: passo 2, immagine 2 di 2
    • Remove the two yellow 2.0mm screws by using a T3 Torx screwdriver.

  3. Google Pixelbook Sound Card Replacement: passo 3, immagine 1 di 3 Google Pixelbook Sound Card Replacement: passo 3, immagine 2 di 3 Google Pixelbook Sound Card Replacement: passo 3, immagine 3 di 3
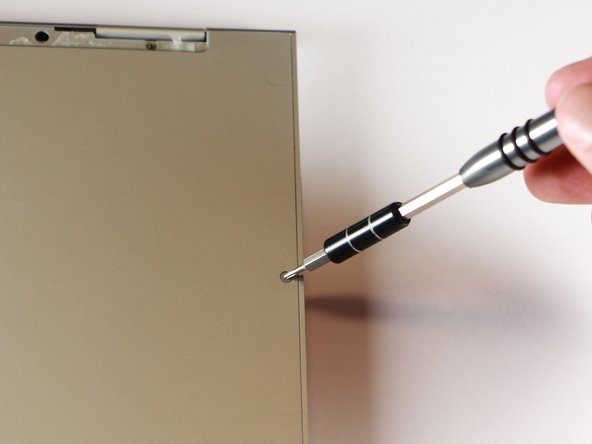
    • Remove the seventeen 3.0mm T5 Torx screws from the bottom panel.

    Just a heads up on “Step 3”: (not sure if maybe mine is a newer model since I just got it about a week ago) But there are only 15 of the T5 Screws on mine… Not 17. There are only 2, instead of 4, screws at the top of the picture (located at the hinge) showing the back where they are all circled.

    Jeff Lewis - Replica

    I had the same experience as Jeff.

    Paul Schreiber - Replica

    same, there are only two screws up top, not 4, thus 15 total

    Meta Data - Replica

  4. Google Pixelbook Sound Card Replacement: passo 4, immagine 1 di 3 Google Pixelbook Sound Card Replacement: passo 4, immagine 2 di 3 Google Pixelbook Sound Card Replacement: passo 4, immagine 3 di 3
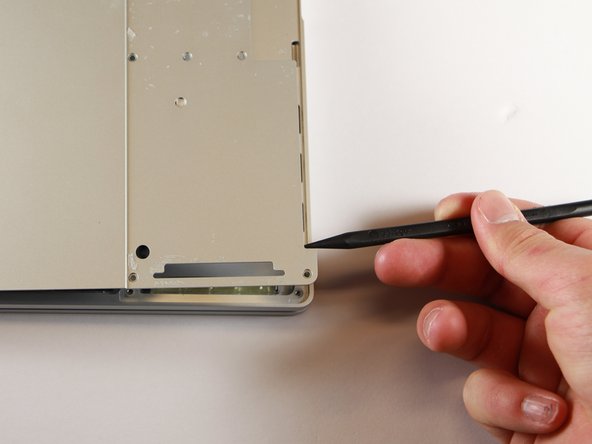
    • Use the nylon spudger to pry the edge of the Pixelbook up until you can grab the edge with your fingers.

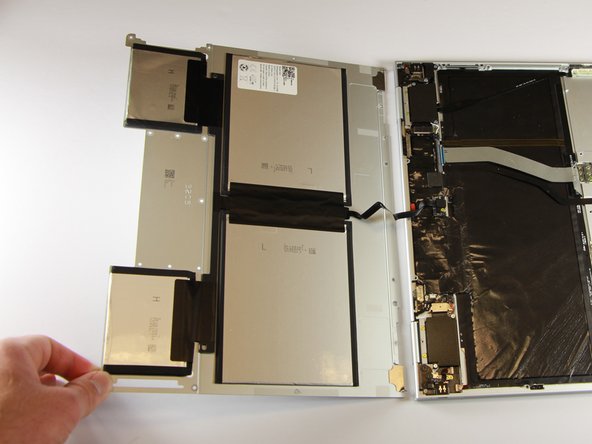
    • Open the back panel completely and lay it flat so you see the whole inside of the computer.

  5. Google Pixelbook Sound Card Replacement: passo 5, immagine 1 di 2 Google Pixelbook Sound Card Replacement: passo 5, immagine 2 di 2
    • Remove the yellow 2.0mm screw from the middle of the panel by using the T3 Torx screwdriver to turn the screw counterclockwise.

    For me, these were T4 and not T3 screws (everything labelled T3 was a T4 for me).

    Paul Schreiber - Replica

  6. Google Pixelbook Sound Card Replacement: passo 6, immagine 1 di 2 Google Pixelbook Sound Card Replacement: passo 6, immagine 2 di 2
    • Remove the small, black casing by using the spudger to lift it up from its place.

    Does anyone know if I can get the cable shown in this image as its own part? It is the only thing wrong with my machine and I don't want to fork out £70 for an entire new battery and cable.

    Mark Huttley - Replica

  7. Google Pixelbook Sound Card Replacement: passo 7, immagine 1 di 1
    • Disconnect the flat, black cord from the main component by using a spudger to push it out of the slot, or by using your hand to carefully pull it out.

    • Your back panel is now free from the main component.

  8. Google Pixelbook Sound Card Replacement, Right Charging Port: passo 8, immagine 1 di 2 Google Pixelbook Sound Card Replacement, Right Charging Port: passo 8, immagine 2 di 2
    • Remove the three 2.0mm black screws from the sound card by using a T5 Torx screwdriver to turn them counterclockwise.

    • Remove the gold 3.0mm screw by using a T3 Torx screwdriver to turn it counterclockwise.

    There is a step missing to remove the two silver 3mm screens from the black component.

    Scott Jones - Replica

  9. Google Pixelbook Sound Card Replacement: passo 9, immagine 1 di 1
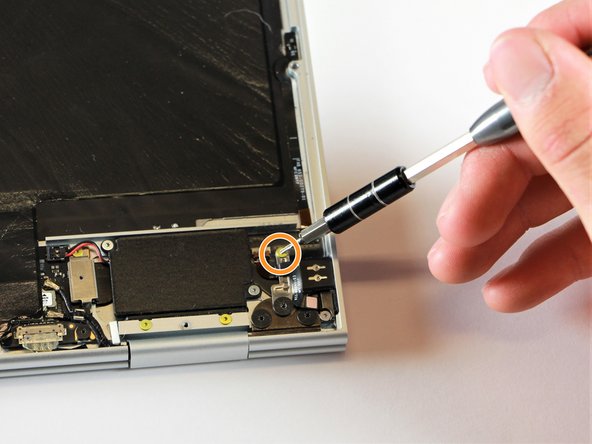
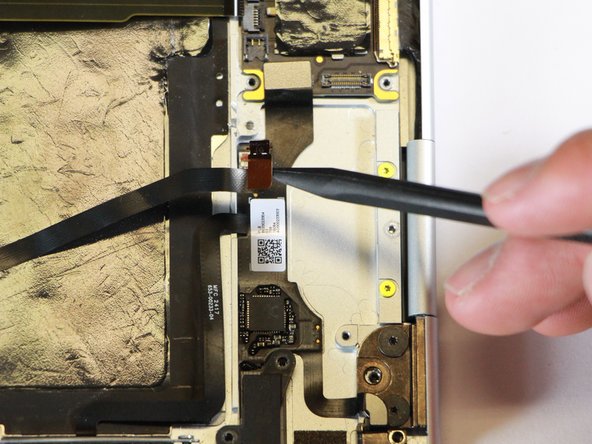
    • Disconect the thin, black and red cord from the motherboard by using the spudger to snap the connector up and out of place.

  10. Google Pixelbook Sound Card Replacement: passo 10, immagine 1 di 1
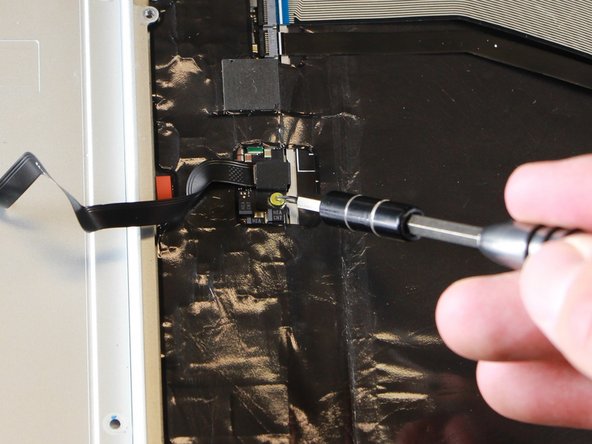
    • Remove the yellow 2.0mm screw by using the T3 Torx screwdriver to turn the screw counterclockwise.

  11. Google Pixelbook Sound Card Replacement: passo 11, immagine 1 di 1
    • Remove the small, red component by lifting it up with the spudger.

  12. Google Pixelbook Sound Card Replacement: passo 12, immagine 1 di 1
    • Disconnect the metal component of the thin, black component by lifting it up with the spudger.

  13. Google Pixelbook Sound Card Replacement: passo 13, immagine 1 di 2 Google Pixelbook Sound Card Replacement: passo 13, immagine 2 di 2
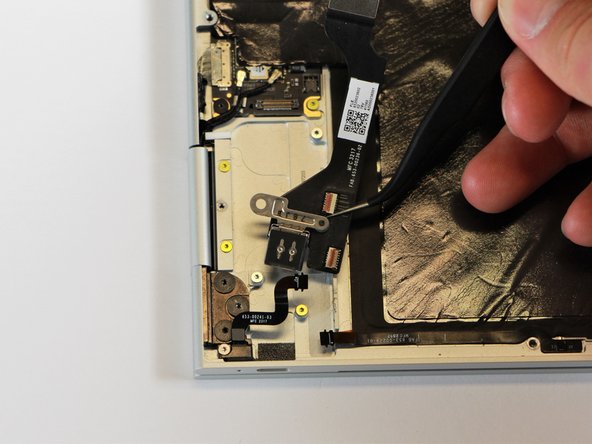
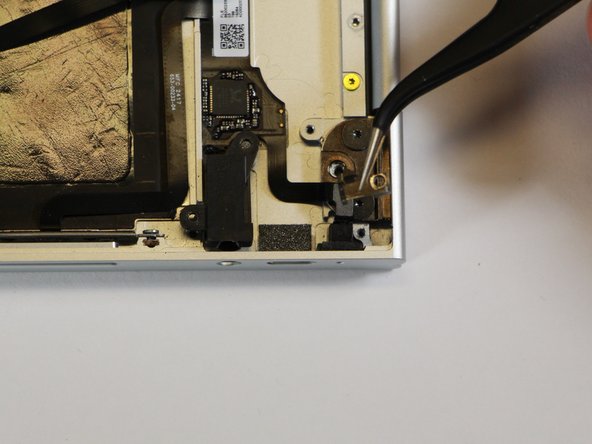
    • Remove the right charging port by picking it up with the tweezers and lifting it from the computer.

  14. Google Pixelbook Sound Card Replacement, Sound Card: passo 14, immagine 1 di 1
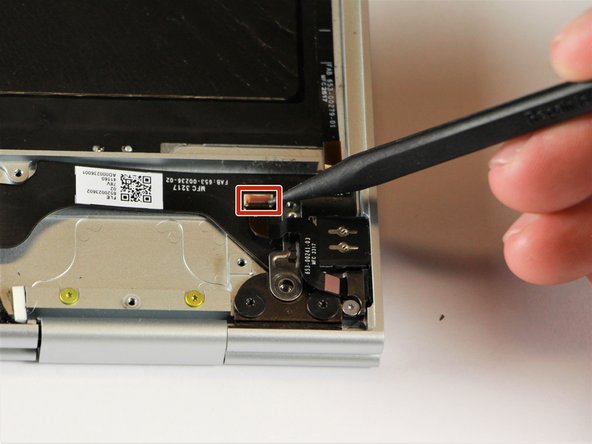
    • Use the spudger to disconnect the sound card from the motherboard by pulling the connector up and away from the motherboard.

  15. Google Pixelbook Sound Card Replacement: passo 15, immagine 1 di 2 Google Pixelbook Sound Card Replacement: passo 15, immagine 2 di 2
    • Flip open the connection point on the sound card by using the spudger to pop the latch upward.

    • Disconnect the black ribbon cable from the sound card by using the spudger or your fingers to pull the cable out and away from the connecting port.

  16. Google Pixelbook Sound Card Replacement: passo 16, immagine 1 di 2 Google Pixelbook Sound Card Replacement: passo 16, immagine 2 di 2
    • Use the needle-nose tweezers to remove the silver casing by lifting it up and out of the laptop.

  17. Google Pixelbook Sound Card Replacement: passo 17, immagine 1 di 1
    • Disconnect the speaker from the laptop frame by pulling the black ribbon cable out and away from the port.

    • The speaker may be tough to pull out of the frame if it has not been disconnected previously.

  18. Google Pixelbook Sound Card Replacement: passo 18, immagine 1 di 1
    • Use a T3 Torx screwdriver to remove the two silver 3.0mm screws located on the vertical edge of the casing by turning the screws counterclockwise.

  19. Google Pixelbook Sound Card Replacement: passo 19, immagine 1 di 2 Google Pixelbook Sound Card Replacement: passo 19, immagine 2 di 2
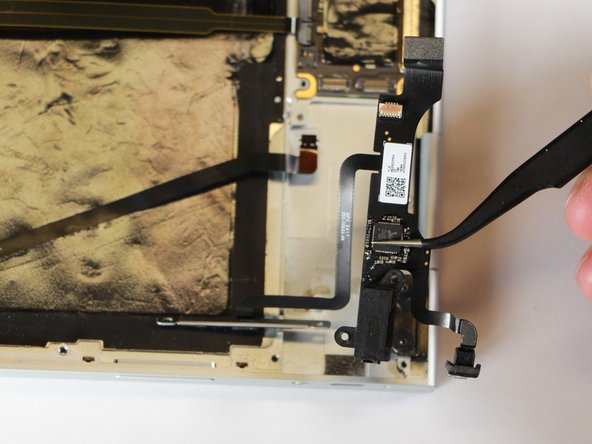
    • Use the needle-nose tweezers to remove the sound card by lifting it up and out of the laptop.

Conclusione

To reassemble your device, follow these instructions in reverse order.

Altre 2 persone hanno completato questa guida.

Derrick Unger

Membro da: 01/24/18

361 Reputazione

2 Guide realizzate

Team

Cal Poly, Team S18-G1, Livingston Winter 2018 Membro di Cal Poly, Team S18-G1, Livingston Winter 2018

CPSU-LIVINGSTON-W18S18G1

4 Membri

7 Guide realizzate

Un commento

Great guide. My headphones broke inside the jack, tried many different techniques to get it out and am now looking to just replace the jack or soundcard. Anyone have any ideas where to source these parts? Looked everywhere, Inc eBay.

Ryan Clifford - Replica

Aggiungi Commento

Visualizza Statistiche:

Ultime 24 Ore: 1

Ultimi 7 Giorni: 4

Ultimi 30 Giorni: 8

Tutti i Tempi: 1,732