Salta al contenuto principale

Questa guida ha delle modifiche più recenti. Passa all'ultima versione non verificata.

Google Pixelbook Motherboard Replacement

Cosa ti serve

  1. Google Pixelbook Motherboard Replacement, Battery (Back Panel): passo 1, immagine 1 di 3 Google Pixelbook Motherboard Replacement, Battery (Back Panel): passo 1, immagine 2 di 3 Google Pixelbook Motherboard Replacement, Battery (Back Panel): passo 1, immagine 3 di 3
    • Use the iFixit opening tools or a metal spudger to pry the rubber covers off the back of your Pixelbook.

    • Peel the linings off completely until the back of the Pixelbook looks bare.

  2. Google Pixelbook Motherboard Replacement: passo 2, immagine 1 di 2 Google Pixelbook Motherboard Replacement: passo 2, immagine 2 di 2
    • Remove the two yellow 2.0mm screws by using a T3 Torx screwdriver.

  3. Google Pixelbook Motherboard Replacement: passo 3, immagine 1 di 3 Google Pixelbook Motherboard Replacement: passo 3, immagine 2 di 3 Google Pixelbook Motherboard Replacement: passo 3, immagine 3 di 3
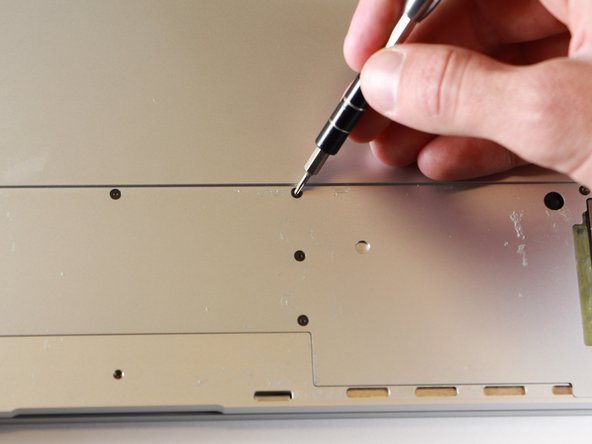
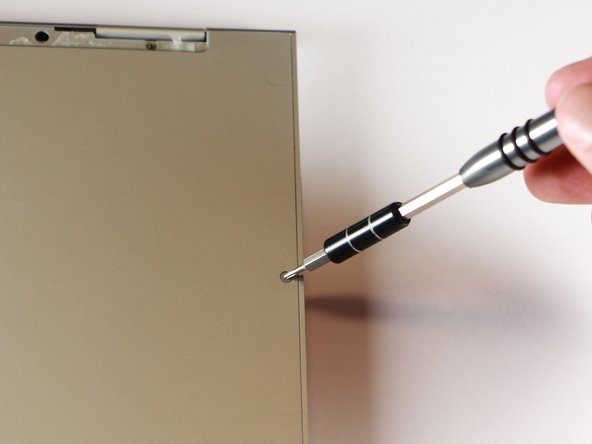
    • Remove the seventeen 3.0mm T5 Torx screws from the bottom panel.

  4. Google Pixelbook Motherboard Replacement: passo 4, immagine 1 di 3 Google Pixelbook Motherboard Replacement: passo 4, immagine 2 di 3 Google Pixelbook Motherboard Replacement: passo 4, immagine 3 di 3
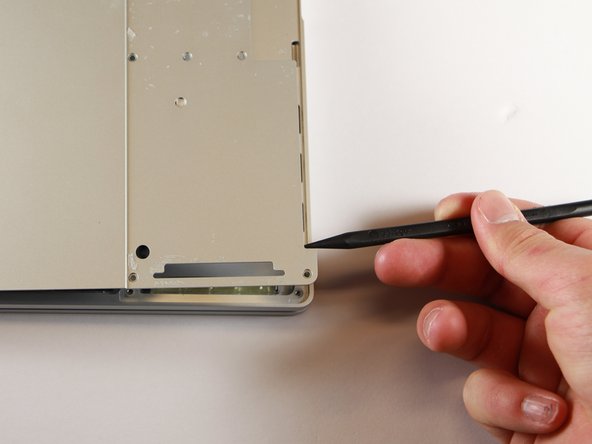
    • Use the nylon spudger to pry the edge of the Pixelbook up until you can grab the edge with your fingers.

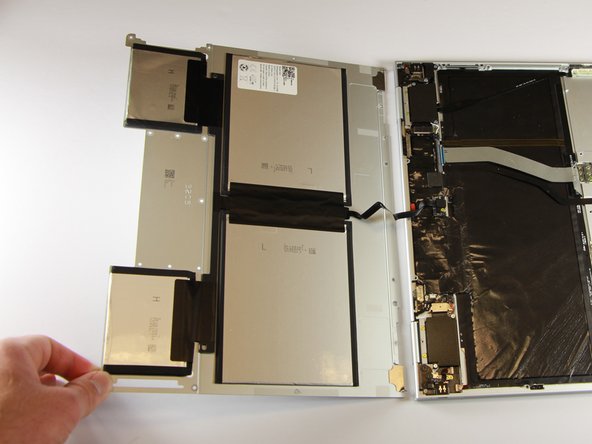
    • Open the back panel completely and lay it flat so you see the whole inside of the computer.

  5. Google Pixelbook Motherboard Replacement: passo 5, immagine 1 di 2 Google Pixelbook Motherboard Replacement: passo 5, immagine 2 di 2
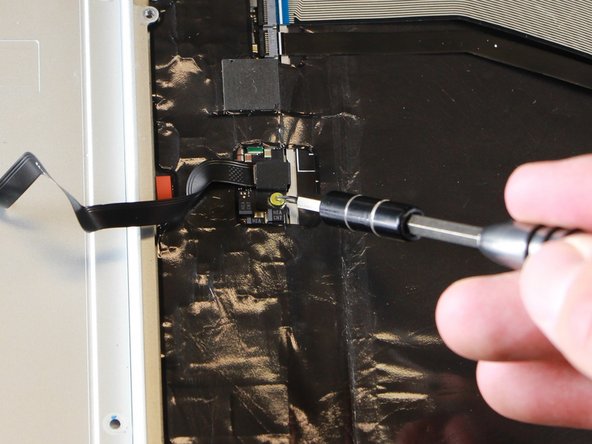
    • Remove the yellow 2.0mm screw from the middle of the panel by using the T3 Torx screwdriver to turn the screw counterclockwise.

  6. Google Pixelbook Motherboard Replacement: passo 6, immagine 1 di 2 Google Pixelbook Motherboard Replacement: passo 6, immagine 2 di 2
    • Remove the small, black casing by using the spudger to lift it up from its place.

  7. Google Pixelbook Motherboard Replacement: passo 7, immagine 1 di 1
    • Disconnect the flat, black cord from the main component by using a spudger to push it out of the slot, or by using your hand to carefully pull it out.

    • Your back panel is now free from the main component.

  8. Google Pixelbook Motherboard Replacement, Left Charging Port: passo 8, immagine 1 di 2 Google Pixelbook Motherboard Replacement, Left Charging Port: passo 8, immagine 2 di 2
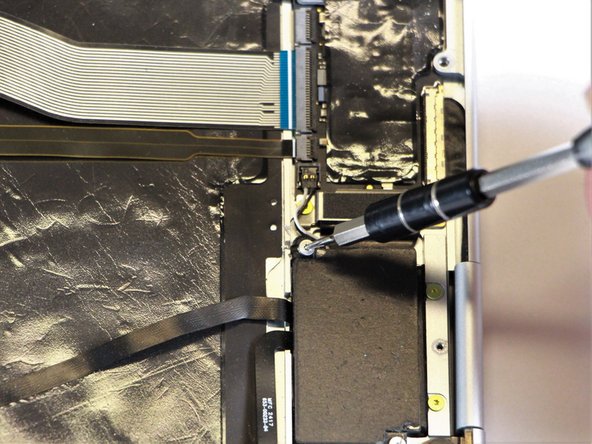
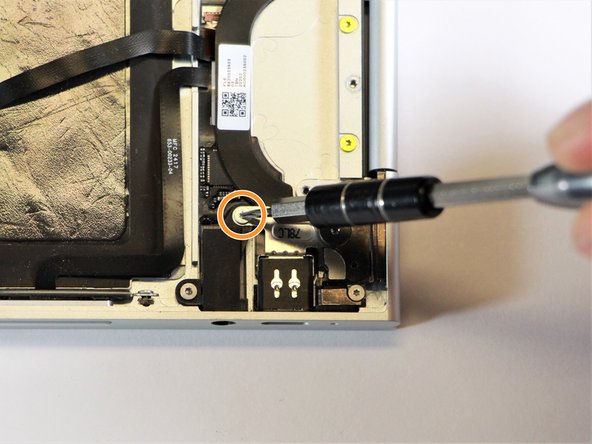
    • Remove the two 3.0mm silver screws from the thin, black component by using a T3 Torx screwdriver to turn the screws counterclockwise.

  9. Google Pixelbook Motherboard Replacement: passo 9, immagine 1 di 2 Google Pixelbook Motherboard Replacement: passo 9, immagine 2 di 2
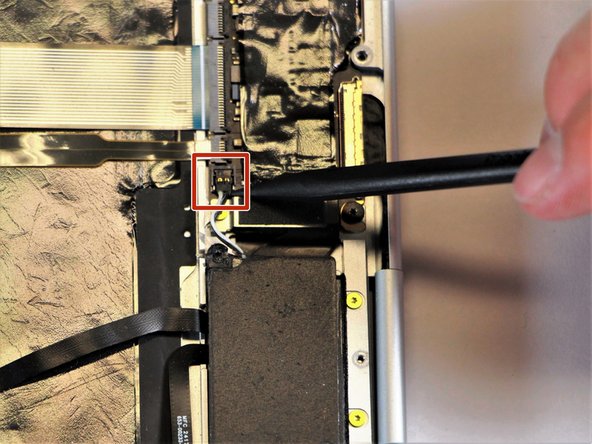
    • Disconnect the thin, black and white cord from the motherboard by using the spudger to snap the connector up and out of place.

  10. Google Pixelbook Motherboard Replacement: passo 10, immagine 1 di 1
    • Remove the thin, black component by pulling it up and out of the laptop with your fingers.

    • This photo shows the bottom screw still in the black box, but yours should be removed.

  11. Google Pixelbook Motherboard Replacement: passo 11, immagine 1 di 1
    • Remove the gold 2.0mm corner screw by turning it counterclockwise with a T3 Torx screwdriver.

  12. Google Pixelbook Motherboard Replacement: passo 12, immagine 1 di 2 Google Pixelbook Motherboard Replacement: passo 12, immagine 2 di 2
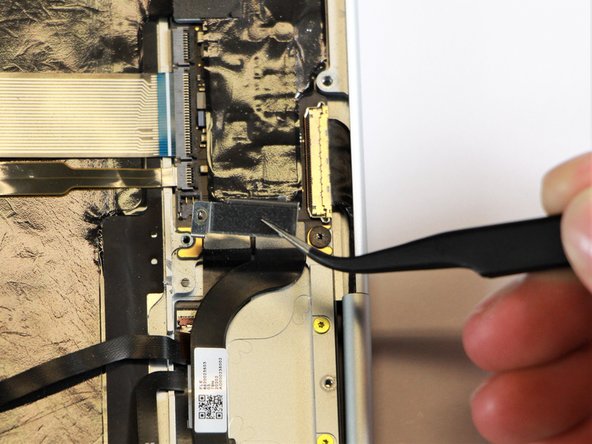
    • Using needle-nose tweezers, remove the silver casing by lifting it up and out of the computer.

  13. Google Pixelbook Motherboard Replacement: passo 13, immagine 1 di 2 Google Pixelbook Motherboard Replacement: passo 13, immagine 2 di 2
    • Remove the three 3.0mm black screws on the right side by using a T5 Torx screwdriver to turn the screws counterclockwise.

    • Remove the silver 2.0mm screw on the left side by using a T3 Torx screwdriver to turn the screw counterclockwise.

  14. Google Pixelbook Motherboard Replacement: passo 14, immagine 1 di 1
    • Disconnect the thin, black ribbon cable by using the spudger to lift it up from the computer.

  15. Google Pixelbook Motherboard Replacement: passo 15, immagine 1 di 2 Google Pixelbook Motherboard Replacement: passo 15, immagine 2 di 2
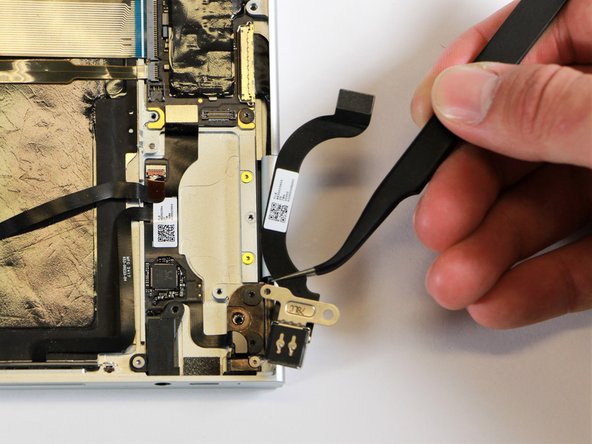
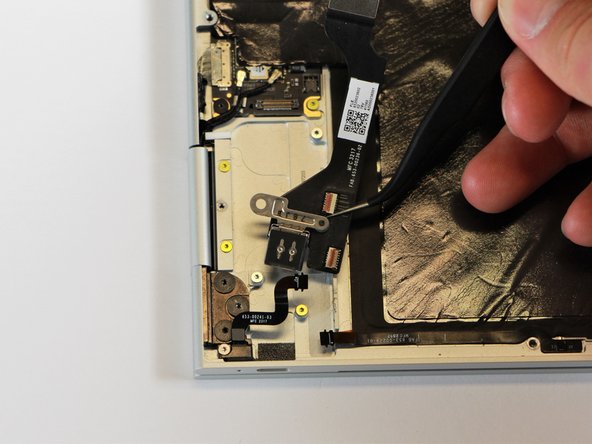
    • Use the needle-nose tweezers to remove the charging port by lifting the component up and out of the Pixelbook.

  16. Google Pixelbook Motherboard Replacement, Right Charging Port: passo 16, immagine 1 di 2 Google Pixelbook Motherboard Replacement, Right Charging Port: passo 16, immagine 2 di 2
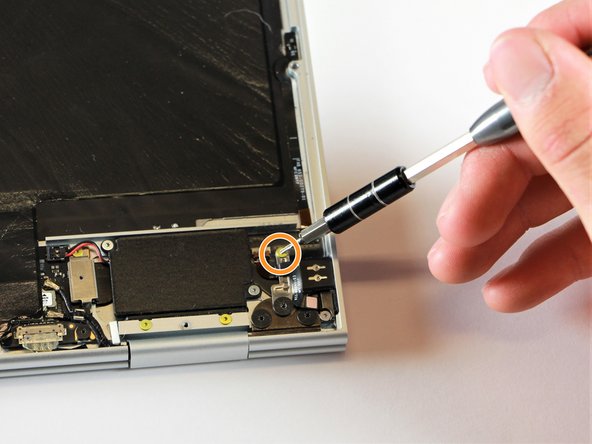
    • Remove the three 2.0mm black screws from the sound card by using a T5 Torx screwdriver to turn them counterclockwise.

    • Remove the gold 3.0mm screw by using a T3 Torx screwdriver to turn it counterclockwise.

  17. Google Pixelbook Motherboard Replacement: passo 17, immagine 1 di 1
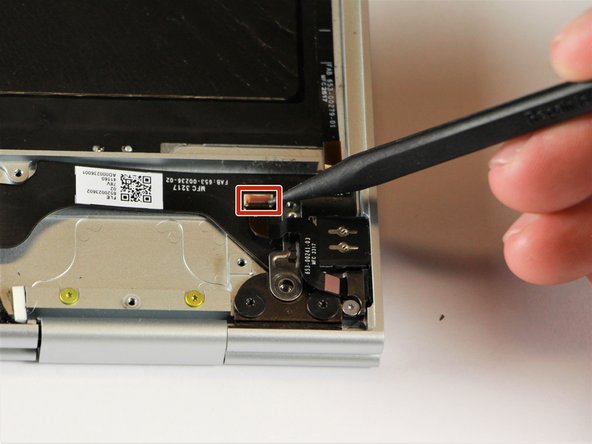
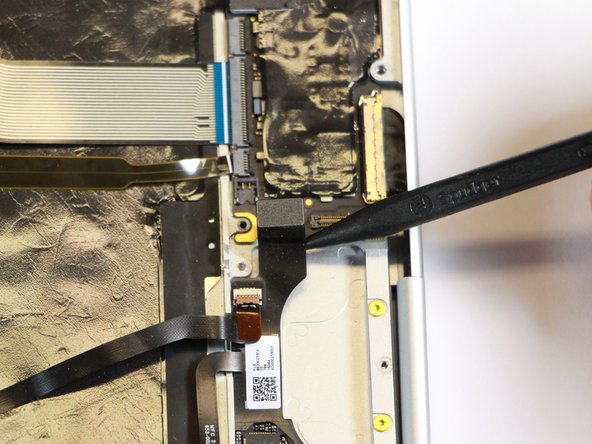
    • Disconect the thin, black and red cord from the motherboard by using the spudger to snap the connector up and out of place.

  18. Google Pixelbook Motherboard Replacement: passo 18, immagine 1 di 1
    • Remove the yellow 2.0mm screw by using the T3 Torx screwdriver to turn the screw counterclockwise.

  19. Google Pixelbook Motherboard Replacement: passo 19, immagine 1 di 1
    • Remove the small, red component by lifting it up with the spudger.

  20. Google Pixelbook Motherboard Replacement: passo 20, immagine 1 di 1
    • Disconnect the metal component of the thin, black component by lifting it up with the spudger.

  21. Google Pixelbook Motherboard Replacement: passo 21, immagine 1 di 2 Google Pixelbook Motherboard Replacement: passo 21, immagine 2 di 2
    • Remove the right charging port by picking it up with the tweezers and lifting it from the computer.

  22. Google Pixelbook Motherboard Replacement, Motherboard: passo 22, immagine 1 di 2 Google Pixelbook Motherboard Replacement, Motherboard: passo 22, immagine 2 di 2
    • Disconnect the flat, black cord from the motherboard by using a spudger to push it upwards out of the slot, or by using your hand to carefully pull upward.

  23. Google Pixelbook Motherboard Replacement: passo 23, immagine 1 di 3 Google Pixelbook Motherboard Replacement: passo 23, immagine 2 di 3 Google Pixelbook Motherboard Replacement: passo 23, immagine 3 di 3
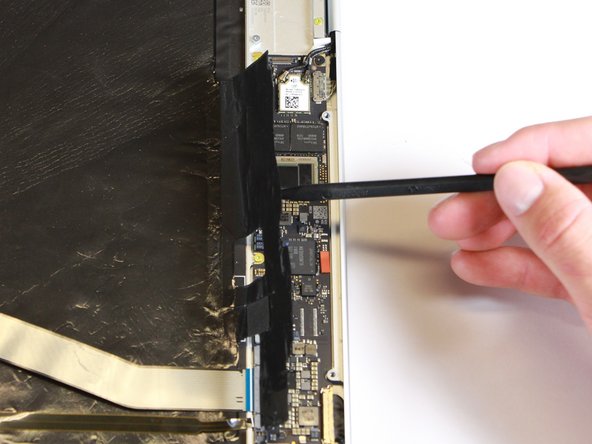
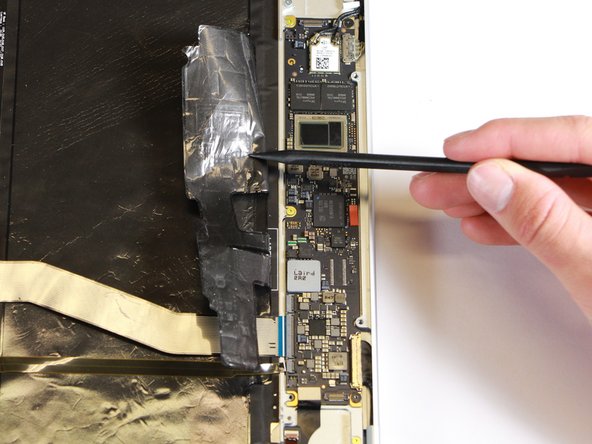
    • Fold back the plastic covering on the motherboard using the nylon spudger.

  24. Google Pixelbook Motherboard Replacement: passo 24, immagine 1 di 3 Google Pixelbook Motherboard Replacement: passo 24, immagine 2 di 3 Google Pixelbook Motherboard Replacement: passo 24, immagine 3 di 3
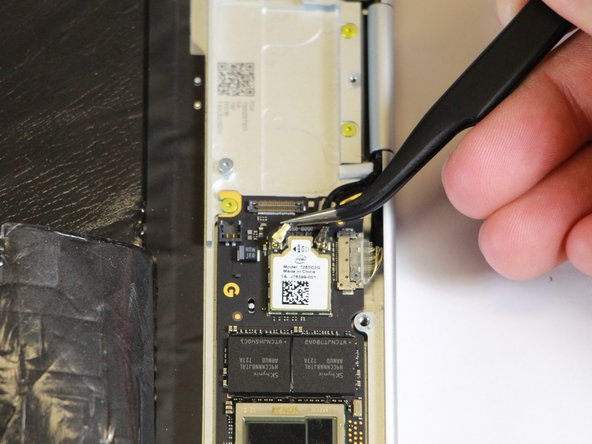
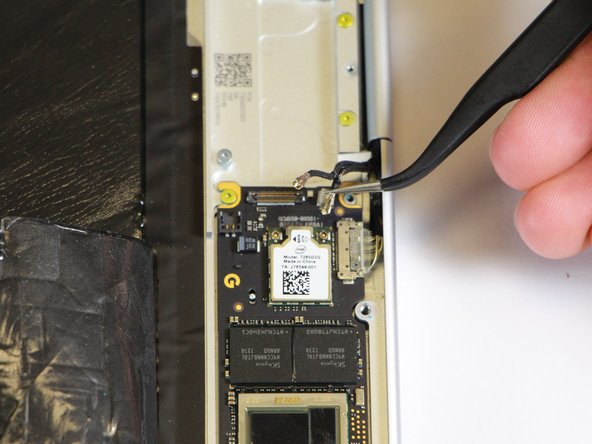
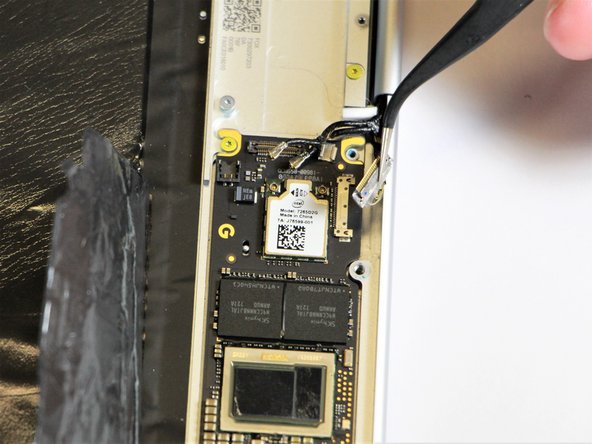
    • Disconnect the two black cables from the motherboard by pulling the connectors upward using the needle-nose tweezers.

  25. Google Pixelbook Motherboard Replacement: passo 25, immagine 1 di 3 Google Pixelbook Motherboard Replacement: passo 25, immagine 2 di 3 Google Pixelbook Motherboard Replacement: passo 25, immagine 3 di 3
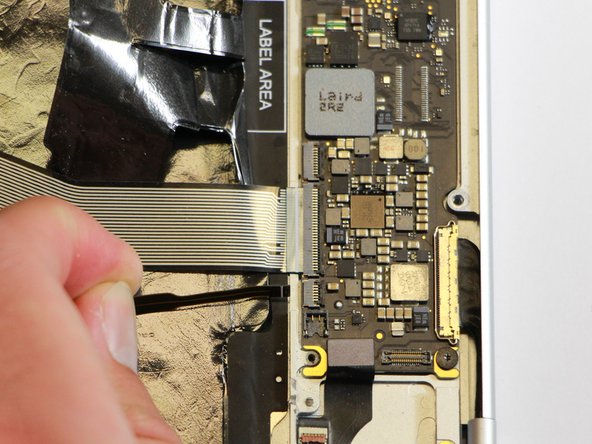
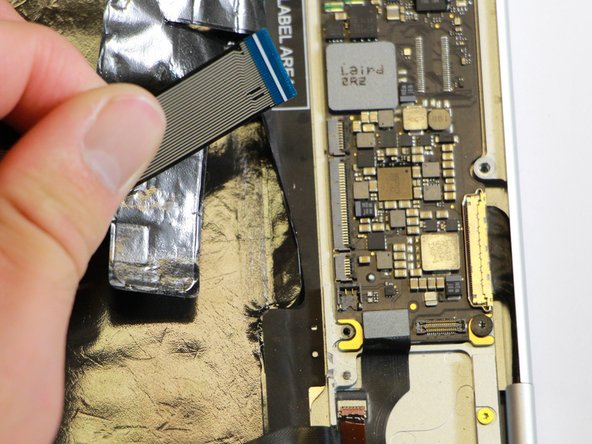
    • Disconnect the flat ribbon cable from the motherboard by using your hand to gently pull it out of the socket, or by using a pair of tweezers to pull it out.

  26. Google Pixelbook Motherboard Replacement: passo 26, immagine 1 di 3 Google Pixelbook Motherboard Replacement: passo 26, immagine 2 di 3 Google Pixelbook Motherboard Replacement: passo 26, immagine 3 di 3
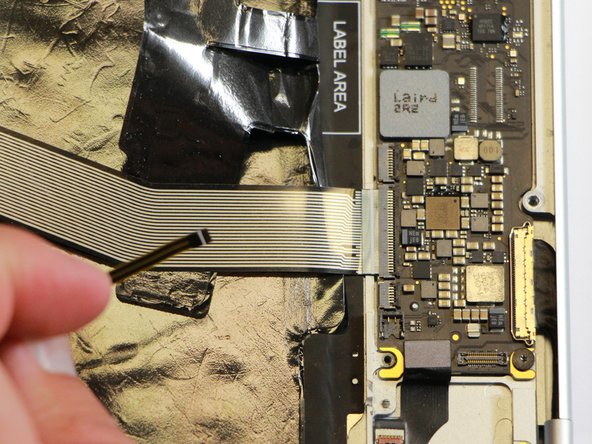
    • Disconnect the large flat ribbon cable from the motherboard by using your hand to gently pull it out of the socket, or by using a pair of tweezers to pull it out.

  27. Google Pixelbook Motherboard Replacement: passo 27, immagine 1 di 3 Google Pixelbook Motherboard Replacement: passo 27, immagine 2 di 3 Google Pixelbook Motherboard Replacement: passo 27, immagine 3 di 3
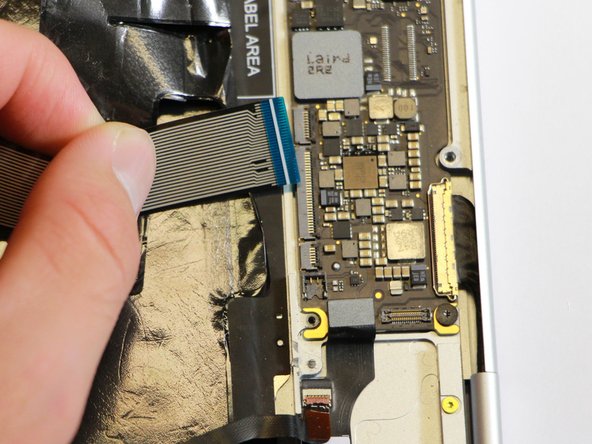
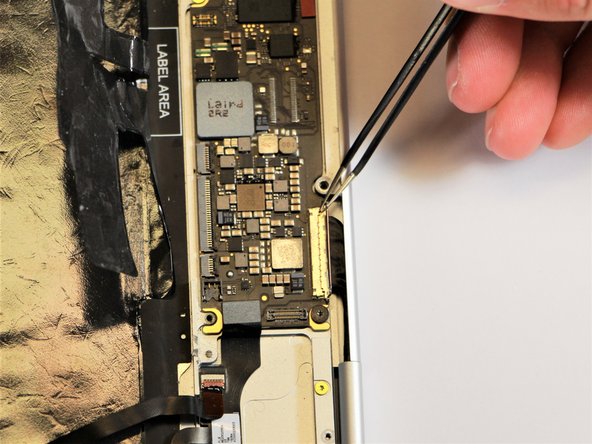
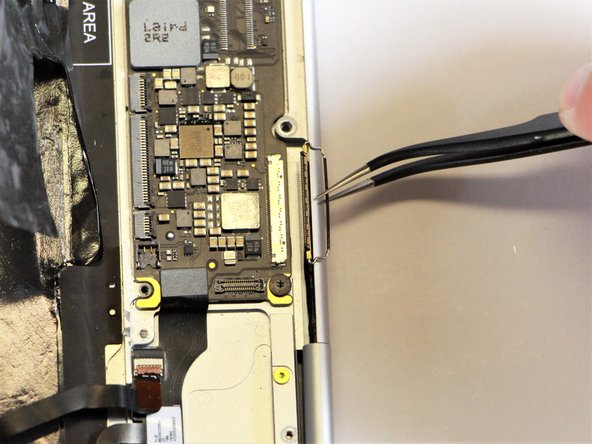
    • Raise the retaining latch of the motherboard connector by using the needle-nose tweezers.

    • Disconnect the large flat cable from the motherboard by gently pulling on the latch using the needle-nose tweezers.

  28. Google Pixelbook Motherboard Replacement: passo 28, immagine 1 di 3 Google Pixelbook Motherboard Replacement: passo 28, immagine 2 di 3 Google Pixelbook Motherboard Replacement: passo 28, immagine 3 di 3
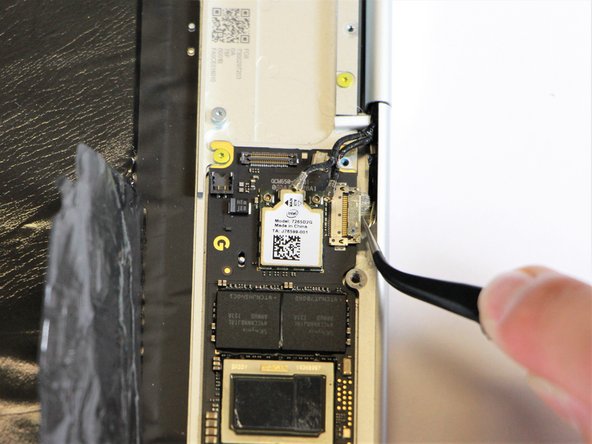
    • Disconnect the flat cable from the motherboard by using the needle-nose tweezers to gently pull the connector out of the slot.

  29. Google Pixelbook Motherboard Replacement: passo 29, immagine 1 di 2 Google Pixelbook Motherboard Replacement: passo 29, immagine 2 di 2
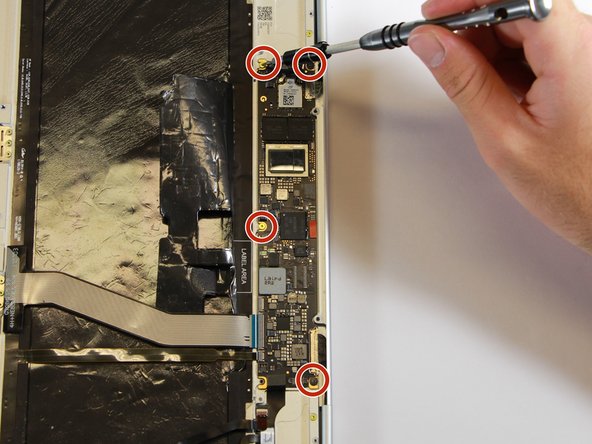
    • Remove the gold 3.0mm screws and the black, flat 2.0mm screws from the motherboard by using a T3 Torx screwdriver to turn the screws counterclockwise.

  30. Google Pixelbook Motherboard Replacement: passo 30, immagine 1 di 3 Google Pixelbook Motherboard Replacement: passo 30, immagine 2 di 3 Google Pixelbook Motherboard Replacement: passo 30, immagine 3 di 3
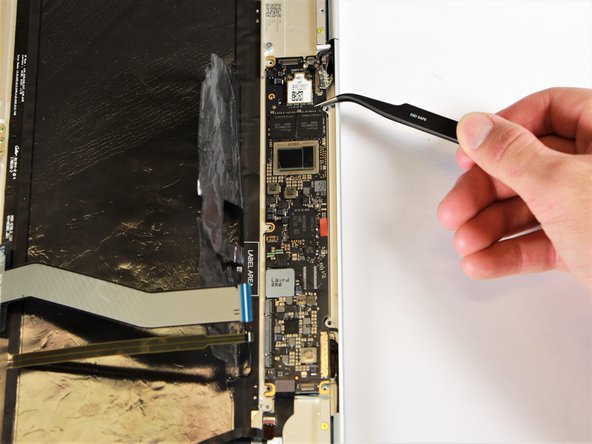
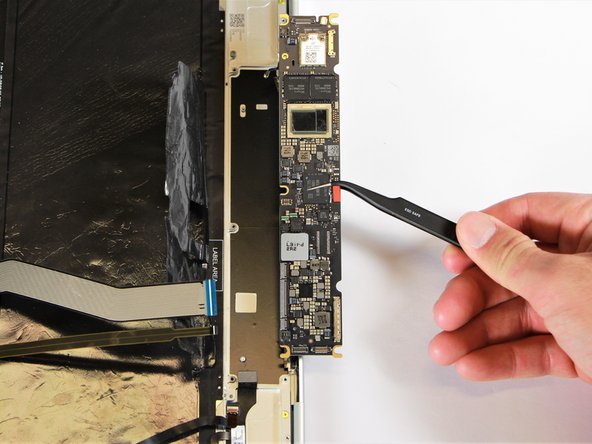
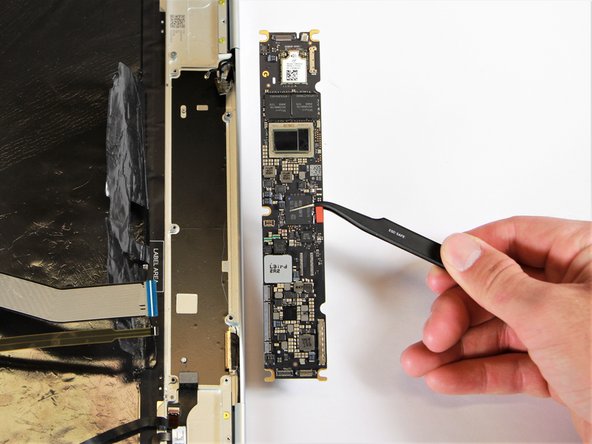
    • Remove the motherboard by gently lifting it out of the laptop using the needle-nose tweezers.

Conclusione

To reassemble your device, follow these instructions in reverse order.

Altre 9 persone hanno completato questa guida.

Logan Lawson

Membro da: 01/24/18

410 Reputazione

1 Guida realizzata

Team

Cal Poly, Team S18-G1, Livingston Winter 2018 Membro di Cal Poly, Team S18-G1, Livingston Winter 2018

CPSU-LIVINGSTON-W18S18G1

4 Membri

7 Guide realizzate

14 Commenti

This would be much more helpful if all the “components” being removed were identified.

TIA,

R

rocwoof - Replica

You’ve put together a very good procedure for replacing a motherboard. My pixelbook needs a motherboard. Where can I buy one? Google does not sell them.

Tony Meier - Replica

You’ve put together a very good procedure for replacing a motherboard. My pixelbook needs a motherboard. Where can I buy one? Google does not sell them.

Tony Meier - Replica

I believe the step8 & step16 mentioned “charging port“ shall be the loudspeaker in fact.

baokai zheng - Replica

It’s bad instruction to pull cable out without unlocking the retaining tab, also it’s impossible to put cable back while the connector is still in locking position. Never pull a cable while it’s locked in the connector, this practice is only used by novices.
nabe_03 - Replica

Aggiungi Commento

Visualizza Statistiche:

Ultime 24 Ore: 2

Ultimi 7 Giorni: 16

Ultimi 30 Giorni: 91

Tutti i Tempi: 13,327