Salta al contenuto principale

Google Pixelbook Go Back Panel Replacement

Cosa ti serve

  1. Google Pixelbook Go Back Panel Replacement, Back Panel: passo 1, immagine 1 di 2 Google Pixelbook Go Back Panel Replacement, Back Panel: passo 1, immagine 2 di 2
    • Flip the device so that the back is facing up.

    • Peel the rubber stoppers off the top and bottom of the device.

  2. Google Pixelbook Go Back Panel Replacement: passo 2, immagine 1 di 2 Google Pixelbook Go Back Panel Replacement: passo 2, immagine 2 di 2
    • Remove ten 3 mm screws from around the edge of the back panel using a T5 Torx screwdriver.

  3. Google Pixelbook Go Back Panel Replacement: passo 3, immagine 1 di 3 Google Pixelbook Go Back Panel Replacement: passo 3, immagine 2 di 3 Google Pixelbook Go Back Panel Replacement: passo 3, immagine 3 di 3
    • Use an iFixit opening tool to pry up the back panel cover.

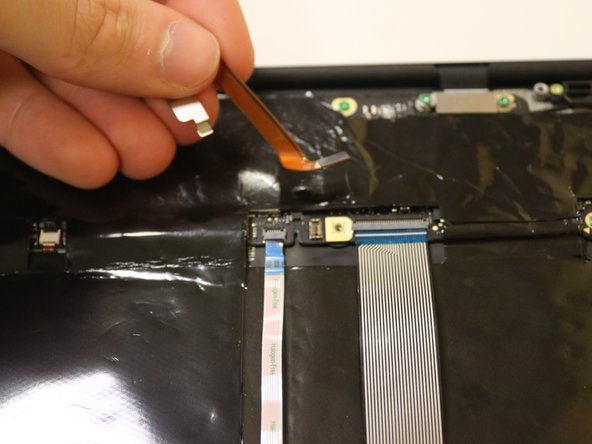
    • There is an orange ribbon cable that connects the cover to the base, so don't separate the two pieces completely.

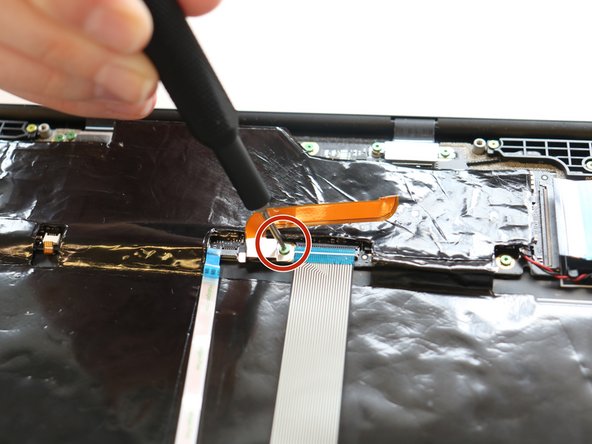
    • Remove the single 2 mm screw using a Torx T3 screwdriver.

    • Disconnect the orange cable from the base of the device.

  4. Google Pixelbook Go Back Panel Replacement: passo 4, immagine 1 di 1
    • Insert wisdom here.

Conclusione

To reassemble your device, follow these instructions in reverse order.

Kristen Gismondi

Membro da: 11/12/14

82.095 Reputazione

200 Guide realizzate

Team

iFixit Membro di iFixit

Staff

135 Membri

17.218 Guide realizzate

0 Commenti

Aggiungi Commento

Visualizza Statistiche:

Ultime 24 Ore: 1

Ultimi 7 Giorni: 4

Ultimi 30 Giorni: 27

Tutti i Tempi: 414