Salta al contenuto principale

Google Pixel XL Charging Assembly Replacement

Guida Archiviata
Questa guida รจ mantenuta solo per scopi storici. Usa la versione aggiornata della guida per eseguire la riparazione.

Cosa ti serve

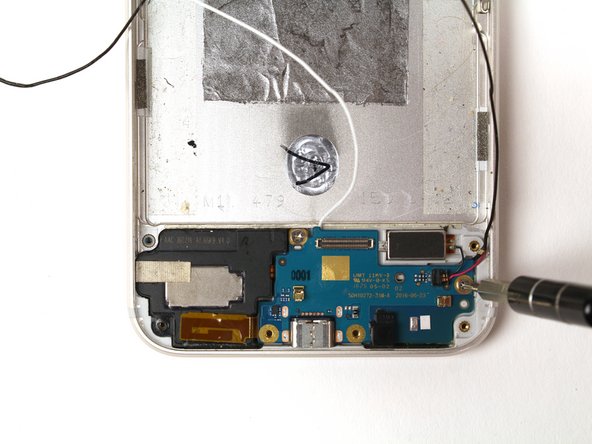
  1. Google Pixel XL Charging Assembly Replacement, Charging Assembly: passo 1, immagine 1 di 2 Google Pixel XL Charging Assembly Replacement, Charging Assembly: passo 1, immagine 2 di 2
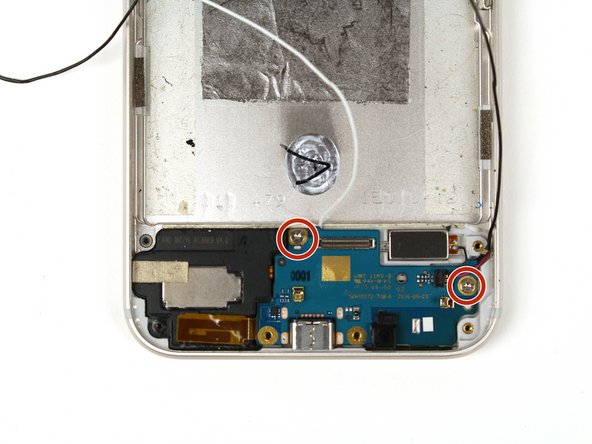
    • Using a T5 Torx screwdriver, unscrew the two 3 mm screws from the daughterboard.

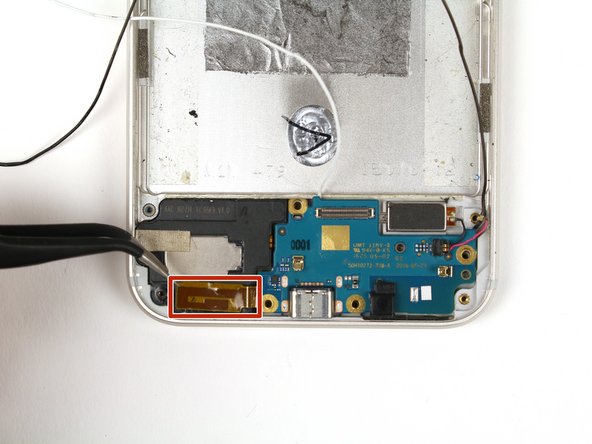
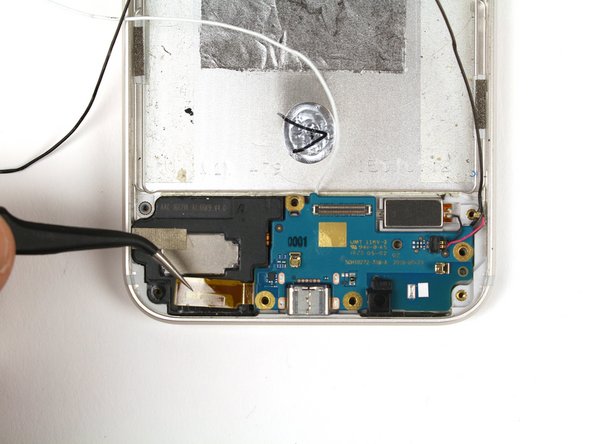
  2. Google Pixel XL Charging Assembly Replacement: passo 2, immagine 1 di 2 Google Pixel XL Charging Assembly Replacement: passo 2, immagine 2 di 2
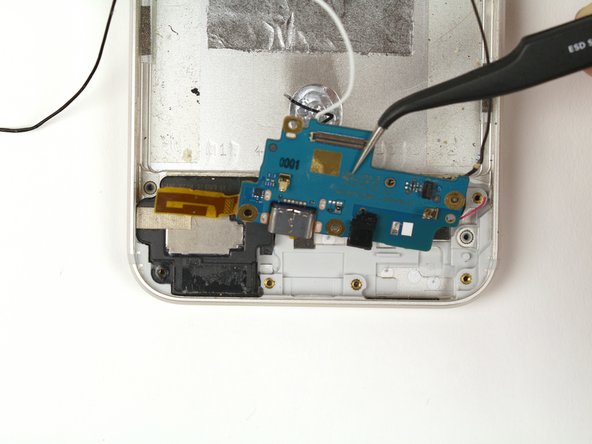
    • Using a pair of precision tweezers, carefully peel the orange tape from the frame.

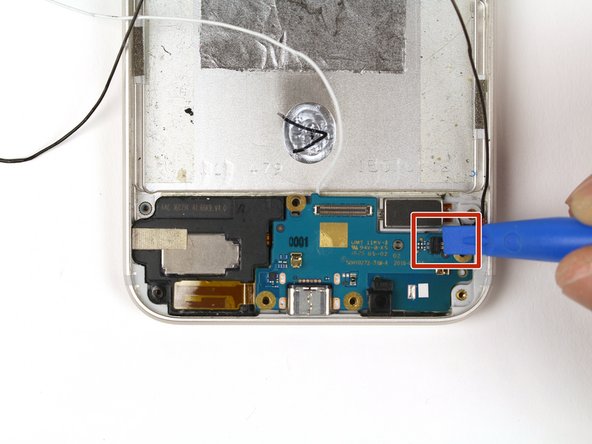
  3. Google Pixel XL Charging Assembly Replacement: passo 3, immagine 1 di 2 Google Pixel XL Charging Assembly Replacement: passo 3, immagine 2 di 2
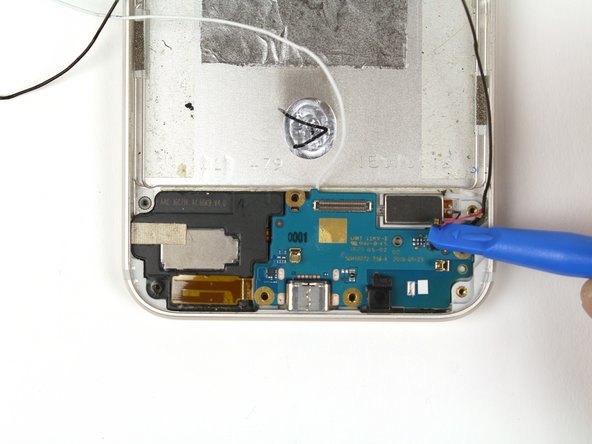
    • Using a blue plastic opening tool, detach the connector by gently pulling to the right.

    • Applying too much force may result in damaging the black connector and/or the cable.

  4. Google Pixel XL Charging Assembly Replacement: passo 4, immagine 1 di 1
    • Gently lift the daughterboard out of the device.

    • To replace the charging assembly, you will need to replace the entire daughterboard.

Conclusione

To reassemble your device, follow these instructions in reverse order.
Julia List

Membro da: 04/21/15

5.604 Reputazione

7 Guide realizzate

0 Commenti

Aggiungi Commento

Visualizza Statistiche:

Ultime 24 Ore: 0

Ultimi 7 Giorni: 0

Ultimi 30 Giorni: 2

Tutti i Tempi: 33