Questa versione può contenere modifiche errate. Passa all'ultima istantanea verificata.
Cosa ti serve
-
-
Spegni il dispositivo.
-
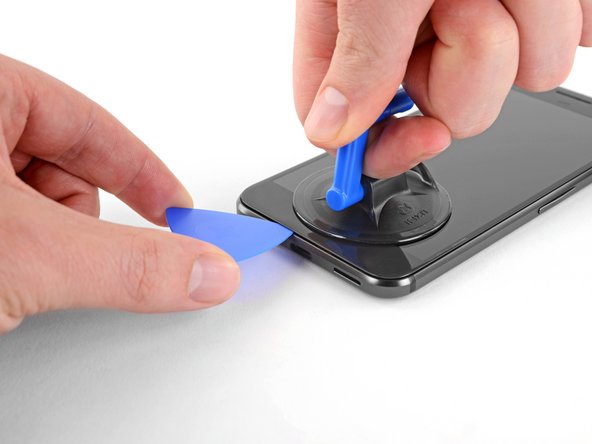
Prepara un iOpener per riscaldare i bordi del display e ammorbidire l'adesivo sottostante. In alternativa, puoi utilizzare una pistola termica o un asciugacapelli.
-
-
-
Una una ventosa per alzare il display e creare un sottile spazio tra il display e lo chassis del telefono.
-
Potrebbe essere necessario applicare più calore se lo schermo non viene via. Non essere impaziente, ci vuole tempo. Una volta che puoi inserire delicatamente uno strumento nella fessura, vai al passaggio successivo.
-
-
-
Una volta tagliato l'adesivo, solleva lentamente il display dalla parte superiore (quella con la griglia per gli altoparlanti), ruotalo delicatamente oltre la verticale e disponilo, come mostrato, con la superficie frontale posata sulla parte inferiore del dispositivo.
-
-
-
Usa un cacciavite Torx T5 per rimuovere le due viti T5 nere da 3,5 mm che fissano la staffa del connettore del cavo del display.
-
Durante questa riparazione, tieni traccia di ogni vite ed assicurati di riavvitarla esattamente dove era.
-
-
-
Utilizza uno spudger per sollevare il connettore del cavo del display, liberando il display.
-
-
-
-
Usa cacciaviti Torx T5 per rimuovere le nove viti 3.5mm che fissano il telaio centrale
-
-
Questo passaggio è privo di traduzione. Aiuta a tradurlo
-
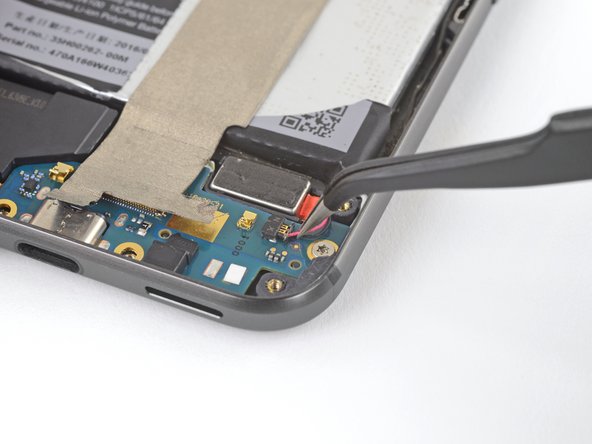
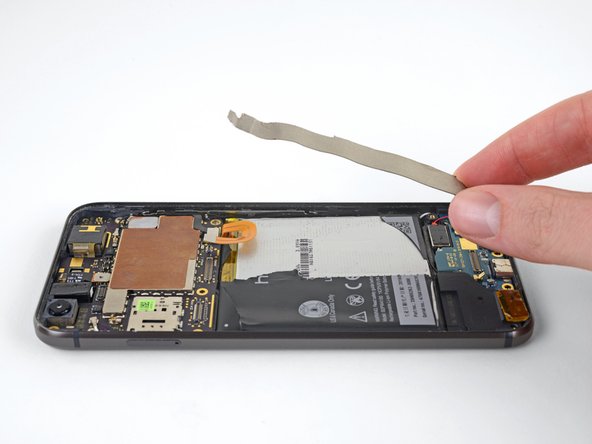
Use tweezers to lift up the silver strip at the top of the daughterboard, and peel it back to expose the connector underneath.
-
-
Questo passaggio è privo di traduzione. Aiuta a tradurlo
-
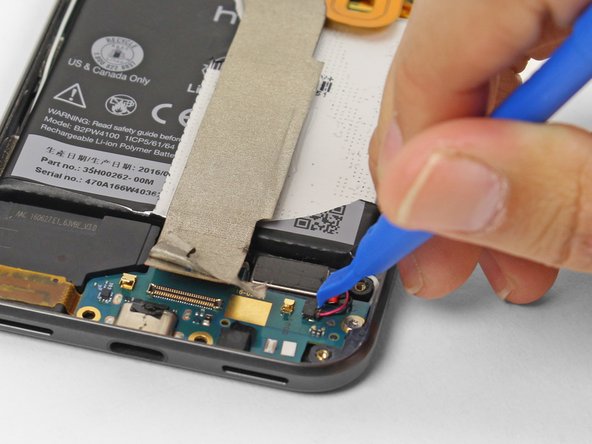
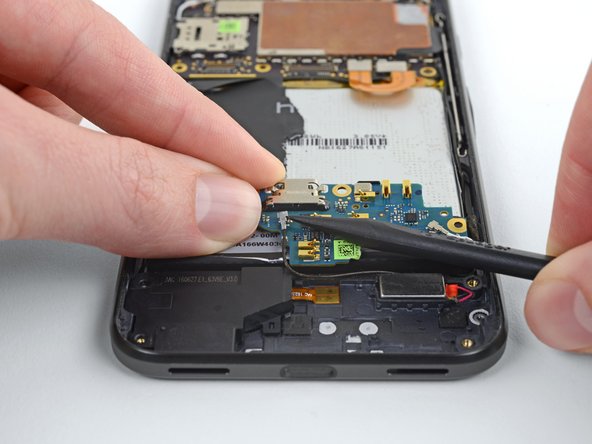
Use a spudger to disconnect the interconnect ribbon cable from the daughterboard.
-
-
Questo passaggio è privo di traduzione. Aiuta a tradurlo
-
To disconnect the cable, use tweezers to carefully pull the connector away from the socket by its cables.
-
-
Questo passaggio è privo di traduzione. Aiuta a tradurlo
-
Remove the silver 2.5 mm T5 screw holding the daughterboard in place.
-
-
Questo passaggio è privo di traduzione. Aiuta a tradurlo
-
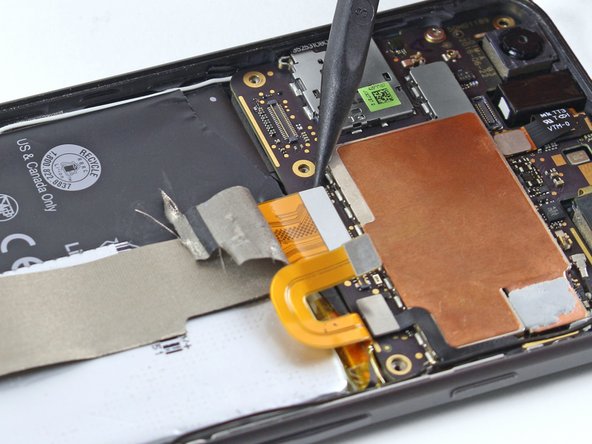
Using tweezers, lift the contact pads located to the left of the daughterboard.
-
-
Questo passaggio è privo di traduzione. Aiuta a tradurlo
-
To do so, peel back the sticker on the motherboard side and use a spudger to lift the connector straight up.
-
-
Questo passaggio è privo di traduzione. Aiuta a tradurlo
-
Using tweezers, lift the daughterboard up and flip it over onto the battery.
-
-
Questo passaggio è privo di traduzione. Aiuta a tradurlo
-
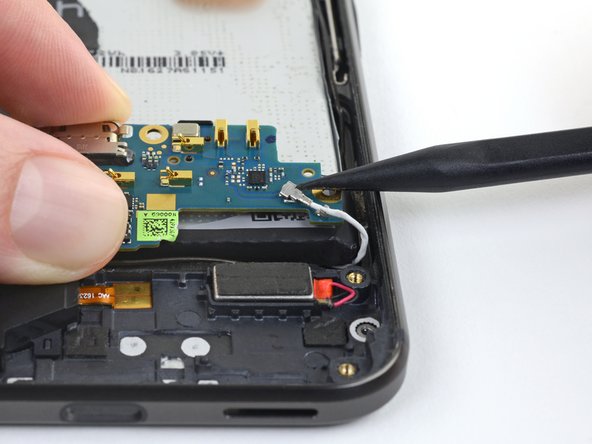
Use a spudger to pry up the black and white coaxial cables attached to underside of the daughterboard.
-
-
Questo passaggio è privo di traduzione. Aiuta a tradurlo
-
Use tweezers to carefully pull each coax cable out of its retaining clip.
-


Annulla: non ho completato questa guida.
Altre 20 persone hanno completato questa guida.
Team

Cal Poly, Team S23-G1, Livingston Spring 2017 Membro di Cal Poly, Team S23-G1, Livingston Spring 2017
CPSU-LIVINGSTON-S17S23G1
4 Membri
13 Guide realizzate
6 Commenti
Hi, I’m looking to fix my google pixel, it has the common microphone problem where I can’t record any audio/ make calls on m device. Where can i purchase a replacement for the daughterboard? I really need to get it fixed. Thanks
where can I look on the daughterboard if everything else seems to work except the speaker? and I don’t mean the earpiece speaker, the main speaker below. The problem appeared after I replaced the battery, so its most likely something I’ve done, I’ve retraced my steps but I don’t see any major issues.
Hey Henry! The daughterboard connects to the speaker with two golden pins that rest on the contact pads that stick out to the right of the speaker. You can see them in this photo. I would recommend cleaning the pins and the pad with some isopropyl alcohol and a q-tip. If that doesn’t fix the problem, check all the pins on both ends of the big interconnect cable and its corresponding sockets on the two boards—you may have accidentally bent one of them! If that’s the case and the bend is obvious, you can try to bend the offending pin back into place, or pick up a replacement cable. Hope this helps!
@taylord Thank you so much for pointing out those pins! You likely saved my sister’s phone. I’m fairly experienced with hardware repair but foolishly allowed one of the coax cables to run underneath the corner of the daughterboard. After cleaning the contacts and reinstalling the daughterboard the speakers and microphone are working, which is why I was trying to replace the board in the first place.
Thank you!
Adam Lee -