Salta al contenuto principale

GoPro Hero 3 Silver Motherboard Replacement

Cosa ti serve

  1. GoPro Hero 3 Silver Motherboard Replacement, Battery: passo 1, immagine 1 di 2 GoPro Hero 3 Silver Motherboard Replacement, Battery: passo 1, immagine 2 di 2
    • Pull back on the tab on the back of GoPro to open the battery cover.

  2. GoPro Hero 3 Silver Motherboard Replacement: passo 2, immagine 1 di 1
    • Pull the battery out using the tab.

  3. GoPro Hero 3 Silver Motherboard Replacement, Motherboard: passo 3, immagine 1 di 2 GoPro Hero 3 Silver Motherboard Replacement, Motherboard: passo 3, immagine 2 di 2
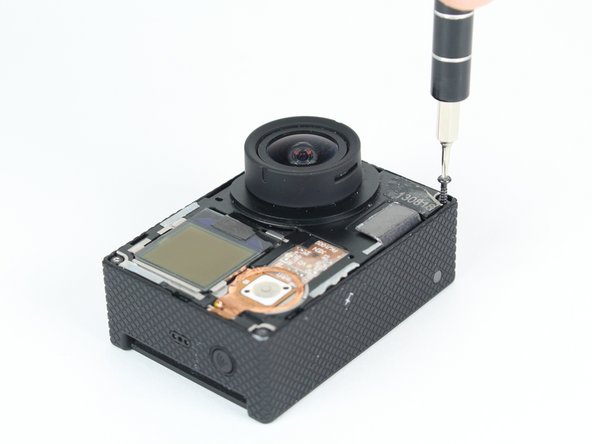
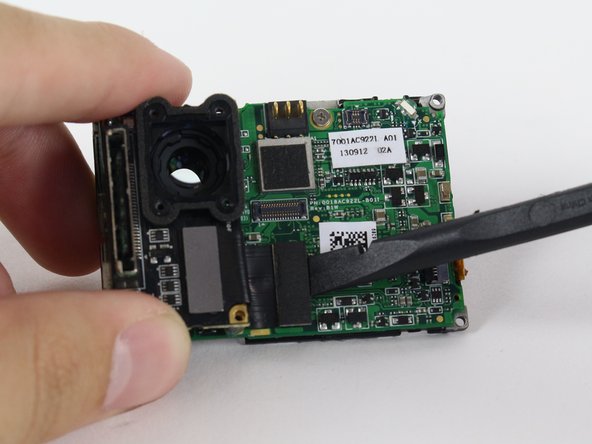
    • Use the plastic opening tool to remove the faceplate.

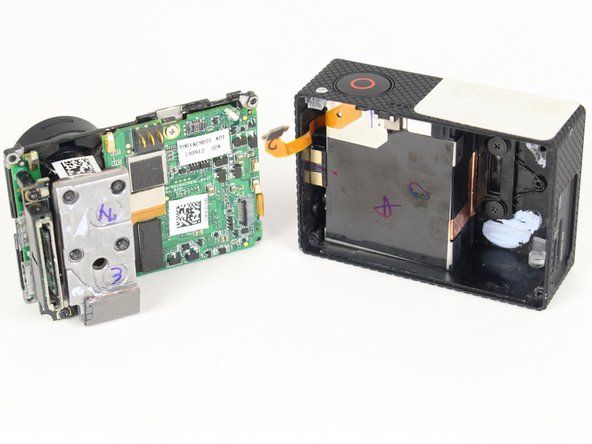
    • There is some adhesive and clips so be careful and the faceplate should pop right off.

  4. GoPro Hero 3 Silver Motherboard Replacement: passo 4, immagine 1 di 2 GoPro Hero 3 Silver Motherboard Replacement: passo 4, immagine 2 di 2
    • Now that the faceplate is off, it is time to remove the 4 screws on each corner.

    • Use the T4 tool bit from the iFixit toolkit in order to remove the 4 screws on each corner.

  5. GoPro Hero 3 Silver Motherboard Replacement: passo 5, immagine 1 di 2 GoPro Hero 3 Silver Motherboard Replacement: passo 5, immagine 2 di 2
    • Note: Make sure you remove the door cover of the USB, mini HDMI, and SD port before. Separating the motherboard will be easier.

    • Using the plastic opening tool, slowly pry open the motherboard assembly.

  6. GoPro Hero 3 Silver Motherboard Replacement: passo 6, immagine 1 di 2 GoPro Hero 3 Silver Motherboard Replacement: passo 6, immagine 2 di 2
    • Use the spudger to gently pry off the connector of the housing to the motherboard.

    • You should now have the motherboard assembly and the housing separated.

  7. GoPro Hero 3 Silver Motherboard Replacement: passo 7, immagine 1 di 3 GoPro Hero 3 Silver Motherboard Replacement: passo 7, immagine 2 di 3 GoPro Hero 3 Silver Motherboard Replacement: passo 7, immagine 3 di 3
    • Use the spudger to remove the heat shield tape and detach the image sensor from the motherboard.

    • Using the T4 Torx toolbit, remove the 4 screws that connect the sensor to the lens.

    • Remove the silver connector of the image sensor from the motherboard using the spudger to pry it off.

  8. GoPro Hero 3 Silver Motherboard Replacement: passo 8, immagine 1 di 3 GoPro Hero 3 Silver Motherboard Replacement: passo 8, immagine 2 di 3 GoPro Hero 3 Silver Motherboard Replacement: passo 8, immagine 3 di 3
    • The media adapter is attached to the motherboard via 3 screws:

    • x1 T4 Torx

    • x2 Phillips #00

    • There's a little silver bracket that is held down by the Phillips #00 screw so be careful not to lose it.

    • With a little prying, use the spudger to detach the media adapter's connector from the motherboard.

  9. GoPro Hero 3 Silver Motherboard Replacement: passo 9, immagine 1 di 3 GoPro Hero 3 Silver Motherboard Replacement: passo 9, immagine 2 di 3 GoPro Hero 3 Silver Motherboard Replacement: passo 9, immagine 3 di 3
    • Use the spudger to lift the black tab up to unlock.

    • Then remove LCD screen connector by sliding out.

  10. GoPro Hero 3 Silver Motherboard Replacement: passo 10, immagine 1 di 3 GoPro Hero 3 Silver Motherboard Replacement: passo 10, immagine 2 di 3 GoPro Hero 3 Silver Motherboard Replacement: passo 10, immagine 3 di 3
    • Using the Phillips head bit, remove the silver screw near the top edge of the board.

    • Separate the LCD assembly by pulling it away. You should have the bare motherboard!

Conclusione

To reassemble your device, follow these instructions in reverse order.

Altre 16 persone hanno completato questa guida.

Brian Alvarez

Membro da: 04/02/15

1.439 Reputazione

6 Guide realizzate

Team

Cal Poly, Team 24-7, Lancaster Spring 2015 Membro di Cal Poly, Team 24-7, Lancaster Spring 2015

CPSU-LANCASTER-S15S24G7

3 Membri

21 Guide realizzate

0 Commenti

Aggiungi Commento

Visualizza Statistiche:

Ultime 24 Ore: 2

Ultimi 7 Giorni: 6

Ultimi 30 Giorni: 22

Tutti i Tempi: 8,280