Questa versione può contenere modifiche errate. Passa all'ultima istantanea verificata.
Cosa ti serve
-
Questo passaggio è privo di traduzione. Aiuta a tradurlo
-
Using the 4mm Allen wrench, partially unscrew the 4 (22mm) hex screws on the front of the axle casing to allow the axle to slide freely.
-
-
Questo passaggio è privo di traduzione. Aiuta a tradurlo
-
Using the 8mm Allen wrench, loosen the axle screw until 1/2 of the axle screw is visible.
-
Push the axle screw to reveal the axle rod on the other side.
-
-
Questo passaggio è privo di traduzione. Aiuta a tradurlo
-
Using the Allen wrench, finish unscrewing the axle screw and pull it out.
-
-
-
Questo passaggio è privo di traduzione. Aiuta a tradurlo
-
Using the 8mm Allen wrench, unscrew 2 (32mm) screws to release the brake calipers from the fork.
-
-
Questo passaggio è privo di traduzione. Aiuta a tradurlo
-
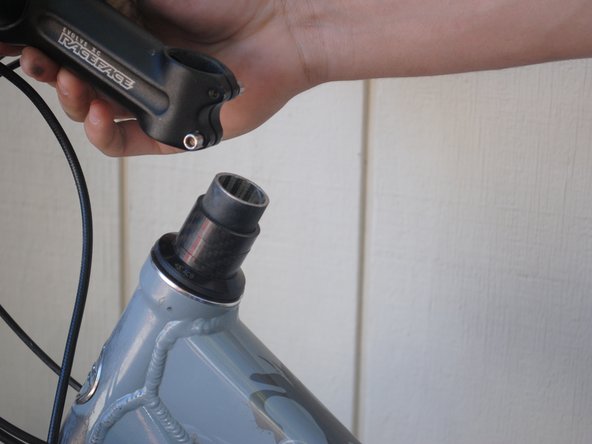
Using the 8mm Allen wrench, unscrew the 30mm head screw located on top of the steam.
-
Using the 4mm Allen wrench, loosen the side screw on both sides.
-
Lift off the handlebar.
-
-
Questo passaggio è privo di traduzione. Aiuta a tradurlo
-
Using your fingers, pry the bearings from the top and bottom of the headset.
-
-
Questo passaggio è privo di traduzione. Aiuta a tradurlo
-
Apply WD-40 to both ends of the headset and bearings.
-
Dry headset and bearings with paper towels.
-
Repeat as necessary until clean.
-
-
Questo passaggio è privo di traduzione. Aiuta a tradurlo
-
Using your finger, apply all-purpose lube to the bearings and each end of the headset.
-
Insert the bearings into the headset with the beveled side facing into the headset.
-
Annulla: non ho completato questa guida.
Un'altra persona ha completato questa guida.


