Salta al contenuto principale

GeeksPhone Keon Back Plate Replacement

Cosa ti serve

  1. GeeksPhone Keon Back Plate Replacement, Battery: passo 1, immagine 1 di 2 GeeksPhone Keon Back Plate Replacement, Battery: passo 1, immagine 2 di 2
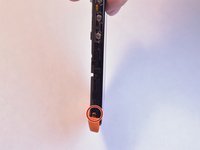
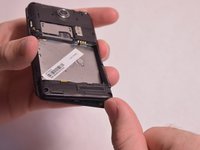
    • Insert the plastic opening tool into the seam between the front of the device and the rear cover.

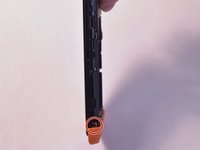
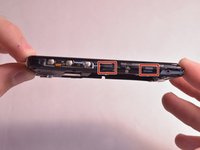
    • Slide the plastic opening tool from the bottom of the phone to the top.

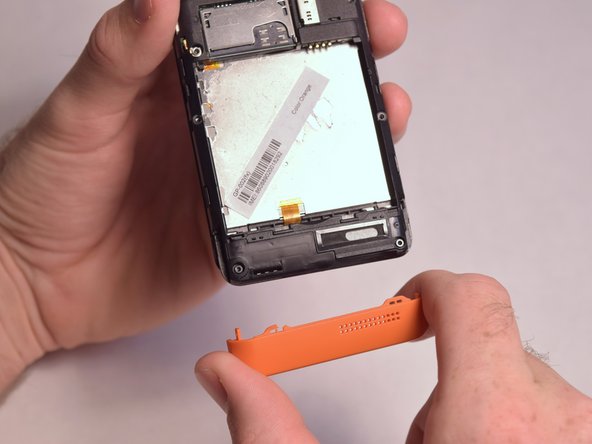
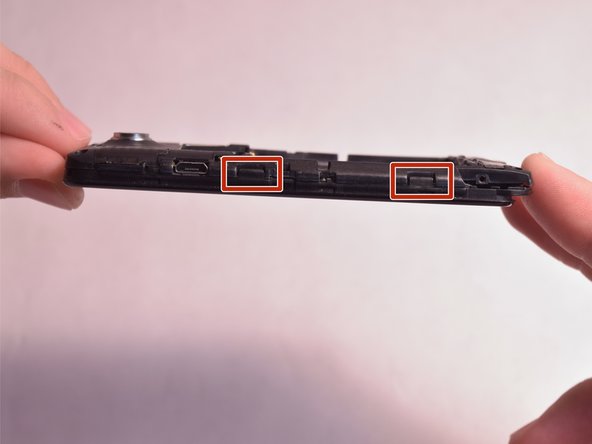
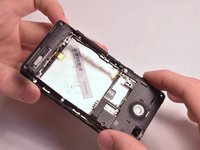
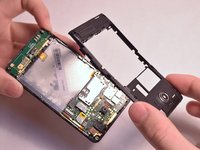
    • Use the plastic opening tool to free all the clips attached to the phone.

  2. GeeksPhone Keon Back Plate Replacement: passo 2, immagine 1 di 1
    • Lift the cover away from the phone.

  3. GeeksPhone Keon Back Plate Replacement: passo 3, immagine 1 di 1
    • Insert the plastic opening tool into the groove between the bottom of the phone and the battery.

    • Lift the battery with the plastic opening tool and finish removing battery by hand.

  4. GeeksPhone Keon Back Plate Replacement, Back Plate: passo 4, immagine 1 di 2 GeeksPhone Keon Back Plate Replacement, Back Plate: passo 4, immagine 2 di 2
    • Remove the two 5mm T4 screws on the sides of the small orange plate.

  5. GeeksPhone Keon Back Plate Replacement: passo 5, immagine 1 di 2 GeeksPhone Keon Back Plate Replacement: passo 5, immagine 2 di 2
    • Gently remove the small orange plate by pulling it down.

  6. GeeksPhone Keon Back Plate Replacement: passo 6, immagine 1 di 1
    • Remove the following screws securing the back plate to the device:

    • Two silver 2mm T3 screws

    • Five black 3mm T3 screws

  7. GeeksPhone Keon Back Plate Replacement: passo 7, immagine 1 di 3 GeeksPhone Keon Back Plate Replacement: passo 7, immagine 2 di 3 GeeksPhone Keon Back Plate Replacement: passo 7, immagine 3 di 3
    • Slightly lift up the bottom corner of the backplate.

    • Release the four clips on both sides by pulling them away from the device.

  8. GeeksPhone Keon Back Plate Replacement: passo 8, immagine 1 di 2 GeeksPhone Keon Back Plate Replacement: passo 8, immagine 2 di 2
    • Lift the backplate away from the device.

Conclusione

To reassemble your device, follow these instructions in reverse order.

Team

USF Tampa, Team 3-5, Eyestone Fall 2015 Membro di USF Tampa, Team 3-5, Eyestone Fall 2015

USFT-EYESTONE-F15S3G5

4 Membri

12 Guide realizzate

0 Commenti

Aggiungi Commento

Visualizza Statistiche:

Ultime 24 Ore: 1

Ultimi 7 Giorni: 4

Ultimi 30 Giorni: 9

Tutti i Tempi: 134