Salta al contenuto principale

Gateway P-6831FX WiFi Card Replacement

Cosa ti serve

  1. Gateway P-6831FX WiFi Card Replacement, WiFi Card: passo 1, immagine 1 di 2 Gateway P-6831FX WiFi Card Replacement, WiFi Card: passo 1, immagine 2 di 2
    • Turn your laptop upside down and remove the five Philips #0 (5mm) screws for the cover of the WiFi Card.

    • Make sure to unplug your laptop charger, as removing the WiFi while the device is charging may damage the WiFi and or the charger.

  2. Gateway P-6831FX WiFi Card Replacement: passo 2, immagine 1 di 2 Gateway P-6831FX WiFi Card Replacement: passo 2, immagine 2 di 2
    • Gently pull the cover away from the device.

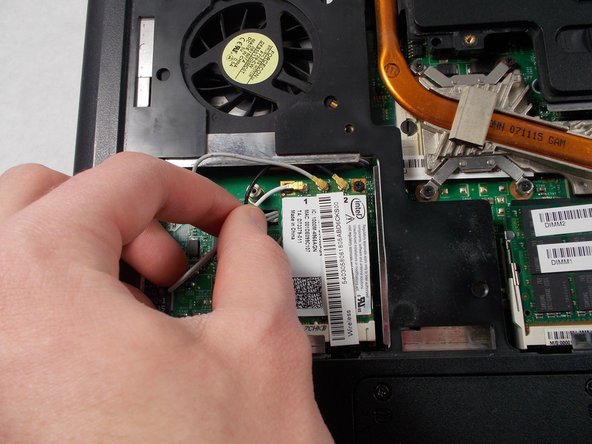
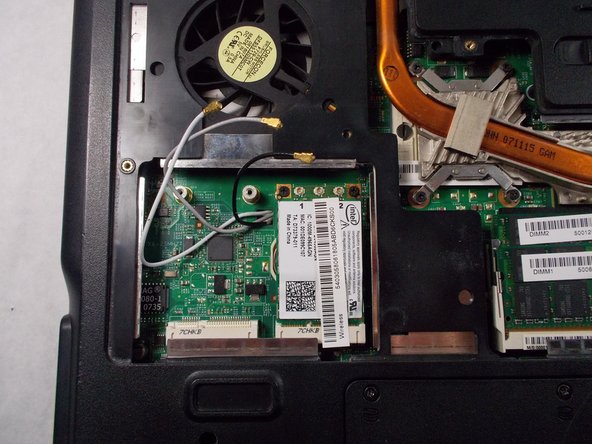
  3. Gateway P-6831FX WiFi Card Replacement: passo 3, immagine 1 di 3 Gateway P-6831FX WiFi Card Replacement: passo 3, immagine 2 di 3 Gateway P-6831FX WiFi Card Replacement: passo 3, immagine 3 di 3
    • Remove the three wires above the WiFi Card.

    • Take note of the color for each wire and it's corresponding location.

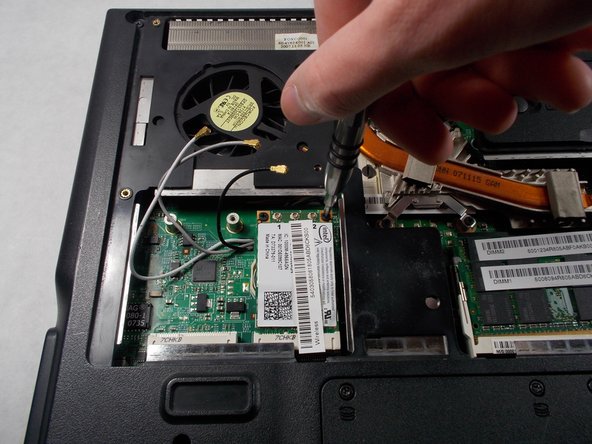
  4. Gateway P-6831FX WiFi Card Replacement: passo 4, immagine 1 di 3 Gateway P-6831FX WiFi Card Replacement: passo 4, immagine 2 di 3 Gateway P-6831FX WiFi Card Replacement: passo 4, immagine 3 di 3
    • Remove the two Phillips #0 (2mm) screws above the WiFi card.

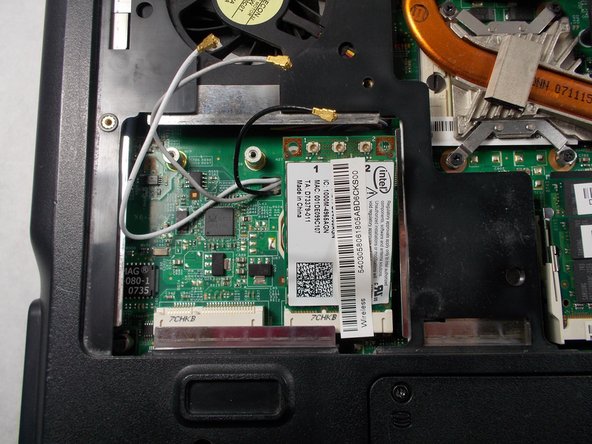
    • The WiFi Card will lift up once the screws are removed.

  5. Gateway P-6831FX WiFi Card Replacement: passo 5, immagine 1 di 2 Gateway P-6831FX WiFi Card Replacement: passo 5, immagine 2 di 2
    • With the WiFi Card lifted up, gently pull the WiFi Card out of the socket and remove it from the device.

Conclusione

To reassemble your device, follow these instructions in reverse order.

Team

0 Commenti

Aggiungi Commento

Visualizza Statistiche:

Ultime 24 Ore: 1

Ultimi 7 Giorni: 1

Ultimi 30 Giorni: 1

Tutti i Tempi: 414