Salta al contenuto principale

Gateway P-6831FX Hard Drive Replacement

Cosa ti serve

  1. Gateway P-6831FX Hard Drive Replacement, Hard Drive: passo 1, immagine 1 di 2 Gateway P-6831FX Hard Drive Replacement, Hard Drive: passo 1, immagine 2 di 2
    • Turn your laptop upside down and remove the four Philips #0 (5mm) screws for the cover of the hard drive.

    • Make sure to unplug your laptop charger, as removing the hard drive while the device is charging may damage the hard drive and or the charger.

  2. Gateway P-6831FX Hard Drive Replacement: passo 2, immagine 1 di 2 Gateway P-6831FX Hard Drive Replacement: passo 2, immagine 2 di 2
    • Gently pull the cover away from the device.

    • Set the cover aside for now, until reassembly.

  3. Gateway P-6831FX Hard Drive Replacement: passo 3, immagine 1 di 2 Gateway P-6831FX Hard Drive Replacement: passo 3, immagine 2 di 2
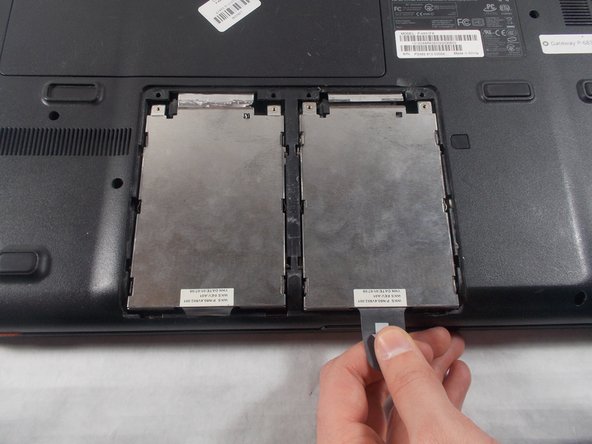
    • Pull the plastic tab as shown to remove the hard drive from the device.

  4. Gateway P-6831FX Hard Drive Replacement: passo 4, immagine 1 di 2 Gateway P-6831FX Hard Drive Replacement: passo 4, immagine 2 di 2
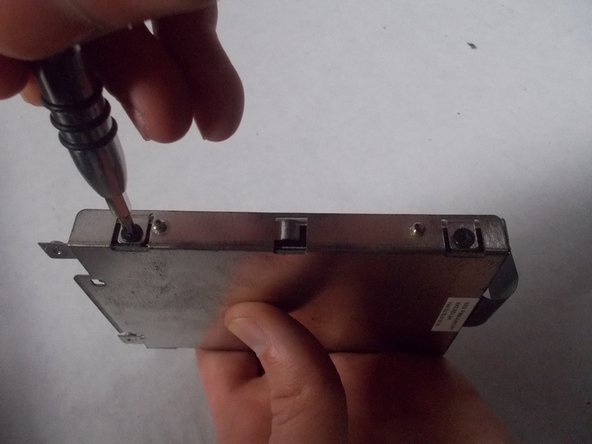
    • Remove the four Philips #0 (3mm) screws around the case for the hard drive. There will be two screws and the left and right side.

  5. Gateway P-6831FX Hard Drive Replacement: passo 5, immagine 1 di 3 Gateway P-6831FX Hard Drive Replacement: passo 5, immagine 2 di 3 Gateway P-6831FX Hard Drive Replacement: passo 5, immagine 3 di 3
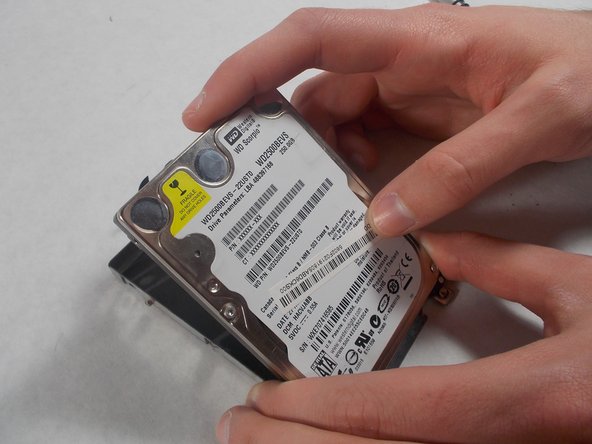
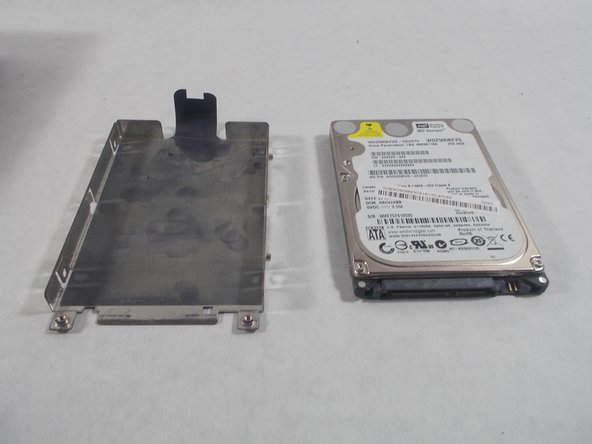
    • Remove the hard drive from the case.

Conclusione

To reassemble your device, follow these instructions in reverse order.

Un'altra persona ha completato questa guida.

Team

0 Commenti

Aggiungi Commento

Visualizza Statistiche:

Ultime 24 Ore: 0

Ultimi 7 Giorni: 0

Ultimi 30 Giorni: 0

Tutti i Tempi: 295