Salta al contenuto principale

Gateway NV52 Hard Drive Compartment Replacement

Cosa ti serve

  1. Gateway NV52 Hard Drive Compartment Replacement, Base Cover: passo 1, immagine 1 di 1
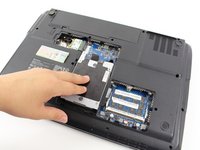
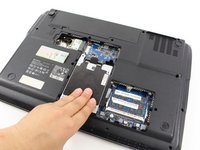
    • Remove the five identical 3/16" Phillips screws that secures the hard drive and memory cover using a Phillips #0 Screwdriver.

  2. Gateway NV52 Hard Drive Compartment Replacement: passo 2, immagine 1 di 1
    • Lift up the base cover from the the top with your hands to a 90 degree angle.

    • Remove the base cover and place it in a safe and dry place.

  3. Gateway NV52 Hard Drive Compartment Replacement, Hard Drive Compartment: passo 3, immagine 1 di 1
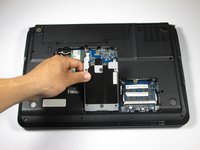
    • Remove the 1/4" Phillip screw located at the top right of the Hard Drive using a Phillips #0 Screwdriver .

  4. Gateway NV52 Hard Drive Compartment Replacement: passo 4, immagine 1 di 3 Gateway NV52 Hard Drive Compartment Replacement: passo 4, immagine 2 di 3 Gateway NV52 Hard Drive Compartment Replacement: passo 4, immagine 3 di 3
    • Remove the Hard Drive component from its compartment. To do so, slide the component downward away from the battery pack.

    • Lift the Hard Drive to a 90 degree angle and out of its slot.

    • Place the Hard Drive in a designated zone.

Conclusione

To reassemble your device, follow these instructions in reverse order.

Altre 2 persone hanno completato questa guida.

Tim En

Membro da: 01/26/13

557 Reputazione

4 Guide realizzate

Team

Cal Poly, Team 7-24, Regan Spring 2014 Membro di Cal Poly, Team 7-24, Regan Spring 2014

CPSU-REGAN-S14S7G24

4 Membri

18 Guide realizzate

0 Commenti

Aggiungi Commento

Visualizza Statistiche:

Ultime 24 Ore: 0

Ultimi 7 Giorni: 5

Ultimi 30 Giorni: 8

Tutti i Tempi: 971