Salta al contenuto principale

Gateway NE52214U Motherboard Replacement

Cosa ti serve

  1. Gateway NE52214U Motherboard Replacement, Battery: passo 1, immagine 1 di 1
    • Make sure to power down and turn off the laptop before proceeding with this guide.

    • Flip over the laptop.

  2. Gateway NE52214U Motherboard Replacement: passo 2, immagine 1 di 2 Gateway NE52214U Motherboard Replacement: passo 2, immagine 2 di 2
    • Slide the tab to the left and hold the tab there.

    • While holding down the sliding tab, remove the battery from the device.

  3. Gateway NE52214U Motherboard Replacement, Upper Case: passo 3, immagine 1 di 2 Gateway NE52214U Motherboard Replacement, Upper Case: passo 3, immagine 2 di 2
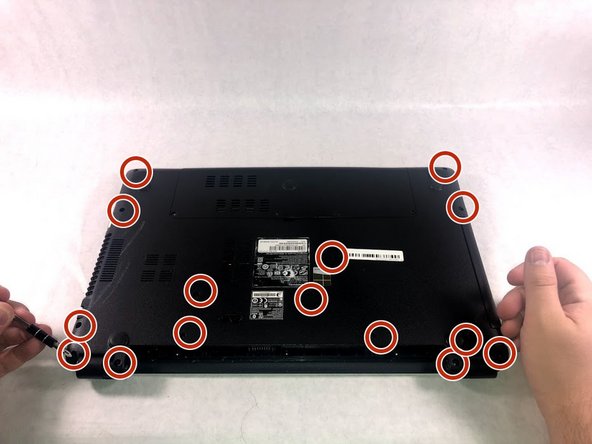
    • After removing the battery, remove 15 7mm screws using the Phillip #1 Screwdriver.

  4. Gateway NE52214U Motherboard Replacement: passo 4, immagine 1 di 1
    • Flip over the laptop and open it so the screen is facing you.

  5. Gateway NE52214U Motherboard Replacement: passo 5, immagine 1 di 1
    • Lift the upper case cover off of the device. Use a prying tool along the edges if necessary.

  6. Gateway NE52214U Motherboard Replacement, Motherboard: passo 6, immagine 1 di 1
    • Remove the twelve 3mm screws using the Phillips #00 screwdriver.

  7. Gateway NE52214U Motherboard Replacement: passo 7, immagine 1 di 2 Gateway NE52214U Motherboard Replacement: passo 7, immagine 2 di 2
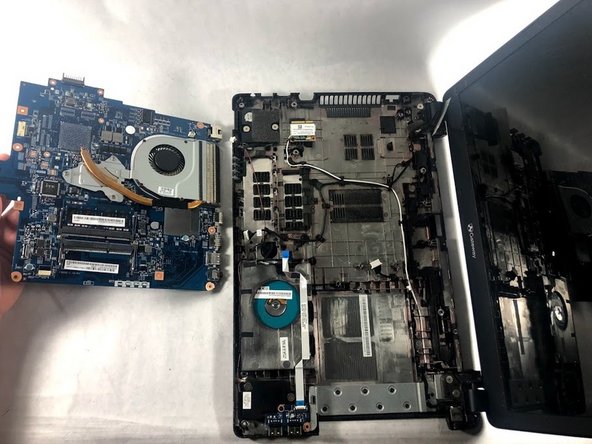
    • Gently lift and remove the motherboard off of device.

    • This will also remove the fan from the device but it will remain attached to the motherboard.

Conclusione

To reassemble your device, follow these instructions in reverse order.

Team

0 Commenti

Aggiungi Commento

Visualizza Statistiche:

Ultime 24 Ore: 2

Ultimi 7 Giorni: 3

Ultimi 30 Giorni: 8

Tutti i Tempi: 321