Salta al contenuto principale

Gateway NE52203u Touchpad Assembly Replacement

Cosa ti serve

  1. Gateway NE52203u Touchpad Assembly Replacement, Touchpad Assembly: passo 1, immagine 1 di 2 Gateway NE52203u Touchpad Assembly Replacement, Touchpad Assembly: passo 1, immagine 2 di 2
    • Remove 18 6.0 mm Phillips #00 screws from the bottom of the laptop.

    • Remove 5 6.0 mm Phillip #00 screws from under cover.

  2. Gateway NE52203u Touchpad Assembly Replacement: passo 2, immagine 1 di 1
    • Remove three 2.9 mm Phillips #00 screws from the battery compartment.

  3. Gateway NE52203u Touchpad Assembly Replacement: passo 3, immagine 1 di 2 Gateway NE52203u Touchpad Assembly Replacement: passo 3, immagine 2 di 2
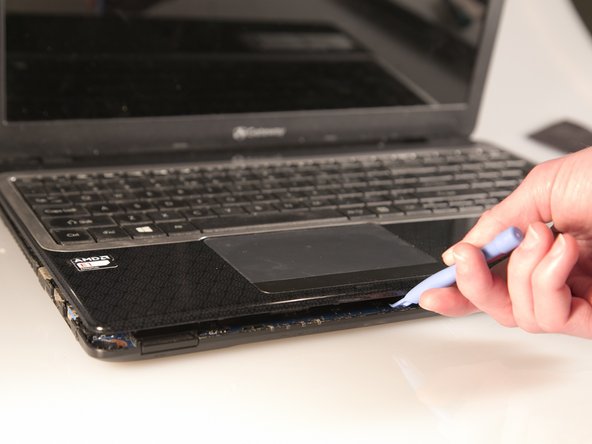
    • Separate the bottom panel from the touchpad assembly by inserting a plastic opening tool between them on all four sides.

  4. Gateway NE52203u Touchpad Assembly Replacement: passo 4, immagine 1 di 1
    • Pull black ribbon wire from port using tweezers in order to completely separate touchpad assembly from bottom assembly.

  5. Gateway NE52203u Touchpad Assembly Replacement: passo 5, immagine 1 di 3 Gateway NE52203u Touchpad Assembly Replacement: passo 5, immagine 2 di 3 Gateway NE52203u Touchpad Assembly Replacement: passo 5, immagine 3 di 3
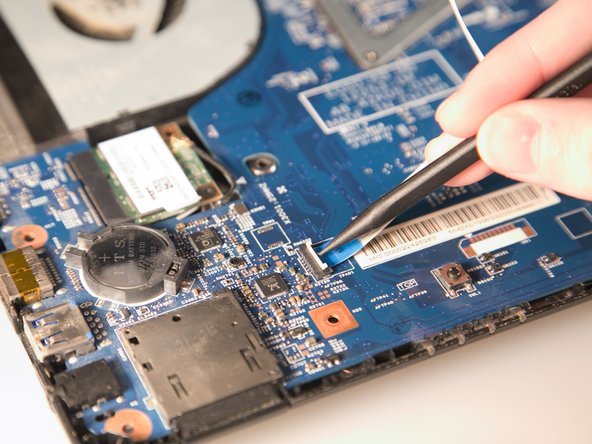
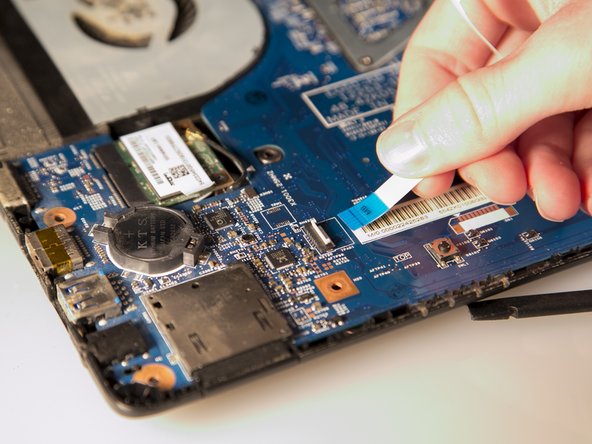
    • Disconnect the two ZIF ports that attach the touchpad assembly to the motherboard.

    • First flip open the flap covering the ribbon using a spudger or fingernail.

    • Second gently pull the ribbon away from the port.

Conclusione

To reassemble your device, follow these instructions in reverse order.

Stephen Spees

Membro da: 03/20/15

542 Reputazione

4 Guide realizzate

Team

Baylor, Team 2-1, Grigsby Spring 2015 Membro di Baylor, Team 2-1, Grigsby Spring 2015

BU-GRIGSBY-S15S2G1

4 Membri

10 Guide realizzate

0 Commenti

Aggiungi Commento

Visualizza Statistiche:

Ultime 24 Ore: 0

Ultimi 7 Giorni: 2

Ultimi 30 Giorni: 6

Tutti i Tempi: 738