Salta al contenuto principale

Gateway NE52203u Optical Drive Replacement

Cosa ti serve

  1. Gateway NE52203u Optical Drive Replacement, Battery: passo 1, immagine 1 di 1
    • Flip the device over onto its backside in order to access the battery.

  2. Gateway NE52203u Optical Drive Replacement: passo 2, immagine 1 di 2 Gateway NE52203u Optical Drive Replacement: passo 2, immagine 2 di 2
    • Locate the battery release latch and slide it over to the other side.

    • A small tool like a pen or screwdriver may be helpful in sliding the latch to release the battery.

  3. Gateway NE52203u Optical Drive Replacement: passo 3, immagine 1 di 1
    • Grab the newly ejected battery from the device to completely remove it.

    • When reinserting the new battery, make sure the prongs on the battery are aligned with the corresponding holes on the laptop.

  4. Gateway NE52203u Optical Drive Replacement, Touchpad Assembly: passo 4, immagine 1 di 2 Gateway NE52203u Optical Drive Replacement, Touchpad Assembly: passo 4, immagine 2 di 2
    • Remove 18 6.0 mm Phillips #00 screws from the bottom of the laptop.

    • Remove 5 6.0 mm Phillip #00 screws from under cover.

  5. Gateway NE52203u Optical Drive Replacement: passo 5, immagine 1 di 1
    • Remove three 2.9 mm Phillips #00 screws from the battery compartment.

  6. Gateway NE52203u Optical Drive Replacement: passo 6, immagine 1 di 2 Gateway NE52203u Optical Drive Replacement: passo 6, immagine 2 di 2
    • Separate the bottom panel from the touchpad assembly by inserting a plastic opening tool between them on all four sides.

  7. Gateway NE52203u Optical Drive Replacement: passo 7, immagine 1 di 1
    • Pull black ribbon wire from port using tweezers in order to completely separate touchpad assembly from bottom assembly.

  8. Gateway NE52203u Optical Drive Replacement: passo 8, immagine 1 di 3 Gateway NE52203u Optical Drive Replacement: passo 8, immagine 2 di 3 Gateway NE52203u Optical Drive Replacement: passo 8, immagine 3 di 3
    • Disconnect the two ZIF ports that attach the touchpad assembly to the motherboard.

    • First flip open the flap covering the ribbon using a spudger or fingernail.

    • Second gently pull the ribbon away from the port.

  9. Gateway NE52203u Optical Drive Replacement, Optical Drive: passo 9, immagine 1 di 3 Gateway NE52203u Optical Drive Replacement, Optical Drive: passo 9, immagine 2 di 3 Gateway NE52203u Optical Drive Replacement, Optical Drive: passo 9, immagine 3 di 3
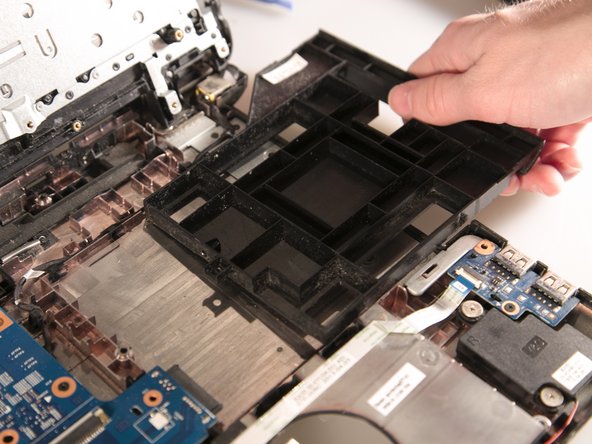
    • Grasp the plastic placeholder firmly and slide it out of the computer.

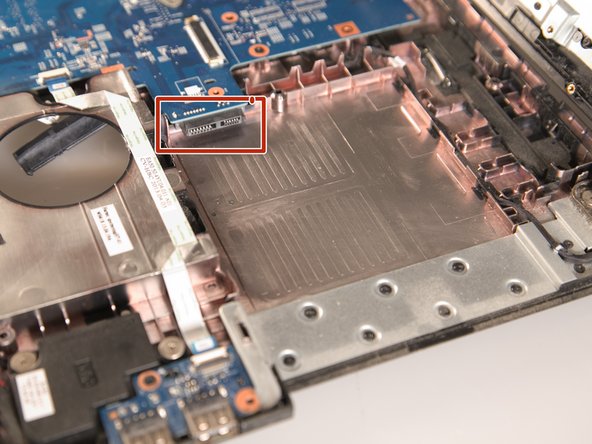
    • When inserting replacement optical drive, use the port at the back left of the open space.

Conclusione

To reassemble your device, follow these instructions in reverse order.

Un'altra persona ha completato questa guida.

Stephen Spees

Membro da: 03/20/15

542 Reputazione

4 Guide realizzate

Team

Baylor, Team 2-1, Grigsby Spring 2015 Membro di Baylor, Team 2-1, Grigsby Spring 2015

BU-GRIGSBY-S15S2G1

4 Membri

10 Guide realizzate

0 Commenti

Aggiungi Commento

Visualizza Statistiche:

Ultime 24 Ore: 0

Ultimi 7 Giorni: 1

Ultimi 30 Giorni: 3

Tutti i Tempi: 475