Salta al contenuto principale
Gateway LT2104u RAM Replacement Guide

Gateway LT2104u RAM Replacement Guide

Chris Sullivan

Chris Sullivan e 6 altri collaboratori

Ultimo aggiornamento il June 23, 2022

5 minuti
Moderato

Introduzione

Vai al passo 1

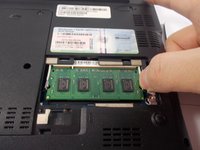
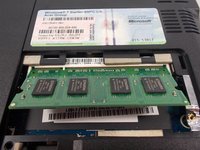
This guide demonstrates how to safely remove and replace the RAM stick of a Gateway LT2104u.

Cosa ti serve

Strumenti

  1. Gateway LT2104u RAM Replacement Guide, RAM: passo 1, immagine 1 di 1
    • Locate the the "L" shaped cover on the back, lower right hand side the device. Using a Philips screwdriver, remove the screw holding it in.

  2. Gateway LT2104u RAM Replacement Guide: passo 2, immagine 1 di 2 Gateway LT2104u RAM Replacement Guide: passo 2, immagine 2 di 2
    • Gently lift the cover until it detaches from the device.

  3. Gateway LT2104u RAM Replacement Guide: passo 3, immagine 1 di 2 Gateway LT2104u RAM Replacement Guide: passo 3, immagine 2 di 2
    • Gently push the levers on each side of the stick of RAM away from each other until the RAM springs into a 45° angle.

  4. Gateway LT2104u RAM Replacement Guide: passo 4, immagine 1 di 1
    • Carefully remove the stick of RAM by pulling at the same 45° angle the RAM is currently at until it detaches from the device.

  5. Gateway LT2104u RAM Replacement Guide: passo 5, immagine 1 di 1
    • When inserting the new stick of ram, be sure to insert it at the same 45° angle that the old stick of ram was taken out at. Press the stick of RAM down until it clicks into place.

Conclusione

To reassemble your device, follow these instructions in reverse order.

Un'altra persona ha completato questa guida.

Team

0Commenti sulla guida

Aggiungi Commento

Visualizza Statistiche:

Ultime 24 Ore: 0

Ultimi 7 Giorni: 2

Ultimi 30 Giorni: 4

Tutti i Tempi: 399