Salta al contenuto principale

Questa guida ha delle modifiche più recenti. Passa all'ultima versione non verificata.

Gateway KAV60 LT2016U RAM Replacement

Cosa ti serve

  1. Gateway KAV60 LT2016U RAM Replacement, Battery: passo 1, immagine 1 di 3 Gateway KAV60 LT2016U RAM Replacement, Battery: passo 1, immagine 2 di 3 Gateway KAV60 LT2016U RAM Replacement, Battery: passo 1, immagine 3 di 3
    • Unlock the tab located in the top left corner of the netbook.

    • The red tab indicated that the battery has been properly unlocked.

    • Remove the battery.

    • When working with electronics, it is always wise to remove the power source before taking the device apart.

  2. Gateway KAV60 LT2016U RAM Replacement, RAM: passo 2, immagine 1 di 1
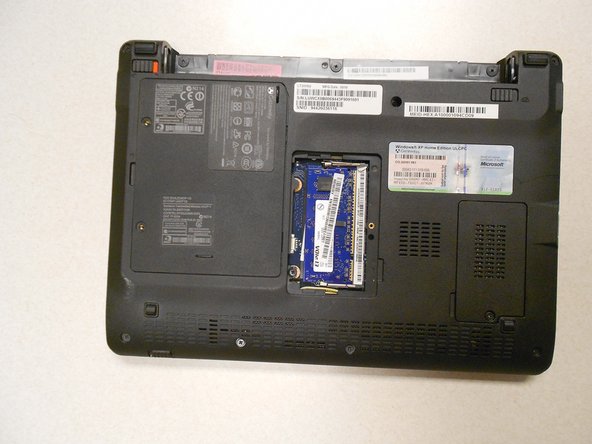
    • The RAM is located under this cover.

  3. Gateway KAV60 LT2016U RAM Replacement: passo 3, immagine 1 di 3 Gateway KAV60 LT2016U RAM Replacement: passo 3, immagine 2 di 3 Gateway KAV60 LT2016U RAM Replacement: passo 3, immagine 3 di 3
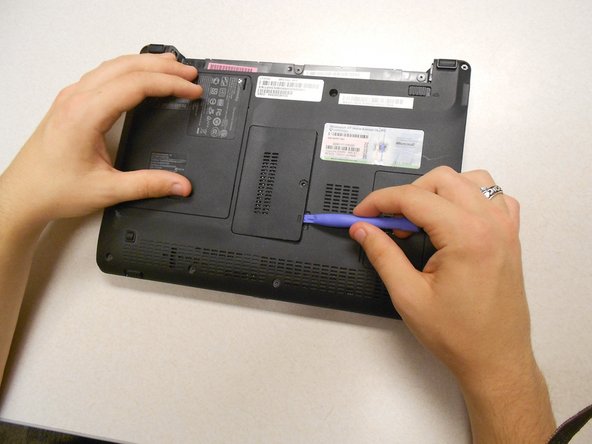
    • Using a Phillips #0 screwdriver, remove one (1) 5mm screw holding the cover in place.

    • Use a plastic opening tool to remove the cover.

  4. Gateway KAV60 LT2016U RAM Replacement: passo 4, immagine 1 di 2 Gateway KAV60 LT2016U RAM Replacement: passo 4, immagine 2 di 2
    • Unlock the RAM by pinching the metal clamps that keep the RAM in place.

    • Remove the RAM while the metal clamps are disengaged.

Conclusione

To reassemble your device, follow these instructions in reverse order.

Lydia Benjock

Membro da: 10/18/13

1.216 Reputazione

10 Guide realizzate

Team

Clemson, Team 14-3, Benson Fall 2013 Membro di Clemson, Team 14-3, Benson Fall 2013

CLEM-BENSON-F13S14G3

3 Membri

22 Guide realizzate

0 Commenti

Aggiungi Commento

Visualizza Statistiche:

Ultime 24 Ore: 0

Ultimi 7 Giorni: 5

Ultimi 30 Giorni: 18

Tutti i Tempi: 2,103