Salta al contenuto principale

Gateway GWTC116-2BL Motherboard Replacement

Cosa ti serve

  1. Gateway GWTC116-2BL Motherboard Replacement, Back Panel: passo 1, immagine 1 di 1
    • Ground yourself before disassembling and handling the computer.

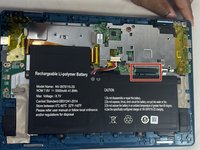
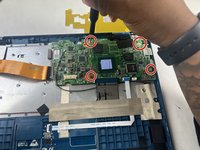
    • Remove the ten 3.0 mm Phillips #00 screws from the back panel of the laptop.

  2. Gateway GWTC116-2BL Motherboard Replacement: passo 2, immagine 1 di 2 Gateway GWTC116-2BL Motherboard Replacement: passo 2, immagine 2 di 2
    • Use the spudger to pry the back panel away from the body of the laptop.

  3. Gateway GWTC116-2BL Motherboard Replacement, Battery: passo 3, immagine 1 di 1
    • Remove the five 3.0 mm Phillips #00 screws.

  4. Gateway GWTC116-2BL Motherboard Replacement: passo 4, immagine 1 di 2 Gateway GWTC116-2BL Motherboard Replacement: passo 4, immagine 2 di 2
    • Using your fingers, flick open the battery connector bracket.

    • Remove the connector from bracket.

  5. Gateway GWTC116-2BL Motherboard Replacement: passo 5, immagine 1 di 1
    • Pull up the battery to remove from the base.

  6. Gateway GWTC116-2BL Motherboard Replacement, Motherboard: passo 6, immagine 1 di 1
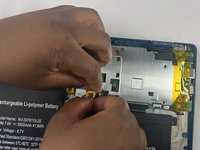
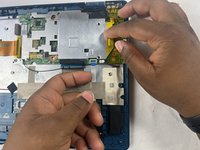
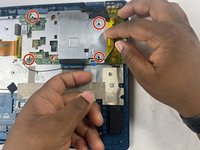
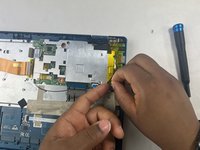
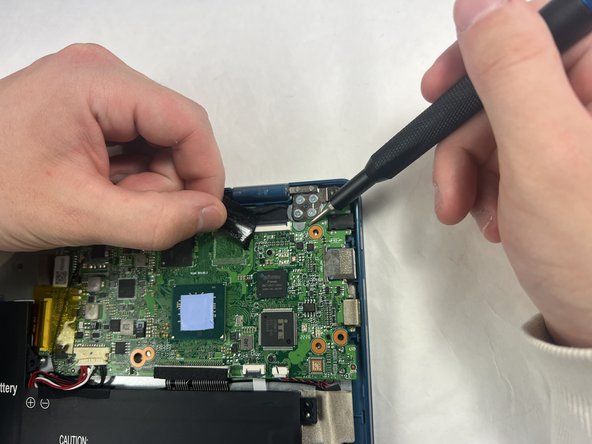
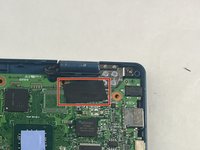
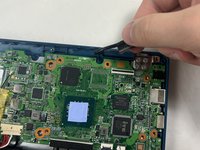
    • Using your fingers, flick the cable connector bracket open.

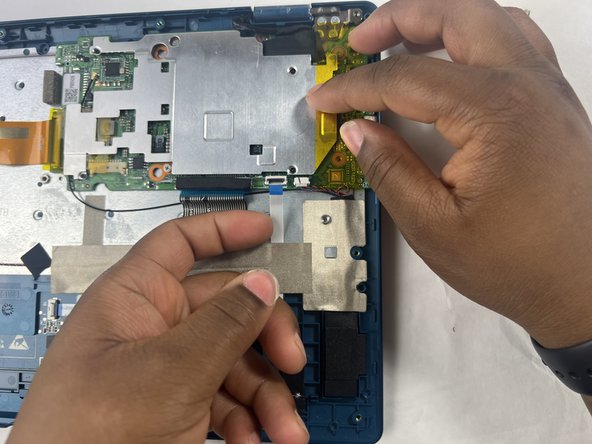
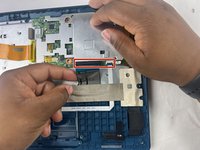
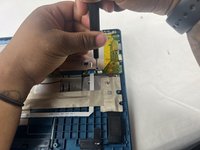
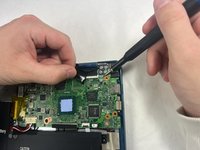
    • Remove the cable from the connector.

  7. Gateway GWTC116-2BL Motherboard Replacement: passo 7, immagine 1 di 2 Gateway GWTC116-2BL Motherboard Replacement: passo 7, immagine 2 di 2
    • Using your fingers, disconnect the black and white connector brackets underneath the gray cable.

  8. Gateway GWTC116-2BL Motherboard Replacement: passo 8, immagine 1 di 2 Gateway GWTC116-2BL Motherboard Replacement: passo 8, immagine 2 di 2
    • Remove the four 3.0 mm Phillips #00 screws located on the motherboard casing.

  9. Gateway GWTC116-2BL Motherboard Replacement: passo 9, immagine 1 di 3 Gateway GWTC116-2BL Motherboard Replacement: passo 9, immagine 2 di 3 Gateway GWTC116-2BL Motherboard Replacement: passo 9, immagine 3 di 3
    • Peel the yellow tape off of the casing.

    • Lift the casing off of the motherboard.

  10. Gateway GWTC116-2BL Motherboard Replacement: passo 10, immagine 1 di 2 Gateway GWTC116-2BL Motherboard Replacement: passo 10, immagine 2 di 2
    • Peel off the yellow tape.

    • Remove four 3.0 mm Phillips #00 screws.

  11. Gateway GWTC116-2BL Motherboard Replacement: passo 11, immagine 1 di 2 Gateway GWTC116-2BL Motherboard Replacement: passo 11, immagine 2 di 2
    • Peel off the black piece of tape covering the display cable.

  12. Gateway GWTC116-2BL Motherboard Replacement: passo 12, immagine 1 di 2 Gateway GWTC116-2BL Motherboard Replacement: passo 12, immagine 2 di 2
    • Flick open the bracket securing the display cable and disconnect the cable from the motherboard.

  13. Gateway GWTC116-2BL Motherboard Replacement: passo 13, immagine 1 di 1
    • Remove the motherboard from the device.

Conclusione

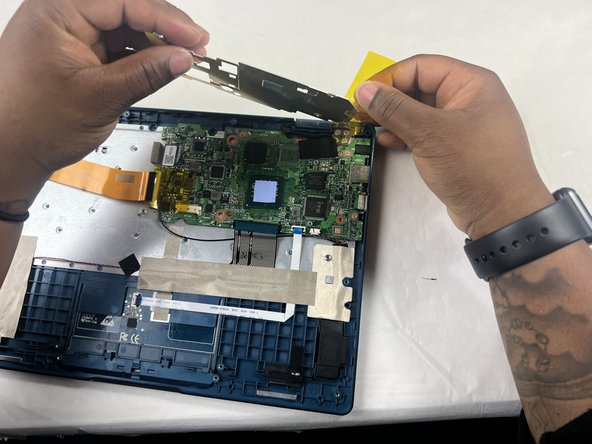
To reassemble your device, follow these instructions in reverse order.

0 Commenti

Aggiungi Commento

Visualizza Statistiche:

Ultime 24 Ore: 5

Ultimi 7 Giorni: 16

Ultimi 30 Giorni: 51

Tutti i Tempi: 105