Salta al contenuto principale

Garmin StreetPilot c330 Screen Replacement

Cosa ti serve

  1. Garmin StreetPilot c330 Screen Replacement, Outer Casing: passo 1, immagine 1 di 3 Garmin StreetPilot c330 Screen Replacement, Outer Casing: passo 1, immagine 2 di 3 Garmin StreetPilot c330 Screen Replacement, Outer Casing: passo 1, immagine 3 di 3
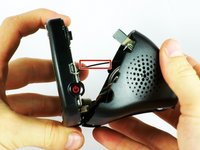
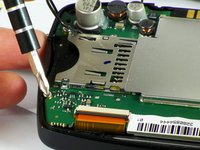
    • At the top of the outer frame, insert the plastic spudger into the groove in the center.

    • Lever the frame gently until it pops out of the case.

  2. Garmin StreetPilot c330 Screen Replacement: passo 2, immagine 1 di 3 Garmin StreetPilot c330 Screen Replacement: passo 2, immagine 2 di 3 Garmin StreetPilot c330 Screen Replacement: passo 2, immagine 3 di 3
    • Use a Phillips #00 screwdriver to remove the four screws around the screen.

  3. Garmin StreetPilot c330 Screen Replacement: passo 3, immagine 1 di 2 Garmin StreetPilot c330 Screen Replacement: passo 3, immagine 2 di 2
    • Gently pull from both ends of the casing to separate the front and back panels.

    • Do not force the pieces apart wider than the length of the connecting wires, or you will damage the wiring.

  4. Garmin StreetPilot c330 Screen Replacement: passo 4, immagine 1 di 3 Garmin StreetPilot c330 Screen Replacement: passo 4, immagine 2 di 3 Garmin StreetPilot c330 Screen Replacement: passo 4, immagine 3 di 3
    • Gently unplug the white cable connector using either your fingers or tweezers.

  5. Garmin StreetPilot c330 Screen Replacement: passo 5, immagine 1 di 1
    • Carefully expose both halves of the device.

    • Be sure not to pull the two halves apart further than the black wire can reach.

  6. Garmin StreetPilot c330 Screen Replacement, Screen: passo 6, immagine 1 di 3 Garmin StreetPilot c330 Screen Replacement, Screen: passo 6, immagine 2 di 3 Garmin StreetPilot c330 Screen Replacement, Screen: passo 6, immagine 3 di 3
    • Remove the three screws holding the motherboard in place.

  7. Garmin StreetPilot c330 Screen Replacement: passo 7, immagine 1 di 1
    • Use the spudger to lift up the motherboard.

  8. Garmin StreetPilot c330 Screen Replacement: passo 8, immagine 1 di 3 Garmin StreetPilot c330 Screen Replacement: passo 8, immagine 2 di 3 Garmin StreetPilot c330 Screen Replacement: passo 8, immagine 3 di 3
    • To remove the ribbon cable, lift the black latch using the spudger tool.

    • Separate the connection using either your fingers, tweezers, or the spudger.

  9. Garmin StreetPilot c330 Screen Replacement: passo 9, immagine 1 di 2 Garmin StreetPilot c330 Screen Replacement: passo 9, immagine 2 di 2
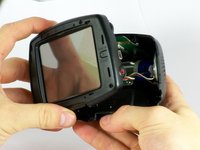
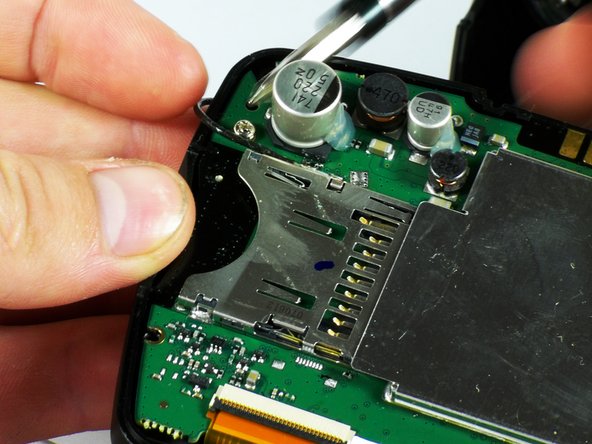
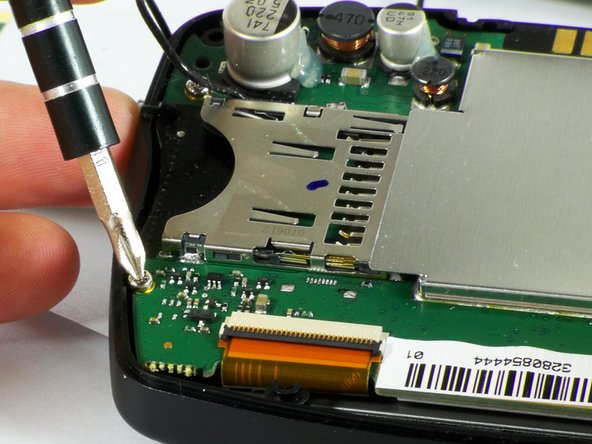
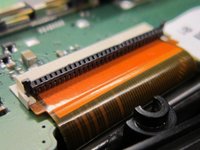
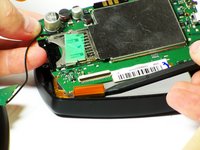
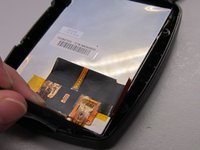
    • Slide the spudger under the two flexible tabs located on the right and left sides of the bottom of the screen.

    • Rotate the spudger outward until the tabs are no longer holding the screen.

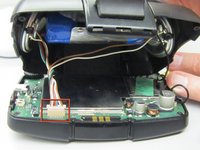
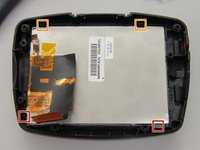
    • When reassembling, slide the bottom of the screen under the two permanent tabs.

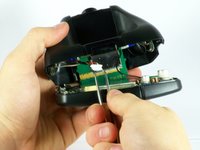
    • Push the screen out from the front.

  10. Garmin StreetPilot c330 Screen Replacement: passo 10, immagine 1 di 1
    • Separate the screen from the front cover.

Conclusione

To reassemble your device, follow these instructions in reverse order.

Adrian Leon

Membro da: 10/07/10

173 Reputazione

3 Guide realizzate

Team

Cal Poly, Team 22-1, Maness Fall 2010 Membro di Cal Poly, Team 22-1, Maness Fall 2010

CPSU-MANESS-F10S22G1

3 Membri

4 Guide realizzate

0 Commenti

Aggiungi Commento

Visualizza Statistiche:

Ultime 24 Ore: 0

Ultimi 7 Giorni: 0

Ultimi 30 Giorni: 4

Tutti i Tempi: 1,533