Questa versione può contenere modifiche errate. Passa all'ultima istantanea verificata.
Cosa ti serve
-
Questo passaggio è privo di traduzione. Aiuta a tradurlo
-
Flip open the antenna on the back of the device.
-
Remove the two 4.42 mm screws on the antenna cover using a T5 Torx screwdriver.
-
-
Questo passaggio è privo di traduzione. Aiuta a tradurlo
-
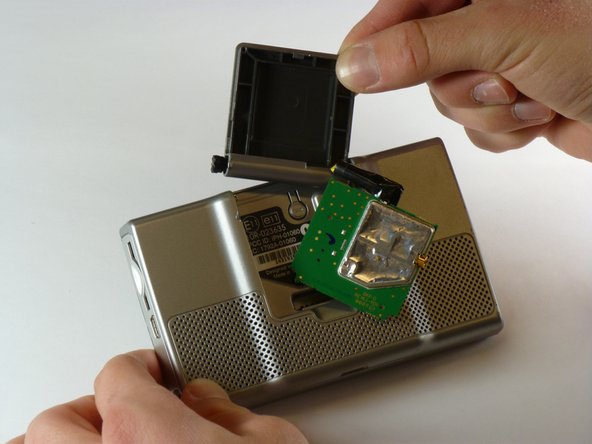
Pull the antenna circuit board out of its case.
-
-
-
Questo passaggio è privo di traduzione. Aiuta a tradurlo
-
Insert the pointed end of a spudger into the leftmost slit of the antenna case.
-
Push the spudger to the right.
-
Slide the antenna case out of the device.
-
-
Questo passaggio è privo di traduzione. Aiuta a tradurlo
-
Remove the two screws on the back of the outer case using a T5 Torx screwdriver.
-
These screws are 10.82 mm long.
-
-
Questo passaggio è privo di traduzione. Aiuta a tradurlo
-
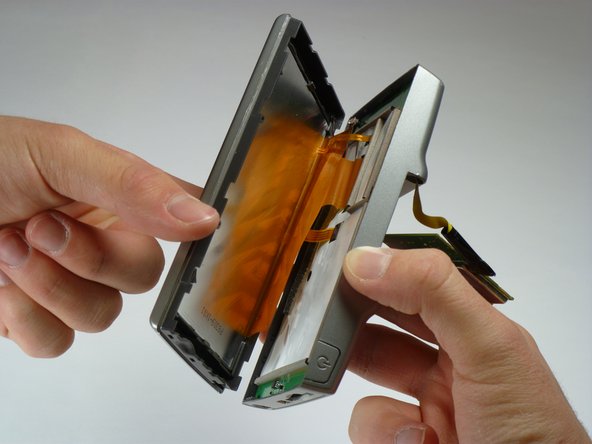
Starting along the top, separate the front and back of the device by pushing an iPod-opening tool into the crack along each side of the case.
-
-
Questo passaggio è privo di traduzione. Aiuta a tradurlo
-
Use a spudger to disconnect the yellow antenna wire from the ZIF connector by opening the brown latch holding the wire in place.
-
Remove the antenna.
-


Team

Cal Poly, Team 5-22, Amido Winter 2011 Membro di Cal Poly, Team 5-22, Amido Winter 2011
CPSU-AMIDO-W11S5G22
5 Membri
7 Guide realizzate