Salta al contenuto principale

Questa guida ha delle modifiche più recenti. Passa all'ultima versione non verificata.

Garmin GPSmap 60CSx Keypad Buttons Replacement

Cosa ti serve

  1. Garmin GPSmap 60CSx Keypad Buttons Replacement, Back Cover and AA Batteries: passo 1, immagine 1 di 1
    • Lift and twist the battery cover release 90 degrees counterclockwise on the back of the device.

  2. Garmin GPSmap 60CSx Keypad Buttons Replacement: passo 2, immagine 1 di 1
    • Lift battery release up to remove battery cover.

  3. Garmin GPSmap 60CSx Keypad Buttons Replacement: passo 3, immagine 1 di 2 Garmin GPSmap 60CSx Keypad Buttons Replacement: passo 3, immagine 2 di 2
    • Pull AA batteries out.

  4. Garmin GPSmap 60CSx Keypad Buttons Replacement, Keypad Buttons: passo 4, immagine 1 di 2 Garmin GPSmap 60CSx Keypad Buttons Replacement, Keypad Buttons: passo 4, immagine 2 di 2
    • Remove the six 10 mm screws on the back of the device with a Phillips #0 screwdriver.

    • Flip the back panel over to view the green electronics board (the PCB) and the PCB covering.

    • Remove the black, yellow, blue, and red wires connected to the PCB with light force.

  5. Garmin GPSmap 60CSx Keypad Buttons Replacement: passo 5, immagine 1 di 1
    • Place the spudger in the bottom right corner of the black PCB cover and pry the corner out.

    • The previous step will need to be done to the other three corners.

    • It is best to do the two bottom corners first.

    • Pull the black PCB board out of the GPSMap 60 CSx.

  6. Garmin GPSmap 60CSx Keypad Buttons Replacement: passo 6, immagine 1 di 2 Garmin GPSmap 60CSx Keypad Buttons Replacement: passo 6, immagine 2 di 2
    • Carefully use a spudger to lift the PCB a few centimeters.

    • Pull the PCB out towards the bottom of the GPSMap 60CSx.

    • This will pull out all the main components including the antenna and the screen.

  7. Garmin GPSmap 60CSx Keypad Buttons Replacement: passo 7, immagine 1 di 2 Garmin GPSmap 60CSx Keypad Buttons Replacement: passo 7, immagine 2 di 2
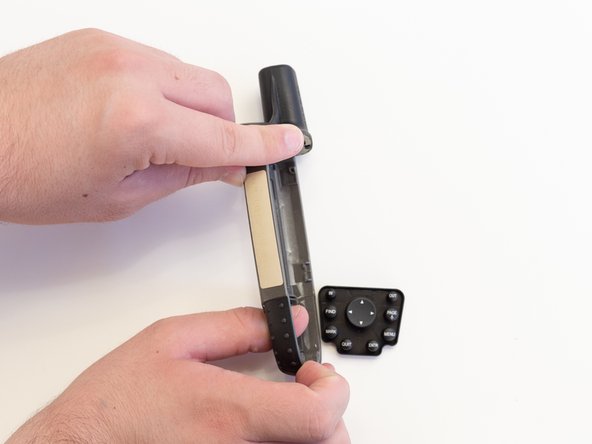
    • Take the front panel and apply light force to the buttons.

    • The buttons are part of one unit and should all pop out at once.

Conclusione

To reassemble your device, follow these instructions in reverse order.

Altre 3 persone hanno completato questa guida.

0 Commenti

Aggiungi Commento

Visualizza Statistiche:

Ultime 24 Ore: 1

Ultimi 7 Giorni: 4

Ultimi 30 Giorni: 20

Tutti i Tempi: 2,611