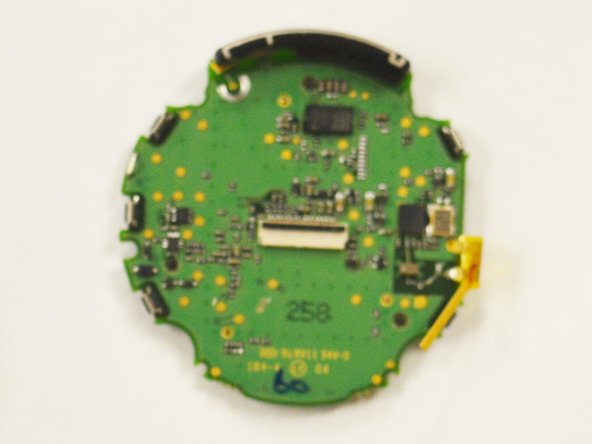
Salta al contenuto principale

Garmin Fenix 2 Motherboard Replacement

Cosa ti serve

  1. Garmin Fenix 2 Motherboard Replacement, Battery: passo 1, immagine 1 di 3 Garmin Fenix 2 Motherboard Replacement, Battery: passo 1, immagine 2 di 3 Garmin Fenix 2 Motherboard Replacement, Battery: passo 1, immagine 3 di 3
    • Use a Torx T9 screwdriver to remove these four .8mm screws and seperate the housing.

  2. Garmin Fenix 2 Motherboard Replacement: passo 2, immagine 1 di 2 Garmin Fenix 2 Motherboard Replacement: passo 2, immagine 2 di 2
    • Use a spudger tool to disengage the power ribbon from the main board. Once the ribbon is disconnected you can separate the bottom piece of the housing that holds the battery.

  3. Garmin Fenix 2 Motherboard Replacement: passo 3, immagine 1 di 2 Garmin Fenix 2 Motherboard Replacement: passo 3, immagine 2 di 2
    • Use the spudger tool again and wedge it in between the battery and the housing, pry until the battery starts to separate from the adhesive holding it in place. Once you have the battery disconnected you are ready to replace it.

    • Despite the fact that the metal spudger is shown being used in this step, make sure to use a plastic opening tool or nylon spudger to pry up the battery. The metal spudger has a much larger chance of puncturing the battery, and thus should not be used.

  4. Garmin Fenix 2 Motherboard Replacement, Motherboard: passo 4, immagine 1 di 1
    • Use a spudger to pry open the power ribbon from the main board.

  5. Garmin Fenix 2 Motherboard Replacement: passo 5, immagine 1 di 1
    • Use your Torx T9 screwdriver to remove the one .8mm screw that holds the main board to the watch housing.

  6. Garmin Fenix 2 Motherboard Replacement: passo 6, immagine 1 di 1
    • Use the spudger to pry the motherboard out of the housing.

  7. Garmin Fenix 2 Motherboard Replacement: passo 7, immagine 1 di 1
    • Once removed simply separate the digitizer from the main board.

  8. Garmin Fenix 2 Motherboard Replacement: passo 8, immagine 1 di 2 Garmin Fenix 2 Motherboard Replacement: passo 8, immagine 2 di 2
    • Lastly use your spudger tool to pry the data ribbon open from the motherboard. Once the ribbon is removed the board will be free and you can replace the board.

Conclusione

To reassemble your device, follow these instructions in reverse order.

Altre 5 persone hanno completato questa guida.

Brandon Barger

Membro da: 02/13/16

1.219 Reputazione

5 Guide realizzate

Team

IUPUI, Team 54-4, Wilson Spring 2016 Membro di IUPUI, Team 54-4, Wilson Spring 2016

IUPUI-WILSON-S16S54G4

3 Membri

6 Guide realizzate

2 Commenti

Ottima, le prime guide che trovo per Garmin Fenix 2. Io metterei una foto con le specifiche della batteria. Saluti.

Ciro Filomeno - Replica

Hi there, any idea where I can buy motherboard replacement for my Fenix 1?

hasmanizam - Replica

Aggiungi Commento

Visualizza Statistiche:

Ultime 24 Ore: 1

Ultimi 7 Giorni: 4

Ultimi 30 Giorni: 15

Tutti i Tempi: 4,429