Salta al contenuto principale

Garmin Dash Cam 20 Screen Replacement

Cosa ti serve

  1. Garmin Dash Cam 20 Screen Replacement, Internal Assembly: passo 1, immagine 1 di 2 Garmin Dash Cam 20 Screen Replacement, Internal Assembly: passo 1, immagine 2 di 2
    • Be sure to turn off the Dash Cam by pressing the power button.

  2. Garmin Dash Cam 20 Screen Replacement: passo 2, immagine 1 di 2 Garmin Dash Cam 20 Screen Replacement: passo 2, immagine 2 di 2
    • Rotate the Dash Cam to where the socket faces you.

    • Remove the 9 mm screw using the Torx T6 screwdriver.

  3. Garmin Dash Cam 20 Screen Replacement: passo 3, immagine 1 di 2 Garmin Dash Cam 20 Screen Replacement: passo 3, immagine 2 di 2
    • Remove the Dash Cam socket piece.

  4. Garmin Dash Cam 20 Screen Replacement: passo 4, immagine 1 di 2 Garmin Dash Cam 20 Screen Replacement: passo 4, immagine 2 di 2
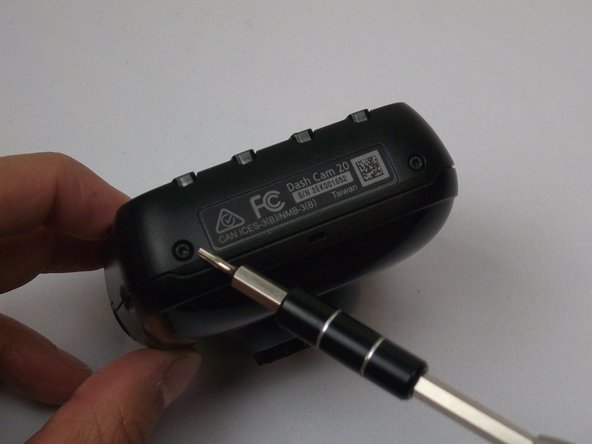
    • Rotate the Dash Cam to where the product information faces you.

    • Remove the two 5 mm screws using the Torx T5 screwdriver.

  5. Garmin Dash Cam 20 Screen Replacement: passo 5, immagine 1 di 3 Garmin Dash Cam 20 Screen Replacement: passo 5, immagine 2 di 3 Garmin Dash Cam 20 Screen Replacement: passo 5, immagine 3 di 3
    • Remove top case from the bottom case.

    • The compact nature of the casing requires use of the metal spudger for needed leverage.

  6. Garmin Dash Cam 20 Screen Replacement: passo 6, immagine 1 di 3 Garmin Dash Cam 20 Screen Replacement: passo 6, immagine 2 di 3 Garmin Dash Cam 20 Screen Replacement: passo 6, immagine 3 di 3
    • Remove the two 5mm screws using the Torx T5 screwdriver

    • By removing the screws, the metal battery frame will now become free from the rest of the device.

  7. Garmin Dash Cam 20 Screen Replacement, Screen: passo 7, immagine 1 di 3 Garmin Dash Cam 20 Screen Replacement, Screen: passo 7, immagine 2 di 3 Garmin Dash Cam 20 Screen Replacement, Screen: passo 7, immagine 3 di 3
    • Use the Phillips screwdriver to remove the four 5mm screws.

  8. Garmin Dash Cam 20 Screen Replacement: passo 8, immagine 1 di 2 Garmin Dash Cam 20 Screen Replacement: passo 8, immagine 2 di 2
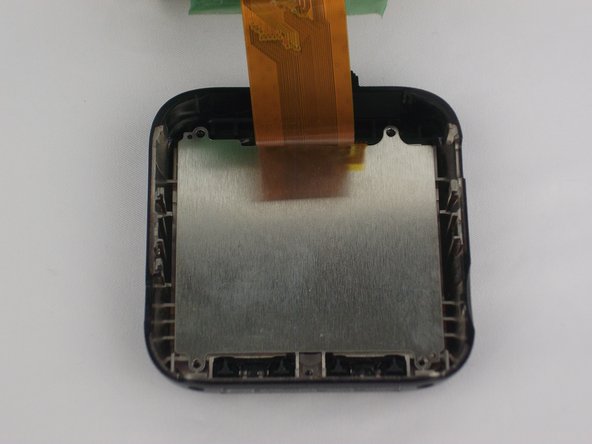
    • Use the metal spudger to remove metal plate from device. This will reveal the screen.

  9. Garmin Dash Cam 20 Screen Replacement: passo 9, immagine 1 di 3 Garmin Dash Cam 20 Screen Replacement: passo 9, immagine 2 di 3 Garmin Dash Cam 20 Screen Replacement: passo 9, immagine 3 di 3
    • Use the metal spudger to remove screen from device.

  10. Garmin Dash Cam 20 Screen Replacement: passo 10, immagine 1 di 1
    • The screen is now detached.

Conclusione

To reassemble your device, follow these instructions in reverse order.

Un'altra persona ha completato questa guida.

Team

USF Tampa, Team 2-1, Cagle Fall 2016 Membro di USF Tampa, Team 2-1, Cagle Fall 2016

USFT-CAGLE-F16S2G1

4 Membri

5 Guide realizzate

0 Commenti

Aggiungi Commento

Visualizza Statistiche:

Ultime 24 Ore: 0

Ultimi 7 Giorni: 5

Ultimi 30 Giorni: 10

Tutti i Tempi: 466