Salta al contenuto principale

Galaxy Tab S 10.5 Camera Replacement

Cosa ti serve

  1. Galaxy Tab S 10.5 Camera Replacement, Disassembling Galaxy Tab S 10.5 Back Cover: passo 1, immagine 1 di 2 Galaxy Tab S 10.5 Camera Replacement, Disassembling Galaxy Tab S 10.5 Back Cover: passo 1, immagine 2 di 2
    • Place the plastic opening tool into the SD card slot or charge port.

    • Try in an upward motion until you see a separation between the tablet and back cover.

  2. Galaxy Tab S 10.5 Camera Replacement: passo 2, immagine 1 di 1
    • Work around the entire device by sliding the plastic opening tool around the rim.

    • If this is the first time, it will be hard to separate the back cover from the tablet.

    • The clips are approximately 5 cm apart. While working around the device, the clips will make a dislocating sound when disconnected.

  3. Galaxy Tab S 10.5 Camera Replacement: passo 3, immagine 1 di 1
    • Remove the back cover once all links have been separated.

    • Be careful when touching any of the internal components of the tablet.

  4. Galaxy Tab S 10.5 Camera Replacement, Camera: passo 4, immagine 1 di 3 Galaxy Tab S 10.5 Camera Replacement, Camera: passo 4, immagine 2 di 3 Galaxy Tab S 10.5 Camera Replacement, Camera: passo 4, immagine 3 di 3
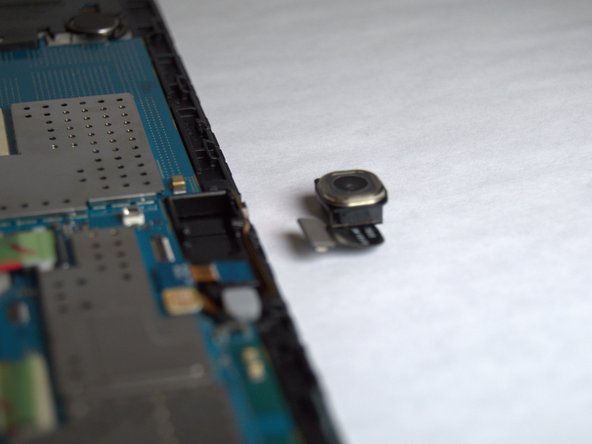
    • Use a spudger to disconnect the camera from the motherboard and then remove the camera.

Conclusione

To reassemble your device, follow these instructions in reverse order.

Un'altra persona ha completato questa guida.

Jordan Soto

Membro da: 08/26/15

3.249 Reputazione

6 Guide realizzate

Team

USF Tampa, Team 3-2, Eyestone Fall 2015 Membro di USF Tampa, Team 3-2, Eyestone Fall 2015

USFT-EYESTONE-F15S3G2

3 Membri

20 Guide realizzate

0 Commenti

Aggiungi Commento

Visualizza Statistiche:

Ultime 24 Ore: 0

Ultimi 7 Giorni: 1

Ultimi 30 Giorni: 1

Tutti i Tempi: 2,522