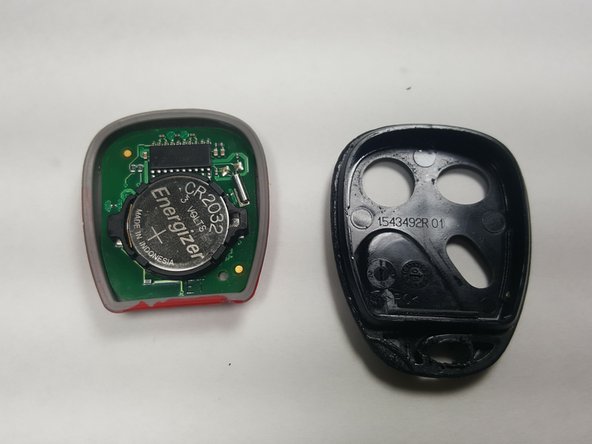
Salta al contenuto principale

GM Key Fob Plastic Housing Replacement

Cosa ti serve

  1. GM Key Fob  Plastic Housing Replacement, Key Fob Plastic Housing: passo 1, immagine 1 di 1
    • Pry apart the key ring to remove it from the old housing.

  2. GM Key Fob  Plastic Housing Replacement: passo 2, immagine 1 di 3 GM Key Fob  Plastic Housing Replacement: passo 2, immagine 2 di 3 GM Key Fob  Plastic Housing Replacement: passo 2, immagine 3 di 3
    • Once you have removed the key ring, use it to open the housing by wedging it into the groove, as pictured.

  3. GM Key Fob  Plastic Housing Replacement: passo 3, immagine 1 di 2 GM Key Fob  Plastic Housing Replacement: passo 3, immagine 2 di 2
    • Remove the electrical board and rubber key pad from the old housing.

  4. GM Key Fob  Plastic Housing Replacement: passo 4, immagine 1 di 2 GM Key Fob  Plastic Housing Replacement: passo 4, immagine 2 di 2
    • Remove the electrical board from the rubber key pad.

  5. GM Key Fob  Plastic Housing Replacement: passo 5, immagine 1 di 2 GM Key Fob  Plastic Housing Replacement: passo 5, immagine 2 di 2
    • If necessary, remove the battery from the electrical board and replace it.

  6. GM Key Fob  Plastic Housing Replacement: passo 6, immagine 1 di 1
    • After Opening the new Key Fob package, select the correct housing as more than one model is included.

Conclusione

To reassemble your device, simply follow these disassembly instructions in reverse order.

Un'altra persona ha completato questa guida.

0 Commenti

Aggiungi Commento

Visualizza Statistiche:

Ultime 24 Ore: 0

Ultimi 7 Giorni: 11

Ultimi 30 Giorni: 31

Tutti i Tempi: 2,465