Salta al contenuto principale

GE JSP39SN4SS Door Seal Replacement

Cosa ti serve

  1. GE JSP39SN4SS Door Seal Replacement, seal/gasket: passo 1, immagine 1 di 2 GE JSP39SN4SS Door Seal Replacement, seal/gasket: passo 1, immagine 2 di 2
    • Make sure the oven is off and at room temperature.

  2. GE JSP39SN4SS Door Seal Replacement: passo 2, immagine 1 di 2 GE JSP39SN4SS Door Seal Replacement: passo 2, immagine 2 di 2
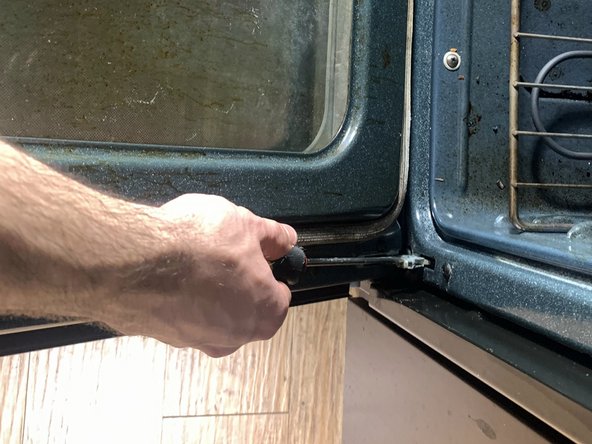
    • Lower the clasps on the oven door using an opening tool or heavy duty spudger.

    • Insert the spudger into the top of the metal hinge and pull it away from the door.

    • Continue to lower the clasp until met with resistance from the hinge.

    • Repeat on both sides of the oven.

  3. GE JSP39SN4SS Door Seal Replacement: passo 3, immagine 1 di 2 GE JSP39SN4SS Door Seal Replacement: passo 3, immagine 2 di 2
    • Raise the oven door until to about a 60 degree angle.

    • Firmly grasp the sides of the door and lift it off of hinges and away from the oven.

    • Make sure to have a firm grasp on the door. It may be heavier than you expect and difficult to hang onto. Lift with your knees instead of your back. It might be a good idea to get help to take the door off if it seems too heavy.

    • If the door does not come out, Try multiple angles until you feel less resistance from lifting.

    • Place door on a flat surface.

  4. GE JSP39SN4SS Door Seal Replacement: passo 4, immagine 1 di 3 GE JSP39SN4SS Door Seal Replacement: passo 4, immagine 2 di 3 GE JSP39SN4SS Door Seal Replacement: passo 4, immagine 3 di 3
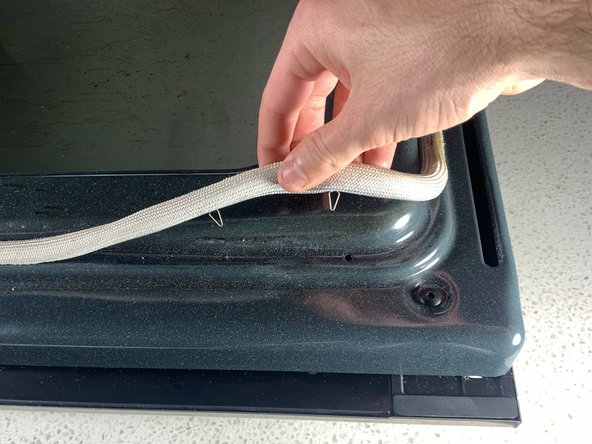
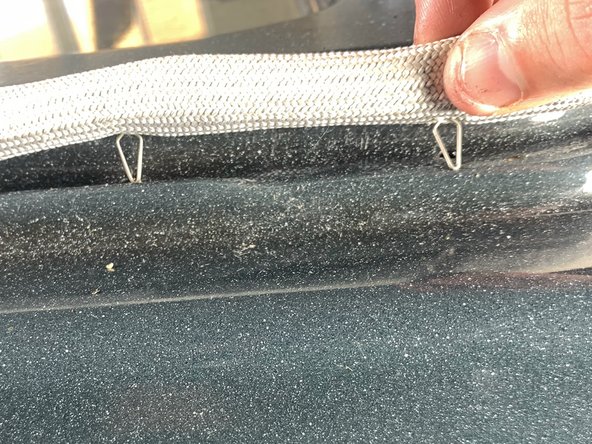
    • Begin removing the seal by gently pinching and lifting away from the door.

    • Some pins may be broken. Avoid any sharp edges.

    • Any broken pins will be more difficult to remove. In order to remove them, either use more force, or pull from different angles until the metal slides out of position.

  5. GE JSP39SN4SS Door Seal Replacement: passo 5, immagine 1 di 3 GE JSP39SN4SS Door Seal Replacement: passo 5, immagine 2 di 3 GE JSP39SN4SS Door Seal Replacement: passo 5, immagine 3 di 3
    • Begin attaching the seal by inserting any pin into the holes around the door.

    • Continue to insert pins along the length of the seal.

    • Make sure each one is secure before moving onto the next.

  6. GE JSP39SN4SS Door Seal Replacement: passo 6, immagine 1 di 2 GE JSP39SN4SS Door Seal Replacement: passo 6, immagine 2 di 2
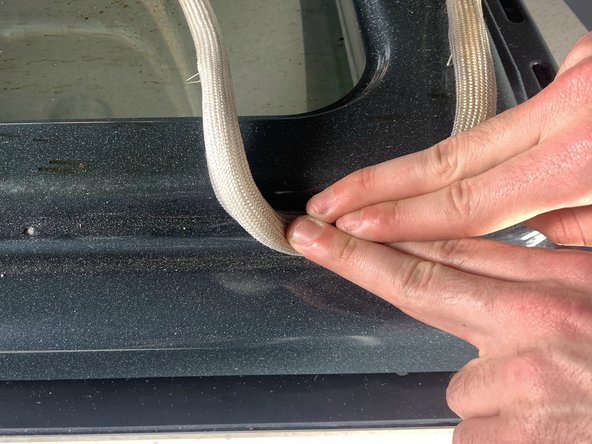
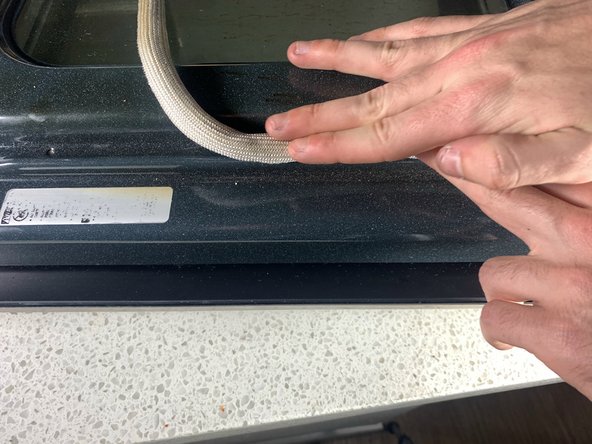
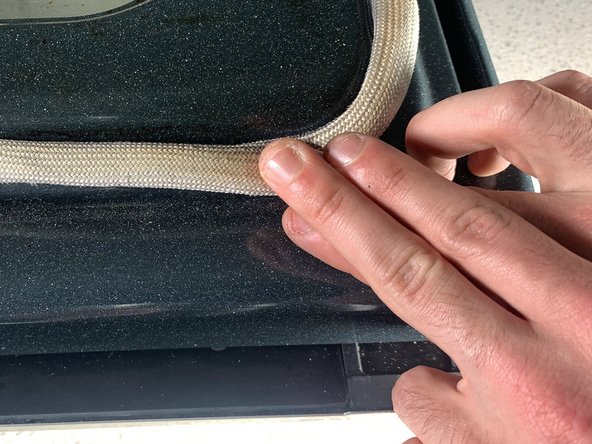
    • Run your fingers over the seal to make sure all pins are in place.

    • Press firmly on any bumps in the seal.

  7. GE JSP39SN4SS Door Seal Replacement: passo 7, immagine 1 di 3 GE JSP39SN4SS Door Seal Replacement: passo 7, immagine 2 di 3 GE JSP39SN4SS Door Seal Replacement: passo 7, immagine 3 di 3
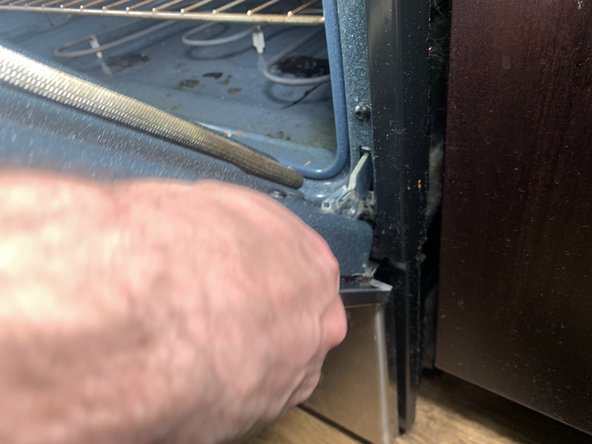
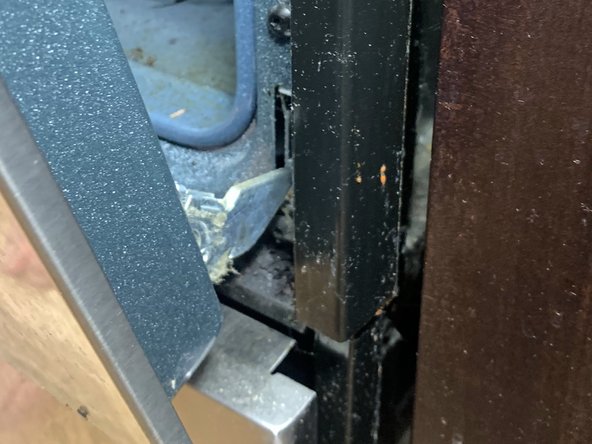
    • To replace the oven door, hold it in front of the opening.

    • Insert the metal teeth into the openings, below the small metal pins, at the base of the oven.

    • If secured properly, the door should be able to rest in an open position.

    • To finish, slowly close the door. Stop if any resistance is felt.

Conclusione

To reassemble your device, follow these instructions in reverse order.

Andrew Silverstein

Membro da: 01/26/23

145 Reputazione

1 Guida realizzata

Team

UC Davis, Team 2-10, Morris Winter 2023 Membro di UC Davis, Team 2-10, Morris Winter 2023

UCD-MORRIS-W23S2G10

2 Membri

1 Guida realizzata

0 Commenti

Aggiungi Commento

Visualizza Statistiche:

Ultime 24 Ore: 1

Ultimi 7 Giorni: 6

Ultimi 30 Giorni: 27

Tutti i Tempi: 254