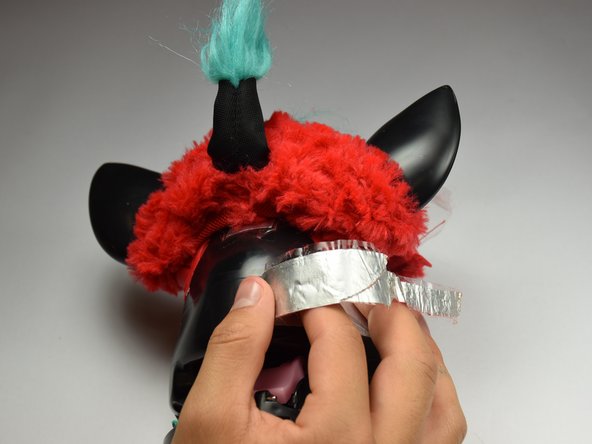
Salta al contenuto principale

Furby Outer Shell Replacement

Solo Prerequisita
Questa guida è destinata a essere usata solo come prerequisito per altre guide. Da sola è incompleta.

Cosa ti serve

  1. Furby Outer Shell Replacement, Outer Shell: passo 1, immagine 1 di 3 Furby Outer Shell Replacement, Outer Shell: passo 1, immagine 2 di 3 Furby Outer Shell Replacement, Outer Shell: passo 1, immagine 3 di 3
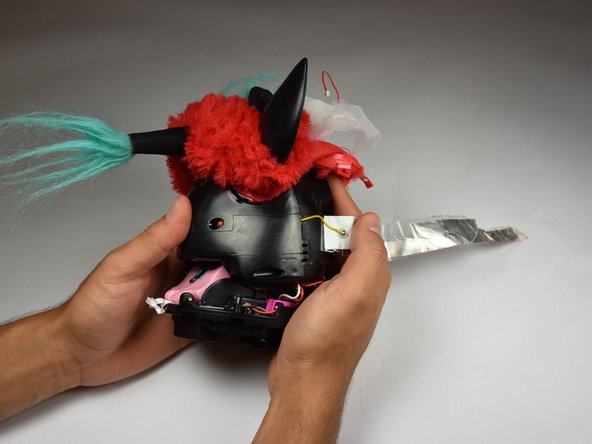
    • Use a flathead screwdriver to remove the two 10mm screws on the base of the Furby.

  2. Furby Outer Shell Replacement: passo 2, immagine 1 di 3 Furby Outer Shell Replacement: passo 2, immagine 2 di 3 Furby Outer Shell Replacement: passo 2, immagine 3 di 3
    • Use a Phillips #0 driver to unscrew the eight 10mm screws.

    • Remove the base ring after unscrewing all the screws.

    • Be careful when lifting the base ring from the Furby. There are sharp edges that hold the base ring in place.

  3. Furby Outer Shell Replacement: passo 3, immagine 1 di 2 Furby Outer Shell Replacement: passo 3, immagine 2 di 2
    • Unhook the white ribbon from the tab on the base.

  4. Furby Outer Shell Replacement: passo 4, immagine 1 di 3 Furby Outer Shell Replacement: passo 4, immagine 2 di 3 Furby Outer Shell Replacement: passo 4, immagine 3 di 3
    • Roll the Furby's fur downward.

    • Disconnect the now exposed red wire.

  5. Furby Outer Shell Replacement: passo 5, immagine 1 di 3 Furby Outer Shell Replacement: passo 5, immagine 2 di 3 Furby Outer Shell Replacement: passo 5, immagine 3 di 3
    • Locate the two middle clips first.

    • Locate the two remaining clips on Furby's sides, they are opposite each other.

    • Orient the Furby upside down with the tail facing away from you.

  6. Furby Outer Shell Replacement: passo 6, immagine 1 di 3 Furby Outer Shell Replacement: passo 6, immagine 2 di 3 Furby Outer Shell Replacement: passo 6, immagine 3 di 3
    • Insert a metal prying tool directly into the clip opening.

    • Press upward into the clip. At the same time, use your other hand to pull away the plastic seam from the Furby's body.

    • Repeat the previous step to remove the remaining three clips.

  7. Furby Outer Shell Replacement: passo 7, immagine 1 di 3 Furby Outer Shell Replacement: passo 7, immagine 2 di 3 Furby Outer Shell Replacement: passo 7, immagine 3 di 3
    • Locate the two 10mm screws and remove them with the Phillips #0 head screwdriver.

    • Lift up on the fur covering until the face of the Furby is exposed.

  8. Furby Outer Shell Replacement: passo 8, immagine 1 di 3 Furby Outer Shell Replacement: passo 8, immagine 2 di 3 Furby Outer Shell Replacement: passo 8, immagine 3 di 3
    • Orient the Furby on its side to where the beak is facing left and locate the edge of the aluminum tape.

    • Lift tape gently and peel back until the tape is nearly removed.

    • Do not pull on the yellow wire located on the opposite end of the tape.

  9. Furby Outer Shell Replacement: passo 9, immagine 1 di 2 Furby Outer Shell Replacement: passo 9, immagine 2 di 2
    • Locate the four 10mm screws. Two on either side of body, and two on top of back plate, around the tape.

    • Remove the 10mm screws with the Phillips#0 screwdriver.

  10. Furby Outer Shell Replacement: passo 10, immagine 1 di 1
    • Peel the tape gently, grabbing it from the bottom edge and folding the tape upward.

    • Peel the tape up until it is nearly detached from the black case.

  11. Furby Outer Shell Replacement: passo 11, immagine 1 di 2 Furby Outer Shell Replacement: passo 11, immagine 2 di 2
    • Orient the Furby face down, with the base facing away from you.

    • Locate the clips below the ears.

    • Repeat the technique used in Step 6. Create leverage using a metal prying tool to press upward into the clip, while also pulling back on the clip itself.

  12. Furby Outer Shell Replacement: passo 12, immagine 1 di 2 Furby Outer Shell Replacement: passo 12, immagine 2 di 2
    • Remove the loose, plastic back panel by pulling the panel away from Furby's body.

Linea Traguardo

Un'altra persona ha completato questa guida.

Team

Cal Poly, Team 15-5, Livingston Fall 2016 Membro di Cal Poly, Team 15-5, Livingston Fall 2016

CPSU-LIVINGSTON-F16S15G5

4 Membri

9 Guide realizzate

0 Commenti

Aggiungi Commento

Visualizza Statistiche:

Ultime 24 Ore: 0

Ultimi 7 Giorni: 2

Ultimi 30 Giorni: 5

Tutti i Tempi: 95