Salta al contenuto principale

Full Solar Cooker Assembly

Cosa ti serve

  1. Full Solar Cooker Assembly, Parabolic Solar Cooker Part Inventory: passo 1, immagine 1 di 1
    • An inventory for all parabolic solar cooker parts follows below.

    • 6 Reflective Dish Sections

    • 1 Expansion Pipe

    • 1 Tripod Center Plate
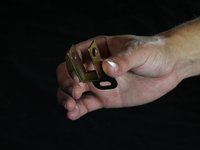
    • 1 T-Bar

    • 3 Tripod Base Legs

    • 1 Cooker Flat

    • 1 Pipe Ring

  2. Full Solar Cooker Assembly: passo 2, immagine 1 di 1
    • The solar cooker part inventory continues below.

    • 1 Cooker Flat Stand

    • 2 Cotter Pins

    • 36 x 10mm Nut/Bolt Pairs

    • 6 Pipe Ring Brackets

    • 12 x 14mm Nut/Bolt Pairs

    • 2 Cooker Assembly Adjustment Star Knobs

  3. Full Solar Cooker Assembly, Assembling Parabolic Solar Cooker Tripod Base Stand: passo 3, immagine 1 di 2 Full Solar Cooker Assembly, Assembling Parabolic Solar Cooker Tripod Base Stand: passo 3, immagine 2 di 2
    • Insert a 14mm bolt through each tripod leg and through the center plate. Secure each bolt by hand threading a nut on the other side.

    • Be sure the flat side of each tripod leg is facing toward the ground.

  4. Full Solar Cooker Assembly: passo 4, immagine 1 di 1
    • Tighten each nut using two 14mm wrenches until each leg is stable and the tripod will stand on its own.

  5. Full Solar Cooker Assembly, Assembling Parabolic Solar Cooker Expansion Pipe and T-Bar: passo 5, immagine 1 di 2 Full Solar Cooker Assembly, Assembling Parabolic Solar Cooker Expansion Pipe and T-Bar: passo 5, immagine 2 di 2
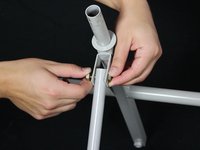
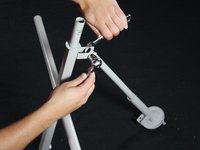
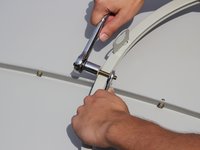
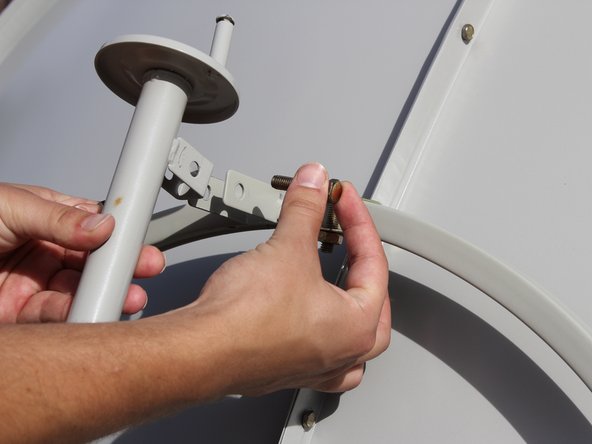
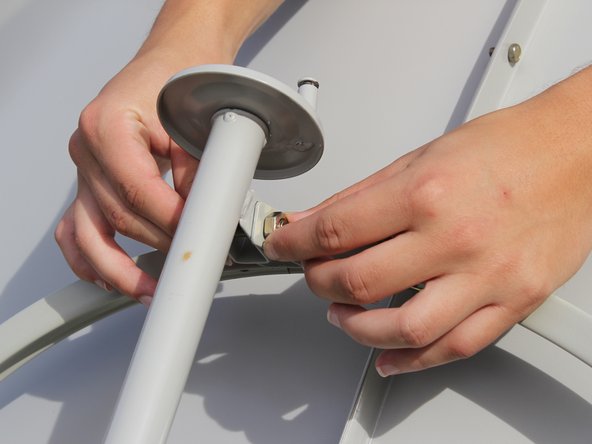
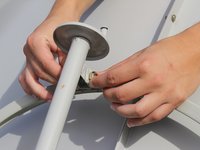
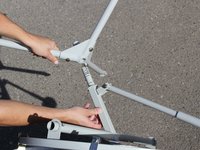
    • Center the bottom of the expansion pipe between the tabs of the t-bar bracket. Insert a 14mm bolt through the bracket and expansion pipe and hand thread a nut. Use 14mm wrenches to secure the assembly.

    • It does not matter which direction the 14mm bolt is inserted from.

  6. Full Solar Cooker Assembly, Assembling Reflective Parabolic Dish: passo 6, immagine 1 di 2 Full Solar Cooker Assembly, Assembling Reflective Parabolic Dish: passo 6, immagine 2 di 2
    • Before you begin, be sure you have all parts and tools needed for assembly and a construction area that is at least two meters in diameter.

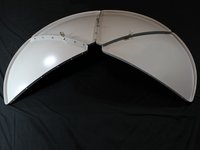
    • Lay two triangular sections side-by-side with pointed edges and bases adjacent to each other.

    • Since the sections are not flat, it is advisable to prop one end up on a box or similar object to give more stability during assembly.

  7. Full Solar Cooker Assembly: passo 7, immagine 1 di 1
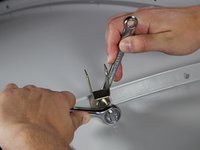
    • Use the 10 mm nuts and bolts to attach the two plates together. First, hand thread each bolt/nut pair, then use two 10 mm wrenches secure them.

    • DO NOT install a nut and bolt in the THIRD hole from the center (pointed end of the section). This is where the Pipe Ring Bracket is attached later on.

  8. Full Solar Cooker Assembly: passo 8, immagine 1 di 3 Full Solar Cooker Assembly: passo 8, immagine 2 di 3 Full Solar Cooker Assembly: passo 8, immagine 3 di 3
    • After firmly fastening the two sections together, return to the third hole which was left empty. In addition to a nut and bolt, you will also need a pipe ring bracket.

    • Install the 10mm nut/bolt again but with the bolt passing through the single holed side of the bracket. Hand thread and use 10mm wrenches to tighten.

    • Be sure the bracket is NOT installed between the edges of the dish sections.

    • The direction the bracket faces does not matter.

  9. Full Solar Cooker Assembly: passo 9, immagine 1 di 2 Full Solar Cooker Assembly: passo 9, immagine 2 di 2
    • Repeat steps 2-3 until you have assembled the entire reflective dish, complete with all six sections.

    • Remember to install the pipe ring brackets in the correct place all the way around the reflective dish in the third hole from the center.

  10. Full Solar Cooker Assembly, Full Solar Cooker Assembly: passo 10, immagine 1 di 1
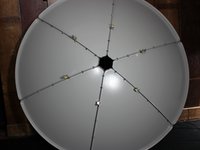
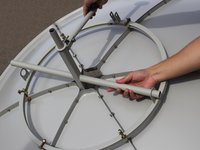
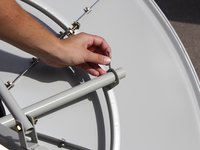
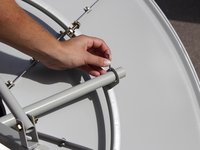
    • Place the assembled solar panel dish face down with the metal brackets on the top and facing up.

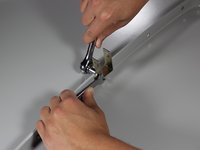
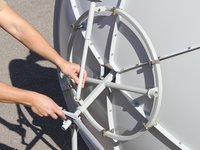
    • Set the pipe ring in the metal brackets circling the center of the dish.

  11. Full Solar Cooker Assembly: passo 11, immagine 1 di 2 Full Solar Cooker Assembly: passo 11, immagine 2 di 2
    • Insert a 14mm bolt through each six metal brackets and secure with a nut.

    • Tighten using two 14mm wrenches until secure.

  12. Full Solar Cooker Assembly: passo 12, immagine 1 di 3 Full Solar Cooker Assembly: passo 12, immagine 2 di 3 Full Solar Cooker Assembly: passo 12, immagine 3 di 3
    • Slide the cross bearer into the two holes in the support ring making sure the top of the cross sticks through the center of the solar panel dish.

    • Insert a 14mm bolt into the metal bracket on the support ring through the adjustable arm and secure with a nut.

    • Tighten with your hands.

  13. Full Solar Cooker Assembly: passo 13, immagine 1 di 2 Full Solar Cooker Assembly: passo 13, immagine 2 di 2
    • Insert a cotter pin through the holes at each end of the cross bearer.

  14. Full Solar Cooker Assembly: passo 14, immagine 1 di 3 Full Solar Cooker Assembly: passo 14, immagine 2 di 3 Full Solar Cooker Assembly: passo 14, immagine 3 di 3
    • Attach the top of the center plate of the tripod base stand to the cross bearer bar making sure the flat side of the tripod legs points away from the solar panel dish.

  15. Full Solar Cooker Assembly: passo 15, immagine 1 di 1
    • Stand the solar cooker upright on the tripod stand and attach the cooker ring stand to the cross bar coming through the center of the solar panel dish.

    • Screw a star knob screw into the hole in the top of the cross bar and tighten with your hand.

Conclusione

To disassemble your device, follow these instructions in reverse order.

Altre 2 persone hanno completato questa guida.

Ashlie Reott

Membro da: 10/20/13

328 Reputazione

3 Guide realizzate

Team

Cal Poly, Team 4-30, Amido Fall 2013 Membro di Cal Poly, Team 4-30, Amido Fall 2013

CPSU-AMIDO-F13S4G30

4 Membri

6 Guide realizzate

3 Commenti

Thank you for these instructions. If it wasn't for these instructions, I would not have been able to put the solar cooker (as seen in the photograghs) together. The seller's manual fail to use photographs as this illustration clarifies.

Chris - Replica

Thank you very much ,mine came without the instructions so this has been so helpful

crafty mav - Replica

Hi everyone, I want to ask about the material used over the dish. whether it's concave mirror or some sheet. kindly someone clear my confusion. Thank you

Zoobia Abbasi - Replica

Aggiungi Commento

Visualizza Statistiche:

Ultime 24 Ore: 0

Ultimi 7 Giorni: 1

Ultimi 30 Giorni: 9

Tutti i Tempi: 2,376