Salta al contenuto principale

FujiFilm FinePix XP50 LCD Screen Replacement

Cosa ti serve

  1. FujiFilm FinePix XP50 LCD Screen Replacement, Rear Case: passo 1, immagine 1 di 3 FujiFilm FinePix XP50 LCD Screen Replacement, Rear Case: passo 1, immagine 2 di 3 FujiFilm FinePix XP50 LCD Screen Replacement, Rear Case: passo 1, immagine 3 di 3
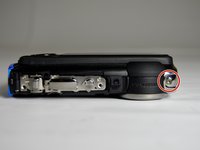
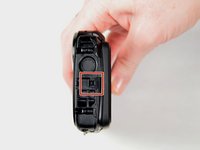
    • Using 1.5mm Hex Screwdriver, remove two 3.0 mm hex screws on the front of the camera.

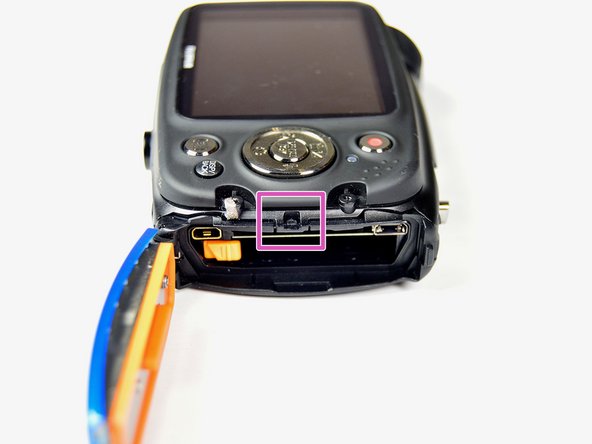
    • Using Phillips #00 screwdriver, remove two 3.0 mm screws on the bottom of the front face.
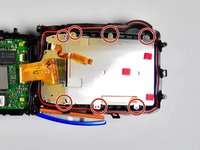
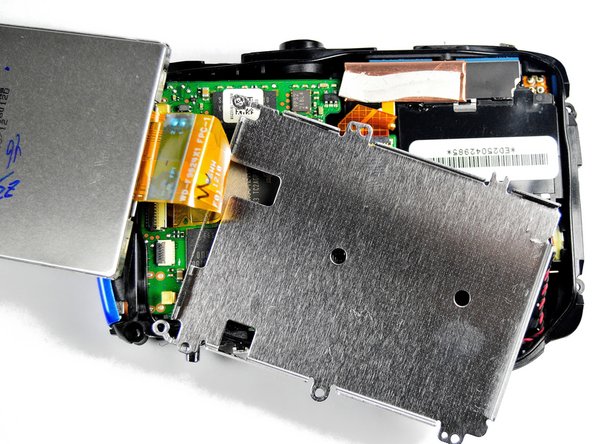
  2. FujiFilm FinePix XP50 LCD Screen Replacement: passo 2, immagine 1 di 3 FujiFilm FinePix XP50 LCD Screen Replacement: passo 2, immagine 2 di 3 FujiFilm FinePix XP50 LCD Screen Replacement: passo 2, immagine 3 di 3
    • Using Phillips #00 screwdriver, remove 3.0 mm screws on the bottom of the camera closer to the back.

    • Using Phillips #00 screwdriver remove two 3.0 mm screws on the back of the camera. This will remove the eyelet for the camera strap and the rear cover.

  3. FujiFilm FinePix XP50 LCD Screen Replacement: passo 3, immagine 1 di 1
    • Using Phillips #00 screwdriver, remove the two 3.0 mm screws.

  4. FujiFilm FinePix XP50 LCD Screen Replacement: passo 4, immagine 1 di 3 FujiFilm FinePix XP50 LCD Screen Replacement: passo 4, immagine 2 di 3 FujiFilm FinePix XP50 LCD Screen Replacement: passo 4, immagine 3 di 3
    • Using 1.5mm Hex screwdriver, remove 3.0 mm hex screw on top edge of silver panel.

    • Using Phillips #00 screwdriver, remove 3.0 mm screw on bottom edge.

    • Once both screws are removed the silver side casing will slide off.

  5. FujiFilm FinePix XP50 LCD Screen Replacement: passo 5, immagine 1 di 3 FujiFilm FinePix XP50 LCD Screen Replacement: passo 5, immagine 2 di 3 FujiFilm FinePix XP50 LCD Screen Replacement: passo 5, immagine 3 di 3
  6. FujiFilm FinePix XP50 LCD Screen Replacement: passo 6, immagine 1 di 3 FujiFilm FinePix XP50 LCD Screen Replacement: passo 6, immagine 2 di 3 FujiFilm FinePix XP50 LCD Screen Replacement: passo 6, immagine 3 di 3
    • Using Phillips #00 screwdriver, remove seven 3.0 mm screws.

    • Remove the remaining five 3.0 mm screws which hold the rear case and the control panel together.

    • The rear panel is now free from the camera.

  7. FujiFilm FinePix XP50 LCD Screen Replacement, LCD Screen: passo 7, immagine 1 di 3 FujiFilm FinePix XP50 LCD Screen Replacement, LCD Screen: passo 7, immagine 2 di 3 FujiFilm FinePix XP50 LCD Screen Replacement, LCD Screen: passo 7, immagine 3 di 3
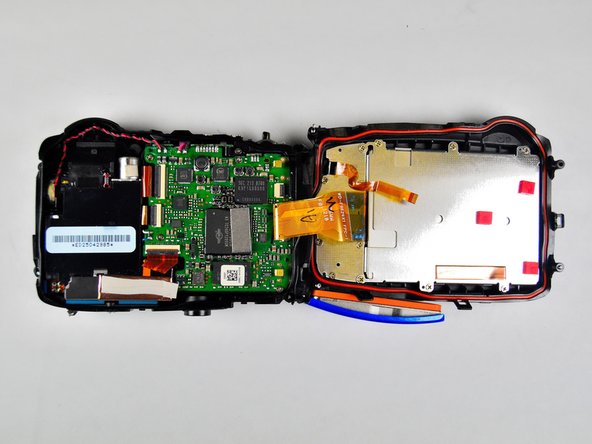
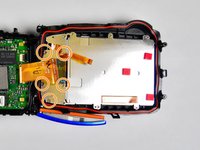
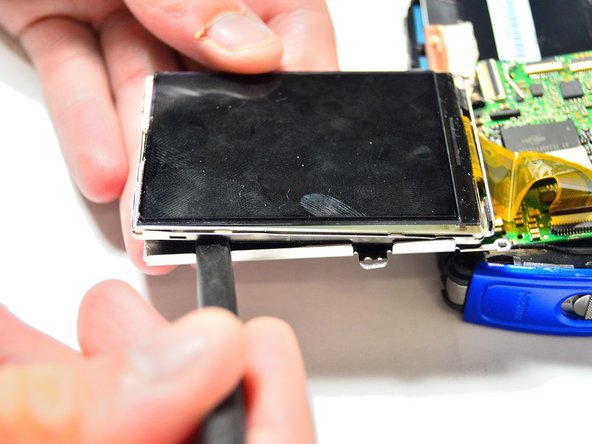
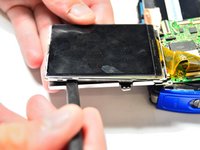
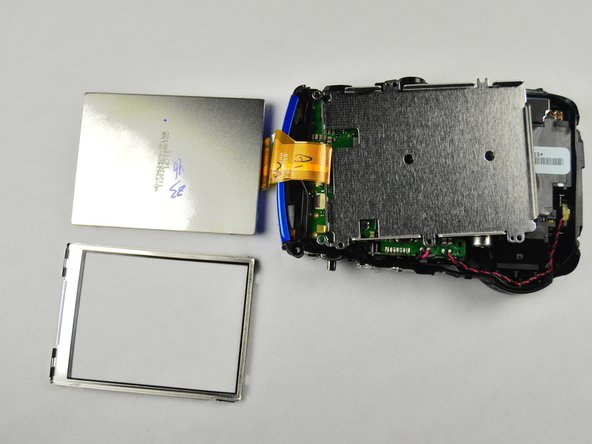
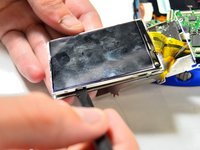
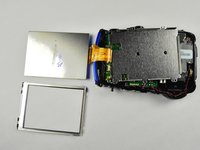
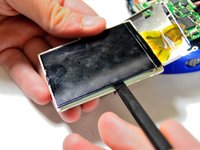
    • Take the spudger and wedge it in between the screen and the frame.

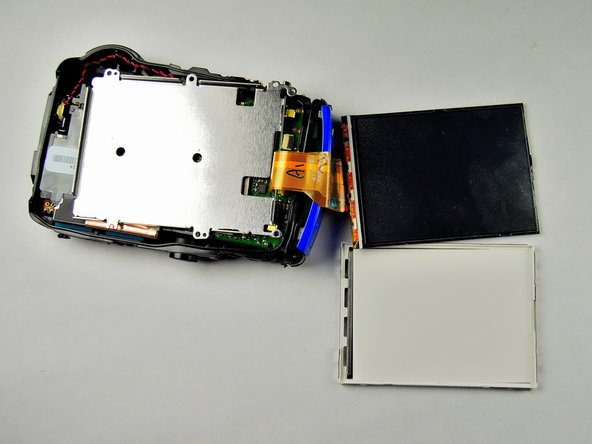
    • Slowly make your way around the screen with the spudger just enough to separate the screen from the frame.

  8. FujiFilm FinePix XP50 LCD Screen Replacement: passo 8, immagine 1 di 2 FujiFilm FinePix XP50 LCD Screen Replacement: passo 8, immagine 2 di 2
    • Take the spudger again and wedge it in the thinner frame to pry the LCD screen from the frame.

    • Make your way around with the spudger just enough to separate the screen and frame once again.

  9. FujiFilm FinePix XP50 LCD Screen Replacement: passo 9, immagine 1 di 2 FujiFilm FinePix XP50 LCD Screen Replacement: passo 9, immagine 2 di 2
    • Take the spudger and wedge it very carefully between the LCD screen and the very thin and fragile frame.

    • Very carefully make your way around the frame with the spudger, while making sure not to use too much force. Otherwise the screen will be damaged.

  10. FujiFilm FinePix XP50 LCD Screen Replacement: passo 10, immagine 1 di 1
    • Detach the LCD screen from the motherboard by detaching the orange ribbon.

Conclusione

To reassemble your device, follow these instructions in reverse order.

Team

Baylor, Team 2-4, Grigsby Spring 2015 Membro di Baylor, Team 2-4, Grigsby Spring 2015

BU-GRIGSBY-S15S2G4

4 Membri

8 Guide realizzate

0 Commenti

Aggiungi Commento

Visualizza Statistiche:

Ultime 24 Ore: 0

Ultimi 7 Giorni: 0

Ultimi 30 Giorni: 1

Tutti i Tempi: 972