Salta al contenuto principale
FujiFilm FinePix A340 LCD Screen Replacement

FujiFilm FinePix A340 LCD Screen Replacement

Cody

Cody e 6 altri collaboratori

Ultimo aggiornamento il January 9, 2025

10 - 15 minuti
Moderato
Foto Azione
Passi mancanti
Immagini Non Adeguate
Introduzione Migliore

Introduzione

Vai al passo 1

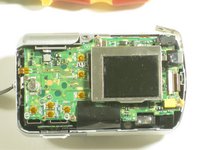
Remove and replace LCD screen.

Cosa ti serve

Strumenti

Mostra di più…

  1. FujiFilm FinePix A340 LCD Screen Replacement, Outer Case: passo 1, immagine 1 di 1
    • To prevent the danger of electric shock, remove the batteries before continuing to the next steps.

    • Slide the battery cover to the side to release the batteries.

  2. FujiFilm FinePix A340 LCD Screen Replacement: passo 2, immagine 1 di 3 FujiFilm FinePix A340 LCD Screen Replacement: passo 2, immagine 2 di 3 FujiFilm FinePix A340 LCD Screen Replacement: passo 2, immagine 3 di 3
    • Remove the five screws from the camera casing using a tri-point Y0 screwdriver.

  3. FujiFilm FinePix A340 LCD Screen Replacement: passo 3, immagine 1 di 2 FujiFilm FinePix A340 LCD Screen Replacement: passo 3, immagine 2 di 2
    • Grab the case with your hands and slowly pull back the outer casing.

  4. FujiFilm FinePix A340 LCD Screen Replacement, LCD Screen: passo 4, immagine 1 di 1
    • Locate the LCD screen and anchoring screw.

    • Remove screw.

  5. FujiFilm FinePix A340 LCD Screen Replacement: passo 5, immagine 1 di 1
    • Carefully pull the LCD screen away from the board it is connected to.

  6. FujiFilm FinePix A340 LCD Screen Replacement: passo 6, immagine 1 di 1
    • Push both blue switches away from the holding device to detach the LCD ribbon.

    • Be careful when removing the ribbon. If you damage it, you will need to replace it as well.

  7. FujiFilm FinePix A340 LCD Screen Replacement: passo 7, immagine 1 di 1
    • Carefully detach the ribbon from where it was connected by the blue pins.

  8. FujiFilm FinePix A340 LCD Screen Replacement: passo 8, immagine 1 di 1
    • Now that everything has been disconnected from the board, remove LCD screen.

Conclusione

To reassemble your device, follow these instructions in reverse order.

Cody

Membro da: 04/18/10

47 Reputazione

4 Guide realizzate

Team

Cal Poly, Team 7-11, Maness Spring 2010 Membro di Cal Poly, Team 7-11, Maness Spring 2010

CPSU-MANESS-S10S7G11

3 Membri

4 Guide realizzate

0Commenti sulla guida

Aggiungi Commento

Visualizza Statistiche:

Ultime 24 Ore: 2

Ultimi 7 Giorni: 6

Ultimi 30 Giorni: 17

Tutti i Tempi: 6,165