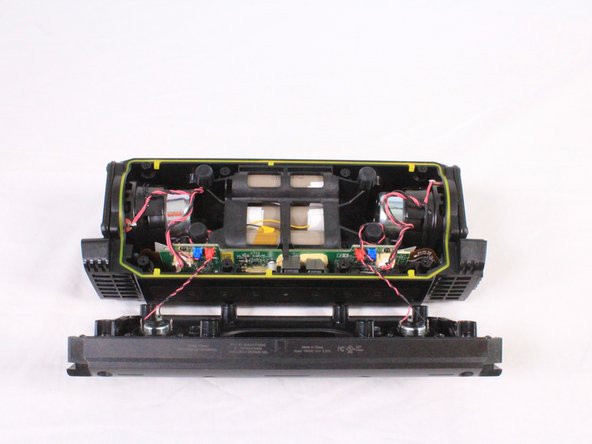
Salta al contenuto principale

Fugoo Style XL Motherboard Replacement

Cosa ti serve

  1. Fugoo Style XL Motherboard Replacement, Fabric Case: passo 1, immagine 1 di 2 Fugoo Style XL Motherboard Replacement, Fabric Case: passo 1, immagine 2 di 2
    • Using your hand, unscrew the large screws underneath the speaker.

  2. Fugoo Style XL Motherboard Replacement: passo 2, immagine 1 di 3 Fugoo Style XL Motherboard Replacement: passo 2, immagine 2 di 3 Fugoo Style XL Motherboard Replacement: passo 2, immagine 3 di 3
    • Using your hand, gently lift the large plastic tab secured to the rubber holding.

    • After lifting the tab, slide the speaker out of its case.

    • Ensure the tab is lifted only slightly above the rubber holding. Bending the plastic tab too far could result in damage to the case.

  3. Fugoo Style XL Motherboard Replacement, Motherboard: passo 3, immagine 1 di 2 Fugoo Style XL Motherboard Replacement, Motherboard: passo 3, immagine 2 di 2
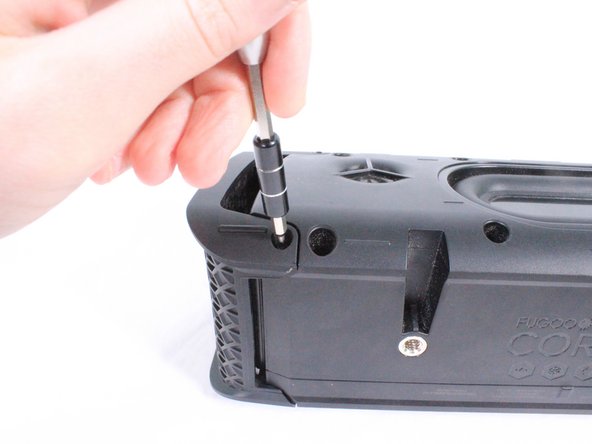
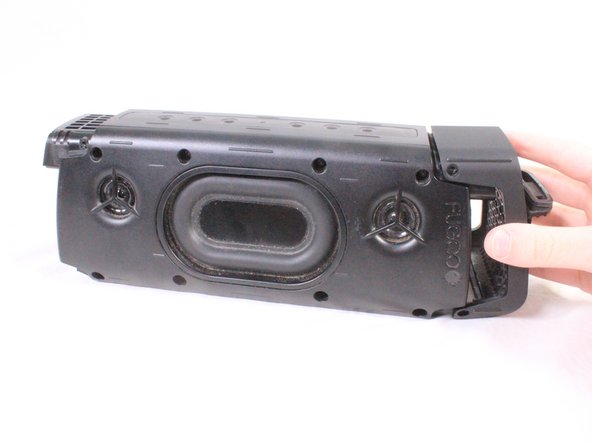
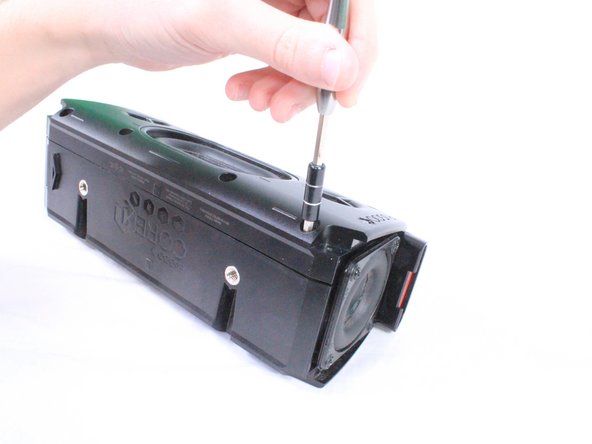
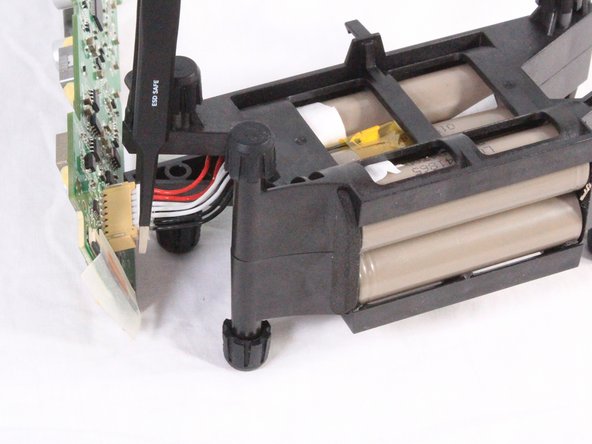
    • Remove the 8 screws (4 on each side) that hold the covers that conceal the bass speakers. Remove these 3mm screws using a #2.0 Hex screwdriver.

  4. Fugoo Style XL Motherboard Replacement: passo 4, immagine 1 di 2 Fugoo Style XL Motherboard Replacement: passo 4, immagine 2 di 2
    • Using your hand, pull the covers away from the speaker.

  5. Fugoo Style XL Motherboard Replacement: passo 5, immagine 1 di 2 Fugoo Style XL Motherboard Replacement: passo 5, immagine 2 di 2
    • Use a #2.0 Hex screwdriver to unscrew the 8 screws shown in the image.

  6. Fugoo Style XL Motherboard Replacement: passo 6, immagine 1 di 2 Fugoo Style XL Motherboard Replacement: passo 6, immagine 2 di 2
    • Gently pull apart the front casing from the back casing.

    • Speakers on the front casing have wires directly connected to the motherboard. Pulling off the casing with force will result in damage.

  7. Fugoo Style XL Motherboard Replacement: passo 7, immagine 1 di 2 Fugoo Style XL Motherboard Replacement: passo 7, immagine 2 di 2
    • Using a pair of tweezers or your hand, carefully remove the red bundled cable connectors from the motherboard.

    • When the red bundled cable connectors are disconnected, set the outer casing aside.

  8. Fugoo Style XL Motherboard Replacement: passo 8, immagine 1 di 2 Fugoo Style XL Motherboard Replacement: passo 8, immagine 2 di 2
    • Untangle any blue bundled cable connectors and gently remove them from the motherboard using a pair of tweezers.

  9. Fugoo Style XL Motherboard Replacement: passo 9, immagine 1 di 2 Fugoo Style XL Motherboard Replacement: passo 9, immagine 2 di 2
    • Carefully untangle and remove the white bundled cable connectors from the motherboard.

  10. Fugoo Style XL Motherboard Replacement: passo 10, immagine 1 di 2 Fugoo Style XL Motherboard Replacement: passo 10, immagine 2 di 2
    • Using a T9 screwdriver, remove the 8 screws (4 on each speaker) surrounding the midwoofers.

    • Using your hand, carefully remove the midwoofers.

  11. Fugoo Style XL Motherboard Replacement: passo 11, immagine 1 di 2 Fugoo Style XL Motherboard Replacement: passo 11, immagine 2 di 2
    • Using a pair of tweezers, lift the padded holding that secures the ZIF connector to the motherboard. The connector will release from the motherboard once the padding is lifted.

    • Do not pull on the cables themselves. Doing so can damage the cables. Always remove the ZIF connector by gently lifting the padding securing them to the motherboard.

  12. Fugoo Style XL Motherboard Replacement: passo 12, immagine 1 di 2 Fugoo Style XL Motherboard Replacement: passo 12, immagine 2 di 2
    • Carefully lift the battery and motherboard unit halfway out of the casing. The motherboard is connected to the battery directly.

    • There is a small coaxial cable connected underneath the motherboard. Using a pair of tweezers, carefully disconnect and remove the cable from under the adhesive tape.

    • When the cable is disconnected, fully remove the motherboard and battery unit.

  13. Fugoo Style XL Motherboard Replacement: passo 13, immagine 1 di 2 Fugoo Style XL Motherboard Replacement: passo 13, immagine 2 di 2
    • Remove the 3mm screws using a #2.0 Hex screwdriver. There are 4 of these screws (2 on each side) that connect the motherboard to the battery unit.

    • When the screws are removed, use an iFixit opening tool to remove the motherboard from the two clamps securing it to the battery pack.

    • Beware! The motherboard is not fully disconnected from the battery even when removed from the clamps.

  14. Fugoo Style XL Motherboard Replacement: passo 14, immagine 1 di 2 Fugoo Style XL Motherboard Replacement: passo 14, immagine 2 di 2
    • Using tweezers or your hand, carefully disconnect the bundled cables connecting the battery to the motherboard.

Conclusione

To reassemble your device, follow these instructions in reverse order.

Un'altra persona ha completato questa guida.

James Gifford

Membro da: 09/25/17

573 Reputazione

5 Guide realizzate

Team

USF Tampa, Team S3-G4, Cannon Fall 2017 Membro di USF Tampa, Team S3-G4, Cannon Fall 2017

USFT-CANNON-F17S3G4

4 Membri

5 Guide realizzate

3 Commenti

Where can I purchase a replacement mother board?

Vincent walcott - Replica

Are you allowed to tell us where you found a motherboard? I can not find one anywhere for my fugoo

Rhett Mccrady - Replica

A repair guy lost my charging board, is there a way I can bypass it? Or Where can I get a replacement?

David Langat - Replica

Aggiungi Commento

Visualizza Statistiche:

Ultime 24 Ore: 0

Ultimi 7 Giorni: 2

Ultimi 30 Giorni: 16

Tutti i Tempi: 735