Salta al contenuto principale

Questa guida ha delle modifiche più recenti. Passa all'ultima versione non verificata.

Fairphone 1 Motherboard Assembly Replacement

Solo Prerequisita
Questa guida è destinata a essere usata solo come prerequisito per altre guide. Da sola è incompleta.

Cosa ti serve

  1. Fairphone 1 Motherboard Assembly Replacement, Motherboard Assembly: passo 1, immagine 1 di 3 Fairphone 1 Motherboard Assembly Replacement, Motherboard Assembly: passo 1, immagine 2 di 3 Fairphone 1 Motherboard Assembly Replacement, Motherboard Assembly: passo 1, immagine 3 di 3
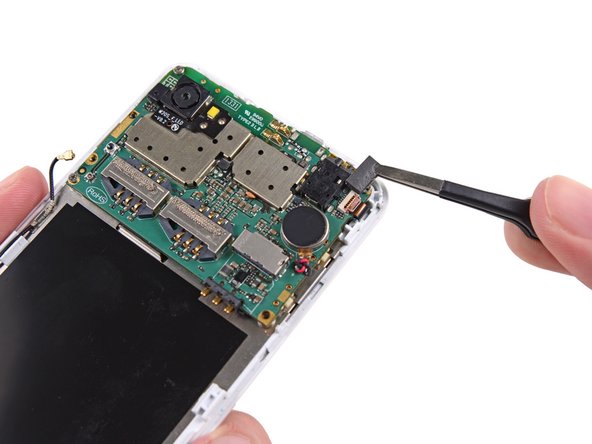
    • Use tweezers to remove the volume rocker and power buttons from the display assembly.

    • During reassembly make sure the orientation of the buttons is correct. The rubber backings must fit into the channels in the assembly.

  2. Fairphone 1 Motherboard Assembly Replacement: passo 2, immagine 1 di 1
    • Use the flat end of a spudger to disconnect the antenna cable connector.

    • Make sure to only disconnect the connector from its socket, and not the entire socket from the board.

  3. Fairphone 1 Motherboard Assembly Replacement: passo 3, immagine 1 di 2 Fairphone 1 Motherboard Assembly Replacement: passo 3, immagine 2 di 2
    • Use tweezers to remove the adhesive foam tape from the top of the digitizer cable ZIF socket.

  4. Fairphone 1 Motherboard Assembly Replacement: passo 4, immagine 1 di 3 Fairphone 1 Motherboard Assembly Replacement: passo 4, immagine 2 di 3 Fairphone 1 Motherboard Assembly Replacement: passo 4, immagine 3 di 3
    • Use the tip of a spudger to flip open the tab on the digitizer ZIF connector.

    • Use tweezers to pull the digitizer cable away from its socket on the motherboard.

  5. Fairphone 1 Motherboard Assembly Replacement: passo 5, immagine 1 di 1
    • Remove the three 2.5 mm Phillips #000 screws securing the motherboard to the display assembly.

  6. Fairphone 1 Motherboard Assembly Replacement: passo 6, immagine 1 di 2 Fairphone 1 Motherboard Assembly Replacement: passo 6, immagine 2 di 2
    • Do not try to remove the motherboard just yet, as it is still connected to the display assembly by the display data cable.

    • Gently lift the top end of the motherboard up to expose the display data cable.

    • The rear-facing camera may be adhered to the display assembly. Try to pry it and the motherboard up together.

  7. Fairphone 1 Motherboard Assembly Replacement: passo 7, immagine 1 di 2 Fairphone 1 Motherboard Assembly Replacement: passo 7, immagine 2 di 2
    • Use the tip of a spudger to disconnect the display data cable from the back of the motherboard.

  8. Fairphone 1 Motherboard Assembly Replacement: passo 8, immagine 1 di 1
    • Remove the motherboard from the display assembly.

Conclusione

To reassemble your device, follow these instructions in reverse order.

Altre 3 persone hanno completato questa guida.

Team

iFixit Membro di iFixit

Staff

135 Membri

16.732 Guide realizzate

0 Commenti

Aggiungi Commento

Visualizza Statistiche:

Ultime 24 Ore: 0

Ultimi 7 Giorni: 0

Ultimi 30 Giorni: 0

Tutti i Tempi: 2,366