Salta al contenuto principale

Edwin the Duck Rubber Heart Power Button Replacement

Cosa ti serve

  1. Edwin the Duck Rubber Heart Power Button Replacement, Rubber Heart Power Button: passo 1, immagine 1 di 2 Edwin the Duck Rubber Heart Power Button Replacement, Rubber Heart Power Button: passo 1, immagine 2 di 2
    • Unscrew the four 9mm screws with a T8 bit

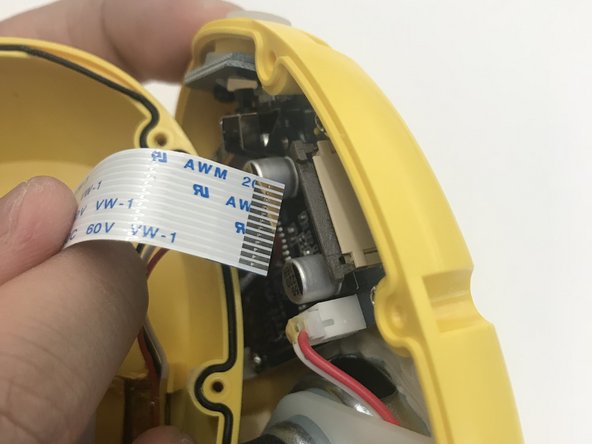
    • Remove the back plate off

  2. Edwin the Duck Rubber Heart Power Button Replacement: passo 2, immagine 1 di 2 Edwin the Duck Rubber Heart Power Button Replacement: passo 2, immagine 2 di 2
    • Carefully take off the rubber skin.

    • It's important to remember to be patient and not rush. You don't want to rip or damage the rubber skin in then resulting in not having a waterproof cover.

  3. Edwin the Duck Rubber Heart Power Button Replacement: passo 3, immagine 1 di 1
    • Using the J1 bit, unscrew all six 9 mm screws that run along the border.

  4. Edwin the Duck Rubber Heart Power Button Replacement: passo 4, immagine 1 di 2 Edwin the Duck Rubber Heart Power Button Replacement: passo 4, immagine 2 di 2
    • Use the plastic opening tool to open the inside of the duck.

    • Be very careful when splitting the two halves apart. There are wires connecting to both sides. Remember to open slowly.

  5. Edwin the Duck Rubber Heart Power Button Replacement: passo 5, immagine 1 di 2 Edwin the Duck Rubber Heart Power Button Replacement: passo 5, immagine 2 di 2
    • Using the plastic opening tool pull up the black tab up until it stops.

    • Be careful not to pull up the black tab too far up, otherwise the cable won't be secure anymore.

    • Pull up the white cable tab up slowly

  6. Edwin the Duck Rubber Heart Power Button Replacement: passo 6, immagine 1 di 2 Edwin the Duck Rubber Heart Power Button Replacement: passo 6, immagine 2 di 2
    • Use the J1 bit to unscrew all four 9 mm screws connected to the motherboard.

    • Use the J1 bit to unscrew both 9 mm screws attached to the white plastic plate

  7. Edwin the Duck Rubber Heart Power Button Replacement: passo 7, immagine 1 di 1
    • Lift up the motherboard and speaker and place it away and to the side like you see in the picture

  8. Edwin the Duck Rubber Heart Power Button Replacement: passo 8, immagine 1 di 2 Edwin the Duck Rubber Heart Power Button Replacement: passo 8, immagine 2 di 2
    • Unscrew the two black 9 mm screws by using the J1 bit.

    • Remove the damaged rubber heart button and replace with a new rubber heart button.

Conclusione

To reassemble your device, follow these instructions in reverse order.

Altre 2 persone hanno completato questa guida.

Team

UW Tacoma, Team S1-G4, Rose Fall 2017 Membro di UW Tacoma, Team S1-G4, Rose Fall 2017

UWT-ROSE-F17S1G4

4 Membri

8 Guide realizzate

0 Commenti

Aggiungi Commento

Visualizza Statistiche:

Ultime 24 Ore: 1

Ultimi 7 Giorni: 3

Ultimi 30 Giorni: 5

Tutti i Tempi: 703