Salta al contenuto principale

Eco X Gear Voice Coil Replacement

Cosa ti serve

  1. Eco X Gear Voice Coil Replacement, Frame: passo 1, immagine 1 di 1
    • Disconnect any power source and/or turn off device.

  2. Eco X Gear Voice Coil Replacement: passo 2, immagine 1 di 1
    • Remove the 15 rubber plugs from the cavities using needle nose pliers.

  3. Eco X Gear Voice Coil Replacement: passo 3, immagine 1 di 1
    • Use a phillips head screwdriver to remove the fifteen 6.4mm screws.

  4. Eco X Gear Voice Coil Replacement: passo 4, immagine 1 di 1
    • Carefully separate the two sections of the frame.

    • Wires still connect the two sections. Be cautious to avoid damaging the wires, terminals, and electronics.

  5. Eco X Gear Voice Coil Replacement, Voice Coil: passo 5, immagine 1 di 1
    • Disconnect the wiring to improve accessibility to the cones.

  6. Eco X Gear Voice Coil Replacement: passo 6, immagine 1 di 2 Eco X Gear Voice Coil Replacement: passo 6, immagine 2 di 2
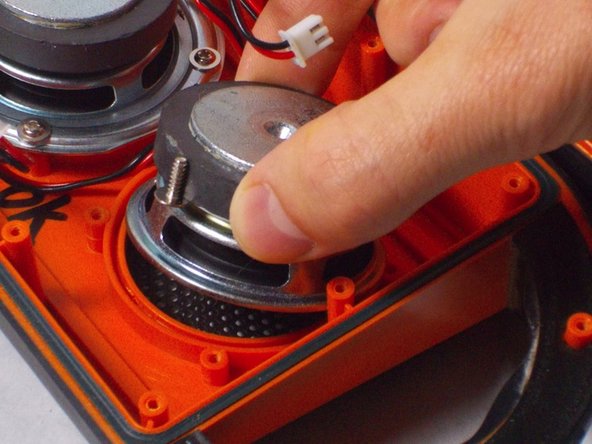
    • Remove the four screws that hold down the speaker and pry up the speaker from the frame.

  7. Eco X Gear Voice Coil Replacement: passo 7, immagine 1 di 1
    • Once the voice coil is removed, solder it back onto the bracket or replace the voice coil entirely.

Conclusione

To reassemble your device, follow these instructions in reverse order.

0 Commenti

Aggiungi Commento

Visualizza Statistiche:

Ultime 24 Ore: 0

Ultimi 7 Giorni: 1

Ultimi 30 Giorni: 1

Tutti i Tempi: 172