Salta al contenuto principale

EasySMX ESM-9110 Vibration Motor Replacement

Cosa ti serve

  1. EasySMX ESM-9110 Vibration Motor Replacement, Handle Covers: passo 1, immagine 1 di 2 EasySMX ESM-9110 Vibration Motor Replacement, Handle Covers: passo 1, immagine 2 di 2
    • Use a Phillips #000 screwdriver to remove the two 10 mm screws from the back of controller.

  2. EasySMX ESM-9110 Vibration Motor Replacement: passo 2, immagine 1 di 1
    • Insert a plastic opening tool into the slit on the side of controller.

    • Wiggle the tool until the cover becomes loose.

    • Repeat this on the other side of Controller.

    • Go slow. Take your time removing the handle covers.

  3. EasySMX ESM-9110 Vibration Motor Replacement: passo 3, immagine 1 di 1
    • Remove the faceplate.

    • Repeat on the other side of the controller.

  4. EasySMX ESM-9110 Vibration Motor Replacement, Vibration Motor: passo 4, immagine 1 di 3 EasySMX ESM-9110 Vibration Motor Replacement, Vibration Motor: passo 4, immagine 2 di 3 EasySMX ESM-9110 Vibration Motor Replacement, Vibration Motor: passo 4, immagine 3 di 3
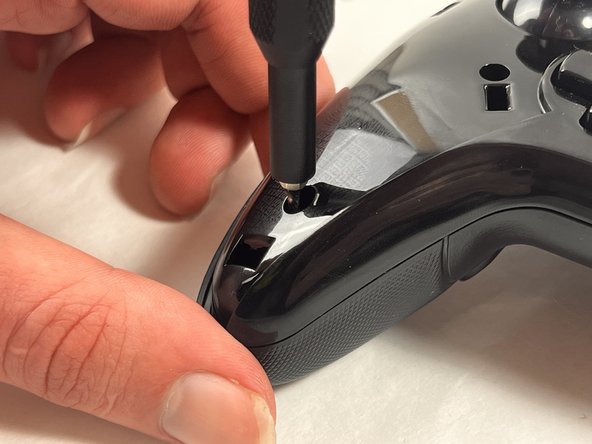
    • Use a Phillips #000 screwdriver to remove the four 20 mm screws from the controller's faceplate.

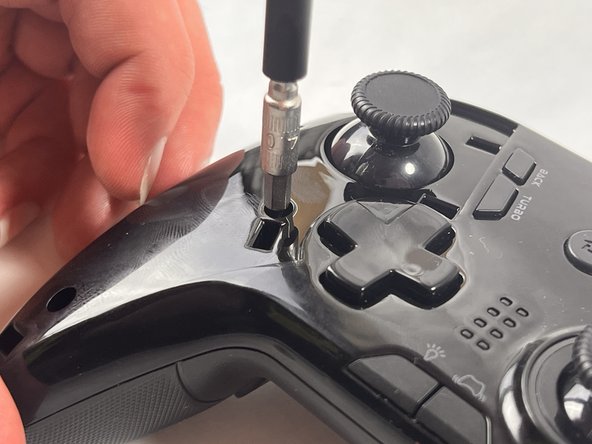
    • Use a Phillips #000 screwdriver (a screwdriver bit extension may be needed) to remove the two 20 mm screws from the controllers faceplate.

    • The screw extender should only be used to unscrew two of the six screws. Do not use it for all six.

  5. EasySMX ESM-9110 Vibration Motor Replacement: passo 5, immagine 1 di 2 EasySMX ESM-9110 Vibration Motor Replacement: passo 5, immagine 2 di 2
    • Remove the faceplate of the controller by lifting it directly up from the backplate.

    • Be gentle, the controller's backplate is still attached. Do not move the controller too roughly.

  6. EasySMX ESM-9110 Vibration Motor Replacement: passo 6, immagine 1 di 2 EasySMX ESM-9110 Vibration Motor Replacement: passo 6, immagine 2 di 2
    • Locate the parts of the vibration motor that are connected to the motherboard

    • Solder these parts of the vibration motor to remove them.

    • There should be two connectors present in your controller, one for each vibration motor.

Conclusione

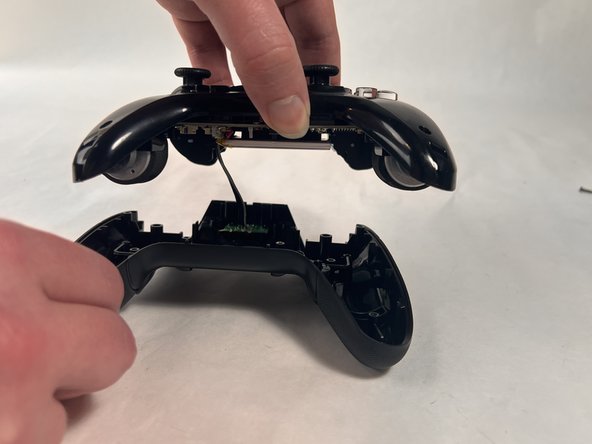
To reassemble your device, follow these instructions in reverse order.

Team

0 Commenti

Aggiungi Commento

Visualizza Statistiche:

Ultime 24 Ore: 1

Ultimi 7 Giorni: 13

Ultimi 30 Giorni: 13

Tutti i Tempi: 59