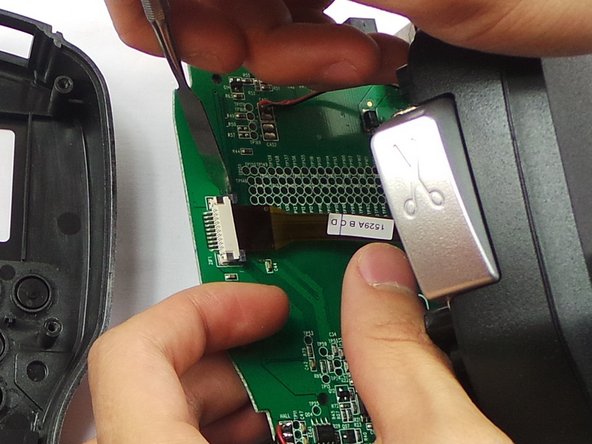
Salta al contenuto principale

Dymo LabelManager 280 Screen Replacement

Cosa ti serve

  1. Dymo LabelManager 280 Screen Replacement, Rear Case: passo 1, immagine 1 di 2 Dymo LabelManager 280 Screen Replacement, Rear Case: passo 1, immagine 2 di 2
    • Remove battery.

    • Remove the label cassette.

  2. Dymo LabelManager 280 Screen Replacement: passo 2, immagine 1 di 2 Dymo LabelManager 280 Screen Replacement: passo 2, immagine 2 di 2
    • Remove the 6 screws in the indicated places. These particular screws are 2mm x 8mm Phillips #0 head

  3. Dymo LabelManager 280 Screen Replacement: passo 3, immagine 1 di 2 Dymo LabelManager 280 Screen Replacement: passo 3, immagine 2 di 2
    • Use the spudger to take apart the device by insterting it as shown in the picture and twisting it. This should be done all around the device to ensure the two parts split correctly.

    • The keys/buttons highlighted in the second picture fall out easily so be careful. Keep device faced down in order to keep them from falling.

  4. Dymo LabelManager 280 Screen Replacement, Screen: passo 4, immagine 1 di 1
    • Further remove the 2 screws (1.2mm X 4mm Phillips #0 head).

  5. Dymo LabelManager 280 Screen Replacement: passo 5, immagine 1 di 2 Dymo LabelManager 280 Screen Replacement: passo 5, immagine 2 di 2
    • Detach the ribbon cable.

  6. Dymo LabelManager 280 Screen Replacement: passo 6, immagine 1 di 1
    • Remove the screen.

Conclusione

To reassemble your device, follow these instructions in reverse order.

Un'altra persona ha completato questa guida.

Team

USF Tampa, Team 6-5, Eyestone Spring 2016 Membro di USF Tampa, Team 6-5, Eyestone Spring 2016

USFT-EYESTONE-S16S6G5

3 Membri

3 Guide realizzate

Un commento

Hi, thak you for the tutorial, it seems pretty simple. Do you know where to find the LCD screen, or whats the specs, maybe I can find it at AliExpress.

Jacques Maltais - Replica

Aggiungi Commento

Visualizza Statistiche:

Ultime 24 Ore: 6

Ultimi 7 Giorni: 17

Ultimi 30 Giorni: 73

Tutti i Tempi: 3,352