Questa versione può contenere modifiche errate. Passa all'ultima istantanea verificata.
Cosa ti serve
-
-
Svita le cinque viti a croce Phillips da 7,2 mm che tengono ferma la copertura posteriore.
-
-
-
Solleva la batteria dalla scheda madre per avere accesso al suo connettore.
-
-
-
-
Rimuovi l'unica vite a croce Phillips da 7,2 mm che fissa la scheda madre al case anteriore.
-
-
Questo passaggio è privo di traduzione. Aiuta a tradurlo
-
Lift the rubber button contacts off the front controller cover to access the plastic button covers.
-
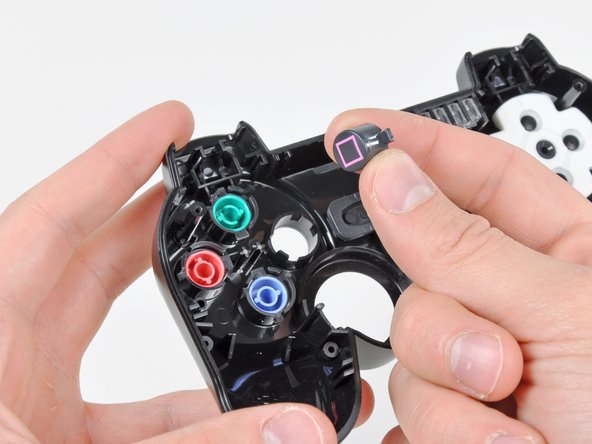
Lift any damaged plastic button covers out of the controller cover.
-


Annulla: non ho completato questa guida.
Altre 95 persone hanno completato questa guida.

6 Commenti
My Dualshock 3 didn't have the three armed plastic piece on the D-pad. Mine's a red one, relatively recent. My controller also had the problem where it would randomly send button press events when using the L-stick. I traced the problem to the ribbon connector between the board and the contacts, which was very dirty. I cleaned the contacts and put the controller back together with an additional rubber shim between the back cover and the battery, which got rid of the creakiness of the somewhat loose-fitting case. Works great now.
How do you clean the contacts? Is there a special way?
Are these instructions the same for the dual-shock 2?
TNX-could not really figure out where the 3-armed plastic should fit in but tnx to step 11 i know-now im going to dismantle my controller again.