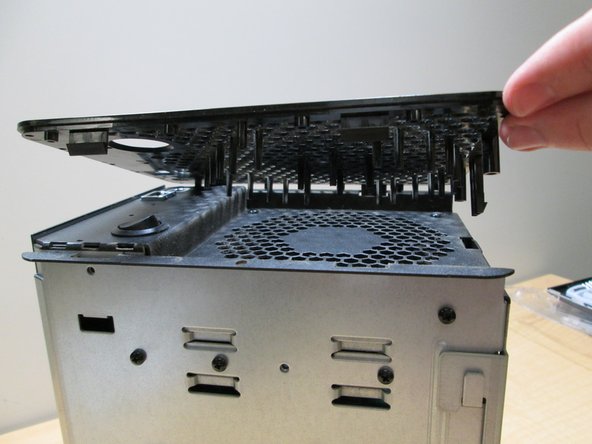
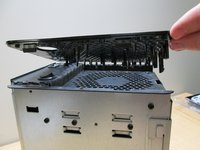
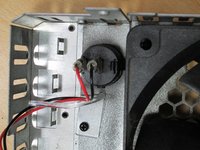
Salta al contenuto principale

Drobo FS DRDS2-A Power Switch Replacement

Cosa ti serve

  1. Drobo FS DRDS2-A Power Switch Replacement, Case: passo 1, immagine 1 di 1
    • To start getting the case off remove the front panel so it's out of the way.

  2. Drobo FS DRDS2-A Power Switch Replacement: passo 2, immagine 1 di 2 Drobo FS DRDS2-A Power Switch Replacement: passo 2, immagine 2 di 2
    • Next remove the screws from the feet of the case with a phillips head screwdriver.

  3. Drobo FS DRDS2-A Power Switch Replacement: passo 3, immagine 1 di 1
    • To remove the case, place the Drobo on its back and slide the case off.

  4. Drobo FS DRDS2-A Power Switch Replacement, Power Switch: passo 4, immagine 1 di 3 Drobo FS DRDS2-A Power Switch Replacement, Power Switch: passo 4, immagine 2 di 3 Drobo FS DRDS2-A Power Switch Replacement, Power Switch: passo 4, immagine 3 di 3
    • Press tabs to release back cover and lift off

  5. Drobo FS DRDS2-A Power Switch Replacement: passo 5, immagine 1 di 2 Drobo FS DRDS2-A Power Switch Replacement: passo 5, immagine 2 di 2
    • Push tabs in and carefully pull out the front facer and drive shelves

  6. Drobo FS DRDS2-A Power Switch Replacement: passo 6, immagine 1 di 2 Drobo FS DRDS2-A Power Switch Replacement: passo 6, immagine 2 di 2
    • Unscrew the back face by removing the screw on the back sides, then slide top face apart from the others

    • If you have a Drobo 5N2, you may also need to remove the 3 screws on each side.

  7. Drobo FS DRDS2-A Power Switch Replacement: passo 7, immagine 1 di 2 Drobo FS DRDS2-A Power Switch Replacement: passo 7, immagine 2 di 2
    • Carefully unplug the Power Switch and Fan wires.

  8. Drobo FS DRDS2-A Power Switch Replacement: passo 8, immagine 1 di 1
    • Press tabs on Power Switch to release the Power Switch and Push out.

    • A Spudger like object is helpful for pushing in the tabs if the fan is not removed also

  9. Drobo FS DRDS2-A Power Switch Replacement: passo 9, immagine 1 di 2 Drobo FS DRDS2-A Power Switch Replacement: passo 9, immagine 2 di 2
    • Finally pull the old switch out and pop the new one in.

Conclusione

To reassemble your device, follow these instructions in reverse order.

Altre 2 persone hanno completato questa guida.

Rye Cassan

Membro da: 01/24/17

155 Reputazione

1 Guida realizzata

Team

Cal Poly, Team 10-4, Banghart Winter 2017 Membro di Cal Poly, Team 10-4, Banghart Winter 2017

CPSU-BANGHART-W17S10G4

3 Membri

5 Guide realizzate

4 Commenti

Hello,

great info I found here, but where do I buy a replacement button for my Drobo in Europe?

Kind regards and thank you in advance,

Heinrich

Heinrich Voelkel - Replica

Hi, where do I find a replacement power switch for my Drobo 5N? BTW, thanks for the great tutorial!

Stephen R Parrott - Replica

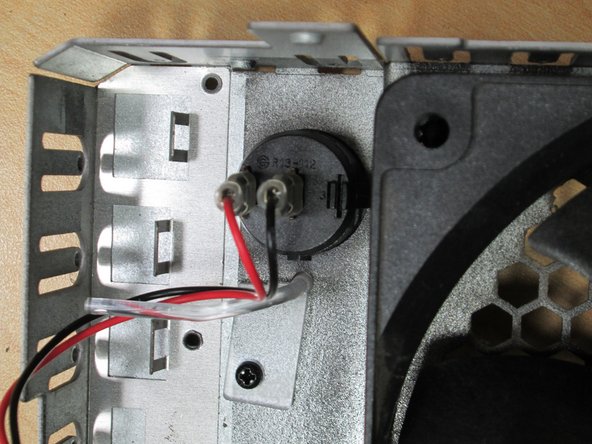
I took my Drobo apart and the printed numbers on the switch are R13-112. I ordered these on Amazon:

https://www.amazon.com/Twidec-Rocker-Tog...

I put it in, crossed my fingers, and BAM, worked like a charm. Hope that helps all the future DIY’ers.

tdubs - Replica

Good article - thanks. Discovered my Drobo 5N (cir 2014) has a 3-wire spring-loaded switch with 2V LED (green) (wires: Red - White - Blue) Press once to turn on; Press and hold to manually turn off. Can simple R13-112 SPST switch be substituted?

John W - Replica

Aggiungi Commento

Visualizza Statistiche:

Ultime 24 Ore: 4

Ultimi 7 Giorni: 9

Ultimi 30 Giorni: 34

Tutti i Tempi: 2,096