Questa versione può contenere modifiche errate. Passa all'ultima istantanea verificata.
Cosa ti serve
-
Questo passaggio è privo di traduzione. Aiuta a tradurlo
-
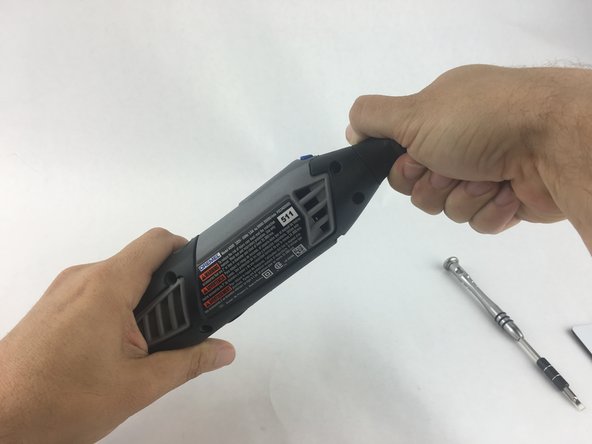
Start by removing the housing cap by unscrewing it.
-
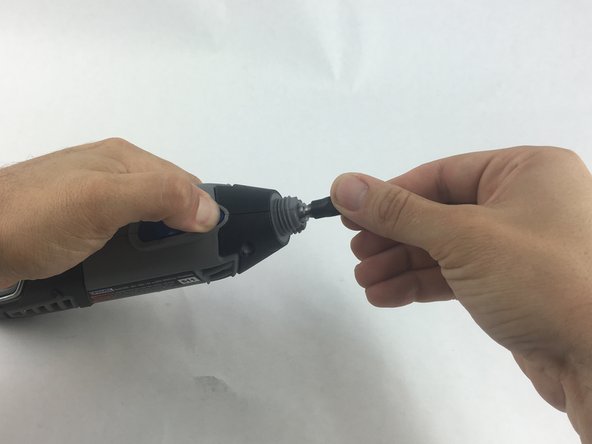
Next, unscrew the now exposed collet nut while holding down the shaft lock button.
-
-
Questo passaggio è privo di traduzione. Aiuta a tradurlo
-
Using your hands, carefully remove hanger from casing.
-
-
Questo passaggio è privo di traduzione. Aiuta a tradurlo
-
Remove the brush caps (one on each side) by using a flathead screwdriver bit.
-
-
Questo passaggio è privo di traduzione. Aiuta a tradurlo
-
Using the Torx 15 screwdriver tip, remove the 5 screws (12.5 mm) that hold the casing together.
-
-
-
Questo passaggio è privo di traduzione. Aiuta a tradurlo
-
Use a plastic opening tool to gently wedge apart the hard plastic threads.
-
-
Questo passaggio è privo di traduzione. Aiuta a tradurlo
-
Use your hands to carefully remove the back casing so that none of the components fall out.
-
-
Questo passaggio è privo di traduzione. Aiuta a tradurlo
-
To clear access to the electrical assembly, remove the variable speed dial cap and blue power lever, and set them aside.
-
-
Questo passaggio è privo di traduzione. Aiuta a tradurlo
-
Using your fingers, carefully pull the circuit board from the casing. This will make it easier to remove the power cord.
-
-
Questo passaggio è privo di traduzione. Aiuta a tradurlo
-
Each wire is fed through a small opening on the circuit board and held with a flat head screw.
-
Loosen the screw just enough to remove the wire by gently pulling it with your hand.
-
-
Questo passaggio è privo di traduzione. Aiuta a tradurlo
-
Carefully remove both wires from circuit board with your hands.
-
-
Questo passaggio è privo di traduzione. Aiuta a tradurlo
-
Carefully pull up on the shaft to lift out of the casing.
-
-
Questo passaggio è privo di traduzione. Aiuta a tradurlo
-
Firmly hold the field assembly in one hand and the bearing assembly in the other.
-
Carefully slide the bearing assemble out of the field assembly.
-


Annulla: non ho completato questa guida.
Altre 6 persone hanno completato questa guida.
Team

USF Tampa, Team 15-4, Remmell Spring 2016 Membro di USF Tampa, Team 15-4, Remmell Spring 2016
USFT-REMMELL-S16S15G4
4 Membri
13 Guide realizzate
5 Commenti
Nice guide. FYI, I've found that removing the rotor/bearing assembly is just as easy without removing the input power wires.
Absolutely, it is.
yeah why did we do that?
thats an abrupt end for someone trying to learn all of this the first time. which one of those is the field assembly and which is the bearing assembly? my guess is the bearing assembly is the cylinder looking thing on the right...
and then what? it just says do it all backwards to put it together again...? whyd we take it apart for? mines whistling or squealing or just going "EEEEEEEEEEEEEEEEEEEEEEEEEEEEEEEEEEEEEEEEEEEEEEEEEEEEEEEEEEEEEEEEEEEEEEEEEEEEE..." when i turn it on. just started today too. am i supposed to just, like, smack this can shaped part on the table and then cram it all back into its plastic case?
i mean, that works when the kids are acting up so im gonna give it a try.,..
Disassembly is shown, but main action of removing ball bearings from the shaft of the armature - vital essential sequence of removing - how to remove the collate pipe from the armature shaft, then how to pull out, ball bearings from the armature shaft is not shown. That is the most important procedure. No one wants to replace the whole armature and ball bearing assembly, at unnecessary high cost when the armature is okay. Please show how to remove ball bearings and replace them on the existing working armature.