Questa versione può contenere modifiche errate. Passa all'ultima istantanea verificata.
Cosa ti serve
-
Questo passaggio è privo di traduzione. Aiuta a tradurlo
-
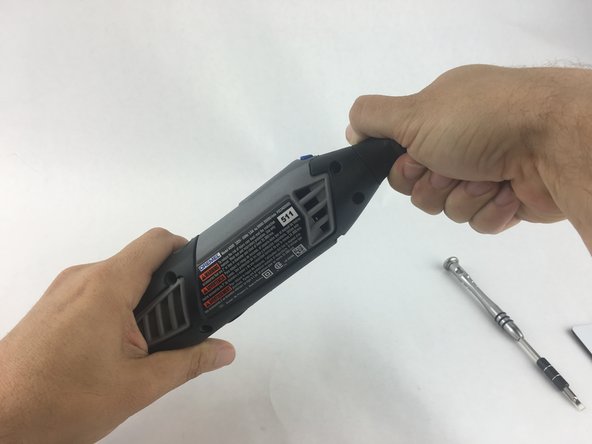
Start by removing the housing cap by unscrewing it.
-
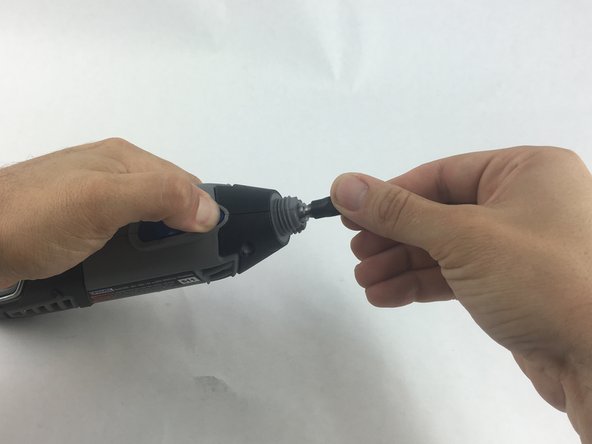
Next, unscrew the now exposed collet nut while holding down the shaft lock button.
-
-
Questo passaggio è privo di traduzione. Aiuta a tradurlo
-
Using your hands, carefully remove hanger from casing.
-
-
-
Questo passaggio è privo di traduzione. Aiuta a tradurlo
-
Remove the brush caps (one on each side) by using a flathead screwdriver bit.
-
-
Questo passaggio è privo di traduzione. Aiuta a tradurlo
-
Using the Torx 15 screwdriver tip, remove the 5 screws (12.5 mm) that hold the casing together.
-
-
Questo passaggio è privo di traduzione. Aiuta a tradurlo
-
Use a plastic opening tool to gently wedge apart the hard plastic threads.
-
-
Questo passaggio è privo di traduzione. Aiuta a tradurlo
-
Use your hands to carefully remove the back casing so that none of the components fall out.
-


Annulla: non ho completato questa guida.
Altre 2 persone hanno completato questa guida.
Team

USF Tampa, Team 15-4, Remmell Spring 2016 Membro di USF Tampa, Team 15-4, Remmell Spring 2016
USFT-REMMELL-S16S15G4
4 Membri
13 Guide realizzate