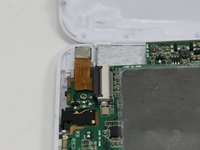
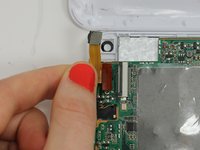
Salta al contenuto principale

Dreamax DMX-ST7A Camera Replacement

Cosa ti serve

  1. Dreamax DMX-ST7A Camera Replacement, Back Cover: passo 1, immagine 1 di 1
    • Position the tablet so the ports and screws are facing you.

  2. Dreamax DMX-ST7A Camera Replacement: passo 2, immagine 1 di 1
    • Remove the two 2.5mm screws using the Phillips #00 precision screwdriver.

  3. Dreamax DMX-ST7A Camera Replacement: passo 3, immagine 1 di 2 Dreamax DMX-ST7A Camera Replacement: passo 3, immagine 2 di 2
    • Use the plastic opening tool to assist in removing the back cover.

  4. Dreamax DMX-ST7A Camera Replacement: passo 4, immagine 1 di 1
    • Upon removing the back cover position the tablet as seen in the picture.

  5. Dreamax DMX-ST7A Camera Replacement, Camera: passo 5, immagine 1 di 3 Dreamax DMX-ST7A Camera Replacement, Camera: passo 5, immagine 2 di 3 Dreamax DMX-ST7A Camera Replacement, Camera: passo 5, immagine 3 di 3
    • Lift the black bar towards the right to expose the data strip.

  6. Dreamax DMX-ST7A Camera Replacement: passo 6, immagine 1 di 3 Dreamax DMX-ST7A Camera Replacement: passo 6, immagine 2 di 3 Dreamax DMX-ST7A Camera Replacement: passo 6, immagine 3 di 3
    • Remove the data strip and camera.

Conclusione

To reassemble your device, follow these instructions in reverse order.

Team

0 Commenti

Aggiungi Commento

Visualizza Statistiche:

Ultime 24 Ore: 0

Ultimi 7 Giorni: 0

Ultimi 30 Giorni: 0

Tutti i Tempi: 156