Salta al contenuto principale
Unisciti alla Community delle riparazioni - Crea un account
Disassembling Nokia E61i Volume Control Buttons

Disassembling Nokia E61i Volume Control Buttons

Christopher Patton

Christopher Patton e 4 altri collaboratori

Ultimo aggiornamento il 30 lug 2014

15 - 20 minuti
Moderato
Passi mancanti
Foto Azione
Necessarie Immagini Migliori

Cosa ti serve

Strumenti

Mostra di più…

  1. Disassembling Nokia E61i Volume Control Buttons, Battery: passo 1, immagine 1 di 2 Disassembling Nokia E61i Volume Control Buttons, Battery: passo 1, immagine 2 di 2
    • First, gather all necessary tools.

    • Remove the back cover to access the battery by pushing the tab on the bottom of the cover.

    • Slide the back cover downwards off of the phone while pressing down on the tab.

  2. Disassembling Nokia E61i Volume Control Buttons: passo 2, immagine 1 di 1
    • Locate the bottom-left corner of the phone where there is a spot to remove the battery.

  3. Disassembling Nokia E61i Volume Control Buttons: passo 3, immagine 1 di 1
    • Lift the battery out using your finger.

    • The E61i uses a Nokia BP-4L standard battery.

  4. Disassembling Nokia E61i Volume Control Buttons, Front Cover: passo 4, immagine 1 di 2 Disassembling Nokia E61i Volume Control Buttons, Front Cover: passo 4, immagine 2 di 2
    • To remove the top of the back cover, pry the sides and pop it off.

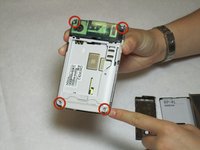
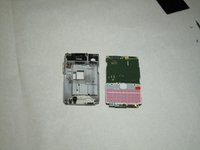
    • Remove the four screws that secure the front cover to the rest of the phone using a T7 screwdriver.

  5. Disassembling Nokia E61i Volume Control Buttons: passo 5, immagine 1 di 1
    • Remove the cover by pulling it up and off.

  6. Disassembling Nokia E61i Volume Control Buttons, Display: passo 6, immagine 1 di 2 Disassembling Nokia E61i Volume Control Buttons, Display: passo 6, immagine 2 di 2
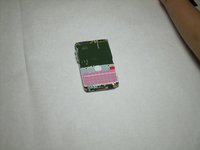
    • Take off the casing and keyboard.

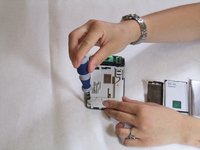
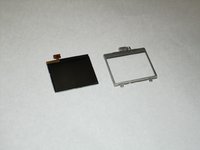
    • Remove the screws while holding the screen in place using a Torx T6 screwdriver.

    • Remove the single screw while holding the screen in place using a Torx T5 screwdriver.

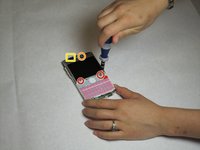
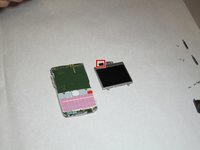
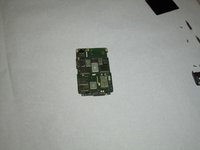
    • Lift the ribbon, disconnecting contact with the motherboard.

    • Firmly press the contacts into place to connect the ribbon and the motherboard when reassembling.

  7. Disassembling Nokia E61i Volume Control Buttons: passo 7, immagine 1 di 2 Disassembling Nokia E61i Volume Control Buttons: passo 7, immagine 2 di 2
    • Gently pull the screen off of the phone.

    • Be sure not to rip the sticker that connects the display and the motherboard.

    • Pull the silver case off to completely free the cracked or damaged screen.

  8. Disassembling Nokia E61i Volume Control Buttons, Motherboard: passo 8, immagine 1 di 3 Disassembling Nokia E61i Volume Control Buttons, Motherboard: passo 8, immagine 2 di 3 Disassembling Nokia E61i Volume Control Buttons, Motherboard: passo 8, immagine 3 di 3
    • Pull the green motherboard from the back casing.

  9. Disassembling Nokia E61i Volume Control Buttons, Volume Control Buttons: passo 9, immagine 1 di 1
    • The volume control buttons are secured to the frame only by their fit around a small piece of the plastic. Using a small flat-head screwdriver or other flat object, lift the ribbon over this piece of the cover.

  10. Disassembling Nokia E61i Volume Control Buttons: passo 10, immagine 1 di 1
    • Next, remove the volume control buttons from the cover by pushing or pulling them out away from the interior of the cover.

Conclusione

To reassemble your device, follow these instructions in reverse order.

Team

Cal Poly, Team 9-63, Walters Spring 2011 Membro di Cal Poly, Team 9-63, Walters Spring 2011

CPSU-WALTERS-S11S9G63

5 Membri

12 Guide realizzate

0Commenti sulla guida

Aggiungi Commento

Visualizza Statistiche:

Ultime 24 Ore: 0

Ultimi 7 Giorni: 4

Ultimi 30 Giorni: 13

Tutti i Tempi: 1,667