Salta al contenuto principale

Disassembling LG Vortex

Cosa ti serve

  1. Disassembling LG Vortex, Power down the Phone: passo 1, immagine 1 di 1
    • Power the phone off

    • The power button is located on top of the phone

  2. Disassembling LG Vortex, Remove the Back Cover: passo 2, immagine 1 di 3 Disassembling LG Vortex, Remove the Back Cover: passo 2, immagine 2 di 3 Disassembling LG Vortex, Remove the Back Cover: passo 2, immagine 3 di 3
    • Find the two thumbnail ridges on the side and top of the phone. One is next to the micro SD slot and the other at the top of the phone

    • Once the ridges are located, use the blue plastic opening tool to pry the back cover away from the rest of the phone.

    • Remove the back cover and set it to the side.

  3. Disassembling LG Vortex: passo 3, immagine 1 di 1
    • Remove the battery using the blue plastic opening tool.

    • There is a small thumbnail ridge at the top left corner of the battery for ease of removal.

    • Put the battery aside.

  4. Disassembling LG Vortex, Unscrew the Back Frame: passo 4, immagine 1 di 2 Disassembling LG Vortex, Unscrew the Back Frame: passo 4, immagine 2 di 2
    • All screws are the same size screwdriver head #00

    • Use the precision screwdriver to remove the 6 screws along the edges of the phone.

    • There are 2 screws at the top in each corner, 2 in the middle on the sides, and 2 in the bottom corners.

    • Place the screws in a container to ensure they aren't lost.

  5. Disassembling LG Vortex, Remove the Back Frame: passo 5, immagine 1 di 3 Disassembling LG Vortex, Remove the Back Frame: passo 5, immagine 2 di 3 Disassembling LG Vortex, Remove the Back Frame: passo 5, immagine 3 di 3
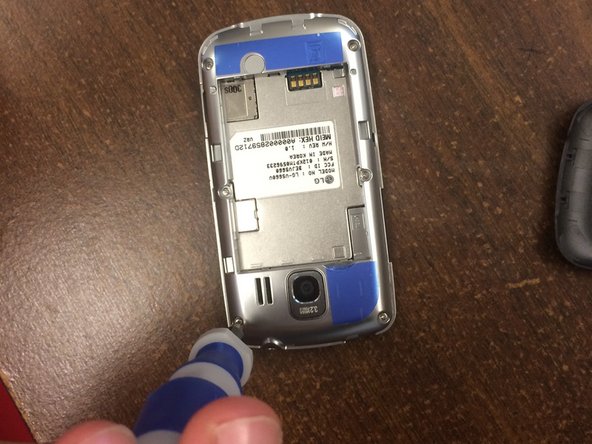
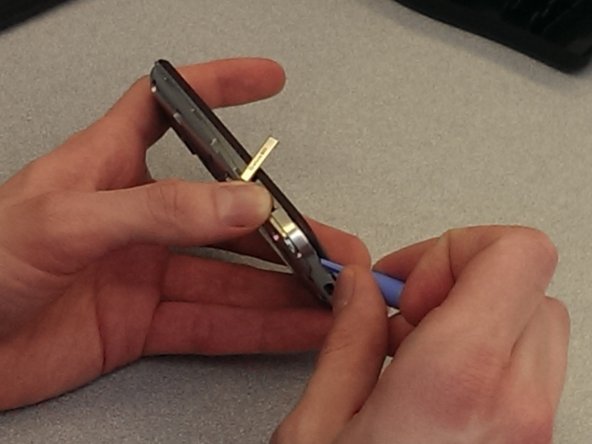
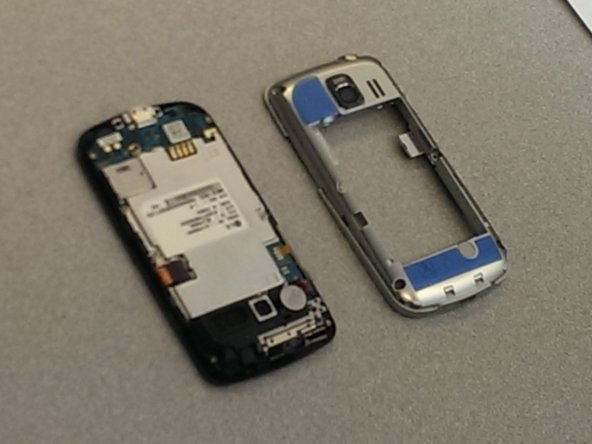
    • Use the blue plastic opening tool to remove the back frame from the rest of the phone.

    • Pry at the micro SD slot. Push the cover for the SD slot away from the front of the phone and pry the back frame away from the rest of the phone.

    • Pry your way around the entire phone to separate the face from the frame.

Conclusione

To reassemble your device, follow these instructions in reverse order.

Altre 2 persone hanno completato questa guida.

Jen

Membro da: 02/13/14

22 Reputazione

3 Guide realizzate

Team

Ohio State, Team 1-3, Buehl Spring 2014 Membro di Ohio State, Team 1-3, Buehl Spring 2014

OSU-BUEHL-S14S1G3

4 Membri

6 Guide realizzate

0 Commenti

Aggiungi Commento

Visualizza Statistiche:

Ultime 24 Ore: 1

Ultimi 7 Giorni: 12

Ultimi 30 Giorni: 100

Tutti i Tempi: 4,018