Salta al contenuto principale

Questa guida ha delle modifiche più recenti. Passa all'ultima versione non verificata.

Disassembling Kodak Advantix F350 View Finder

Cosa ti serve

  1. Disassembling Kodak Advantix F350 View Finder, Back Cover: passo 1, immagine 1 di 1
    • Turn off the camera.

    • Locate the power switch on the front of the camera below the camera lens.

    • Slide the switch to the off position.

  2. Disassembling Kodak Advantix F350 View Finder: passo 2, immagine 1 di 2 Disassembling Kodak Advantix F350 View Finder: passo 2, immagine 2 di 2
    • Locate the 3 screws that hold the back cover to the camera.

    • One screw is located on the film opener side of the camera.

    • The other screws are located on the opposite side of the camera.

  3. Disassembling Kodak Advantix F350 View Finder: passo 3, immagine 1 di 3 Disassembling Kodak Advantix F350 View Finder: passo 3, immagine 2 di 3 Disassembling Kodak Advantix F350 View Finder: passo 3, immagine 3 di 3
    • Use the Phillips #00 Precision Screwdriver and remove the screws on the back cover.

  4. Disassembling Kodak Advantix F350 View Finder: passo 4, immagine 1 di 2 Disassembling Kodak Advantix F350 View Finder: passo 4, immagine 2 di 2
    • Open the film door to remove the back cover.

    • Slide the film door lever to the left until the film door opens.

  5. Disassembling Kodak Advantix F350 View Finder: passo 5, immagine 1 di 2 Disassembling Kodak Advantix F350 View Finder: passo 5, immagine 2 di 2
    • Use a plastic opening tool to pry the case open until a small gap is present.

    • Repeat this process at the top and bottom of the film door to loosen it.

  6. Disassembling Kodak Advantix F350 View Finder: passo 6, immagine 1 di 3 Disassembling Kodak Advantix F350 View Finder: passo 6, immagine 2 di 3 Disassembling Kodak Advantix F350 View Finder: passo 6, immagine 3 di 3
    • Grab the top and bottom of the case firmly as shown.

    • Gently remove the back of the camera case with a slight twisting motion.

  7. Disassembling Kodak Advantix F350 View Finder, Front Cover: passo 7, immagine 1 di 2 Disassembling Kodak Advantix F350 View Finder, Front Cover: passo 7, immagine 2 di 2
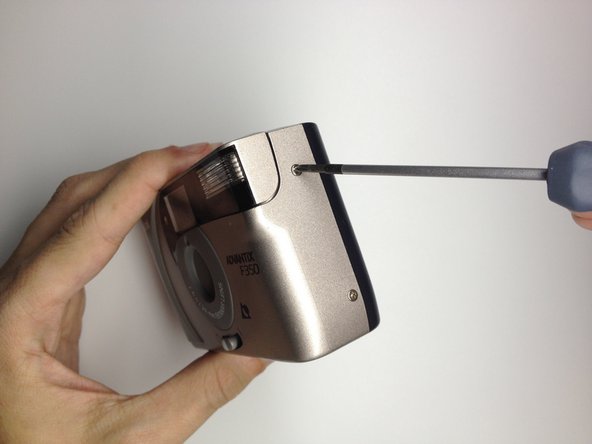
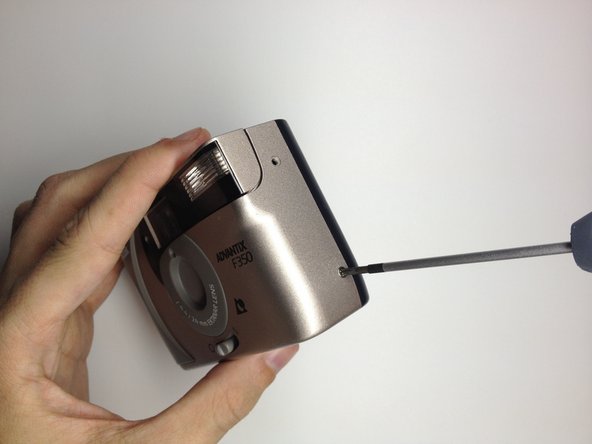
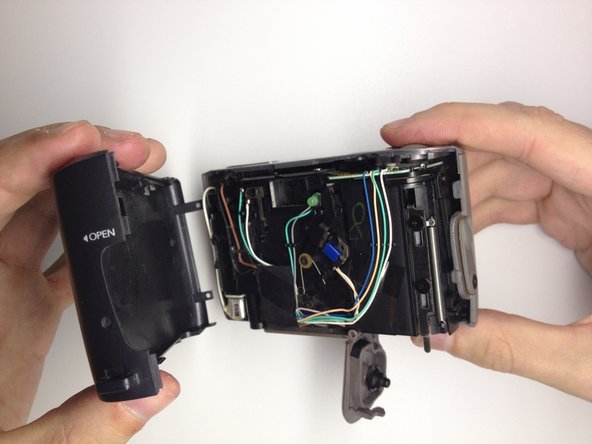
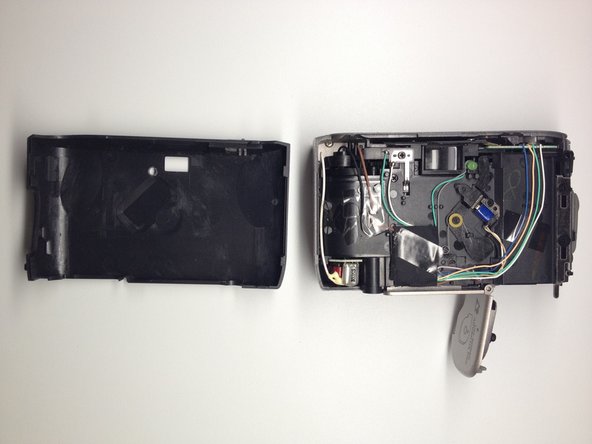
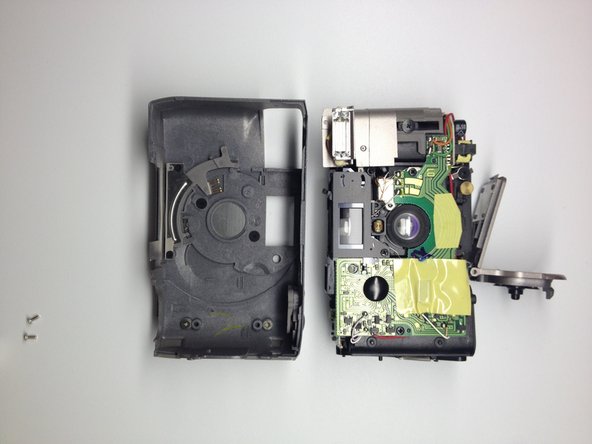
    • Locate the 3 screws on the camera that hold the front cover of the camera to the camera body.

    • The first 2 are located on the bottom of the camera.

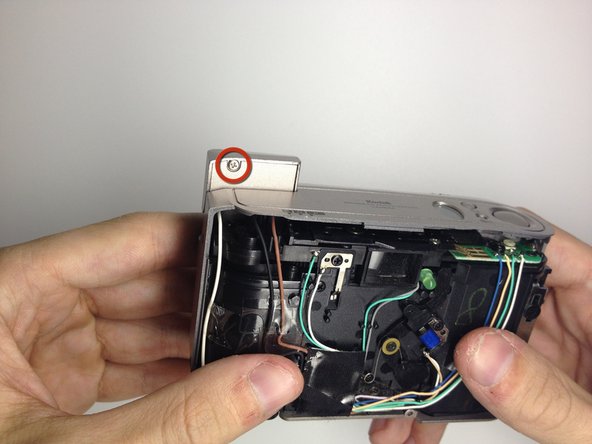
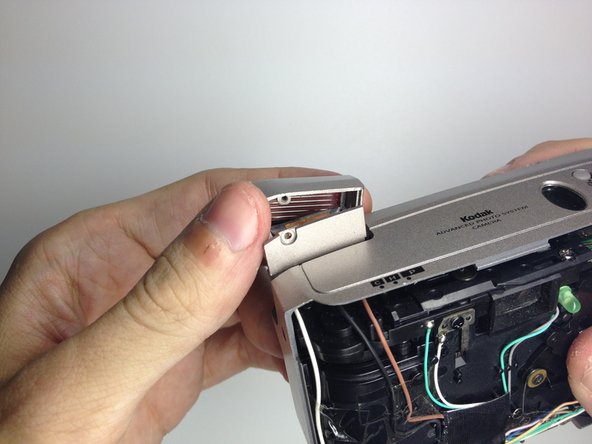
    • The last screw is located behind the flash module.

    • Turn the camera on, and raise the flash module to locate the flash module screw.

  8. Disassembling Kodak Advantix F350 View Finder: passo 8, immagine 1 di 2 Disassembling Kodak Advantix F350 View Finder: passo 8, immagine 2 di 2
    • Remove the 2 screws at the base of the camera housing.

    • Use the Phillips #00 Precision Screwdriver and remove the screws.

    • Repeat this process for the screw behind the flash module.

  9. Disassembling Kodak Advantix F350 View Finder: passo 9, immagine 1 di 2 Disassembling Kodak Advantix F350 View Finder: passo 9, immagine 2 di 2
    • Remove the screw located under the flash module using the Phillips #00 Precision Screwdriver.

  10. Disassembling Kodak Advantix F350 View Finder: passo 10, immagine 1 di 2 Disassembling Kodak Advantix F350 View Finder: passo 10, immagine 2 di 2
    • Remove the flash cover.

    • Remove the flash module by twisting it up and outward of the camera housing.

    • The cover can now be be removed.

  11. Disassembling Kodak Advantix F350 View Finder: passo 11, immagine 1 di 2 Disassembling Kodak Advantix F350 View Finder: passo 11, immagine 2 di 2
    • Remove the film door lever.

    • Remove the screw holding the film lever in place by using a Phillips #00 Precision Screwdriver.

    • Using a plastic opening tool, gently pry the switch upwards to remove it.

  12. Disassembling Kodak Advantix F350 View Finder: passo 12, immagine 1 di 1
    • Open the battery door by pushing the lever towards the arrow indicated.

  13. Disassembling Kodak Advantix F350 View Finder: passo 13, immagine 1 di 3 Disassembling Kodak Advantix F350 View Finder: passo 13, immagine 2 di 3 Disassembling Kodak Advantix F350 View Finder: passo 13, immagine 3 di 3
    • Remove the front cover.

    • Insert your thumb in the film hole and gently pry the bottom loose.

    • Once the front is loose, gently pull it out.

  14. Disassembling Kodak Advantix F350 View Finder, Display: passo 14, immagine 1 di 1
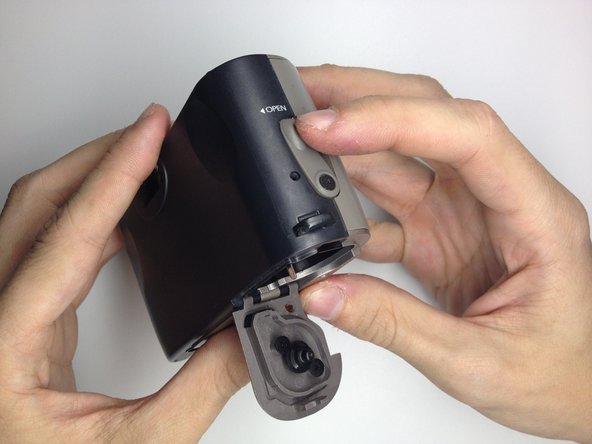
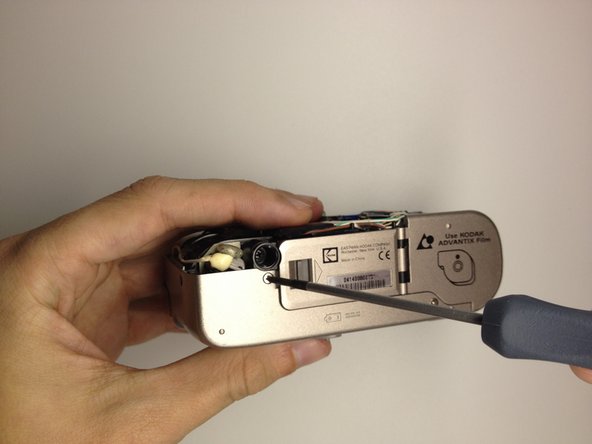
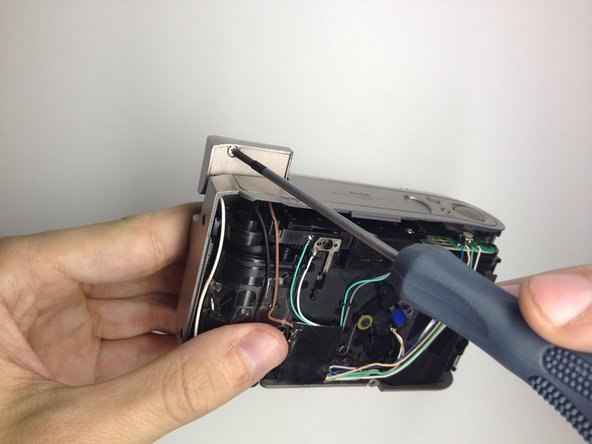
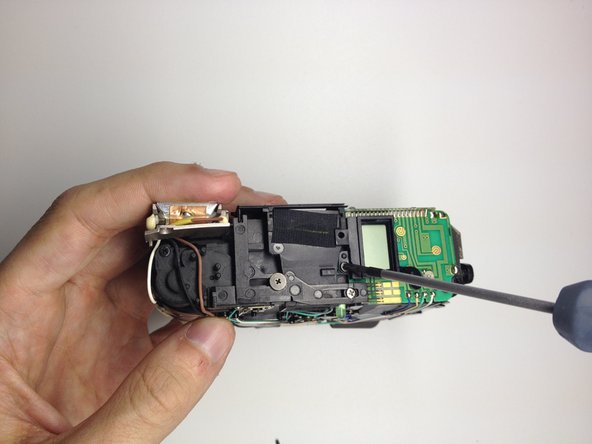
    • Locate the 3 screws on the top of the camera.

    • These will be removed in the next step.

  15. Disassembling Kodak Advantix F350 View Finder: passo 15, immagine 1 di 3 Disassembling Kodak Advantix F350 View Finder: passo 15, immagine 2 di 3 Disassembling Kodak Advantix F350 View Finder: passo 15, immagine 3 di 3
    • Remove the 3 screws using the Phillips #00 Precision Screwdriver.

  16. Disassembling Kodak Advantix F350 View Finder: passo 16, immagine 1 di 2 Disassembling Kodak Advantix F350 View Finder: passo 16, immagine 2 di 2
    • Remove the LCD.

    • Gently pry the LCD and plastic bezel upward with a plastic opening tool.

    • Remove LCD and replace as needed.

  17. Disassembling Kodak Advantix F350 View Finder, View Finder: passo 17, immagine 1 di 1
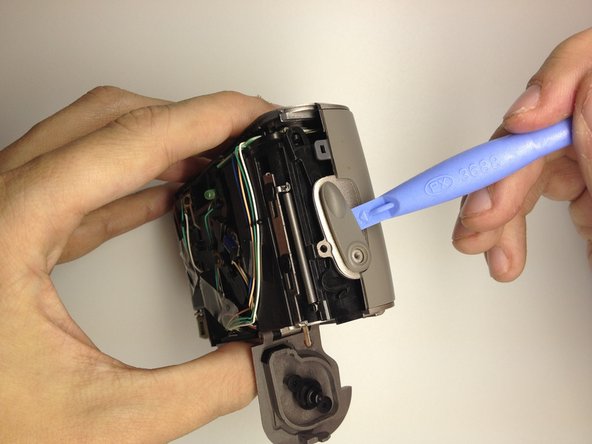
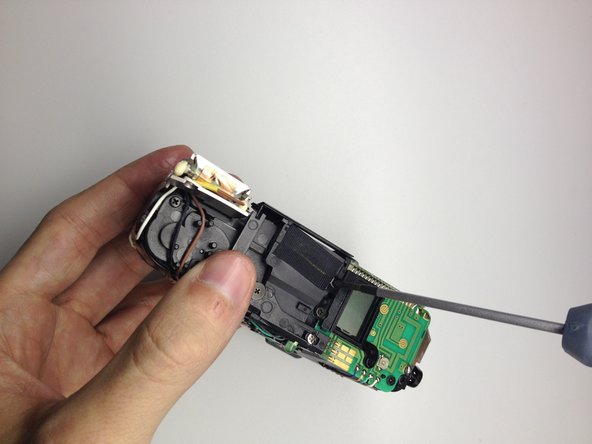
    • Locate the screw on the front of the camera that holds the view finder assembly.

  18. Disassembling Kodak Advantix F350 View Finder: passo 18, immagine 1 di 1
    • Using the Phillips #00 Precision Screwdriver, remove the screw.

  19. Disassembling Kodak Advantix F350 View Finder: passo 19, immagine 1 di 2 Disassembling Kodak Advantix F350 View Finder: passo 19, immagine 2 di 2
    • Remove the 3 view finder covers.

    • The first one is metal and comes off easily.

    • The last two are plastic and tend to fall off, so gently remove them.

  20. Disassembling Kodak Advantix F350 View Finder: passo 20, immagine 1 di 1
    • Locate the 2 screws on the top of the camera.

    • These are holding the view finder assembly in place.

  21. Disassembling Kodak Advantix F350 View Finder: passo 21, immagine 1 di 2 Disassembling Kodak Advantix F350 View Finder: passo 21, immagine 2 di 2
    • Use the Phillips #00 Precision Screwdriver to remove the screws.

  22. Disassembling Kodak Advantix F350 View Finder: passo 22, immagine 1 di 2 Disassembling Kodak Advantix F350 View Finder: passo 22, immagine 2 di 2
    • Remove the mount holding the view finder in place.

  23. Disassembling Kodak Advantix F350 View Finder: passo 23, immagine 1 di 2 Disassembling Kodak Advantix F350 View Finder: passo 23, immagine 2 di 2
    • Remove the front view finder.

    • Gently fold the plastic up from the back.

    • Pull up to remove the front view finder.

  24. Disassembling Kodak Advantix F350 View Finder: passo 24, immagine 1 di 1
    • Gently grab the back view finder.

    • Slide up to remove from camera.

Conclusione

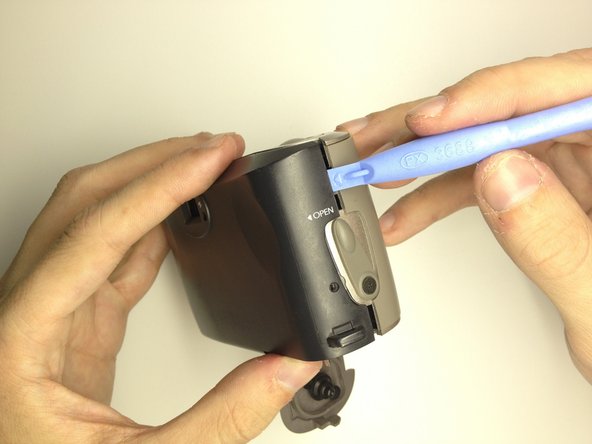
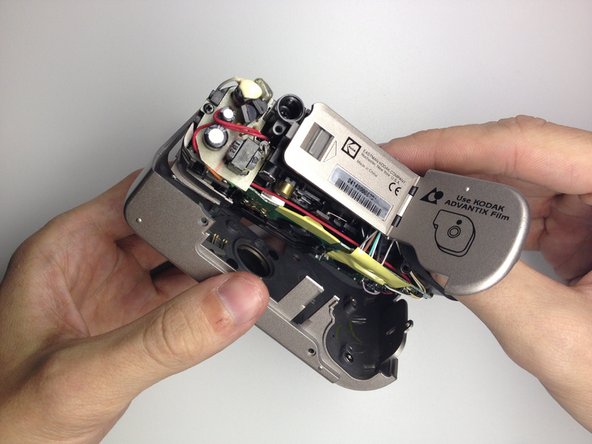
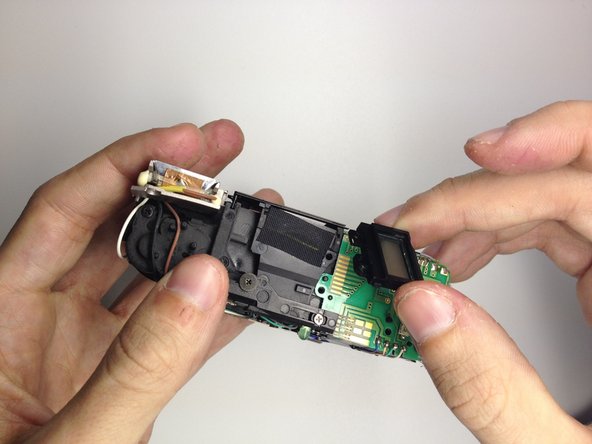
To reassemble your device, follow these instructions in reverse order.

Altre 3 persone hanno completato questa guida.

Team

UW Stout, Team 1-2, Zhou Fall 2011 Membro di UW Stout, Team 1-2, Zhou Fall 2011

UWSTOUT-ZHOU-F11S1G2

4 Membri

10 Guide realizzate

0 Commenti

Aggiungi Commento

Visualizza Statistiche:

Ultime 24 Ore: 0

Ultimi 7 Giorni: 1

Ultimi 30 Giorni: 2

Tutti i Tempi: 1,117