Salta al contenuto principale

Questa guida ha delle modifiche più recenti. Passa all'ultima versione non verificata.

Disassembling Griffin iFM 4027 Central Button

Cosa ti serve

  1. Disassembling Griffin iFM 4027 Central Button, Right Side Panel: passo 1, immagine 1 di 1
    Attrezzo utilizzato in questo passaggio:
    iFixit Opening Tool
    $1.99
    Compra
    • First, lodge the tip of the plastic iFixit opening tool into the top corner of the device.

    • Apply pressure upward with the iFixit Opening Tool. This should release the two panels away from each other.

  2. Disassembling Griffin iFM 4027 Central Button: passo 2, immagine 1 di 3 Disassembling Griffin iFM 4027 Central Button: passo 2, immagine 2 di 3 Disassembling Griffin iFM 4027 Central Button: passo 2, immagine 3 di 3
    • Use your fingers to separate the right side panel from the device.

    • Turn the panel over so that the outer edge is facing downward.

    • Use your fingers to dislodge the buttons, and then set them aside for later.

  3. Disassembling Griffin iFM 4027 Central Button, Left Side Panel: passo 3, immagine 1 di 1
    • Lodge the tip of the plastic opening tool into the top arc where the side and main part of the device meet.

    • Push the plastic opening tool upward until the side panel detaches.

  4. Disassembling Griffin iFM 4027 Central Button: passo 4, immagine 1 di 3 Disassembling Griffin iFM 4027 Central Button: passo 4, immagine 2 di 3 Disassembling Griffin iFM 4027 Central Button: passo 4, immagine 3 di 3
    • Slide the plastic opening tool along the panel seam and push upward until the side panel detaches from the main device.

    • Turn over the detached side panel, so that the outer side is facing downward.

    • Then use your fingers to disassemble the panel button and set it off to the side.

  5. Disassembling Griffin iFM 4027 Central Button, Central Button: passo 5, immagine 1 di 2 Disassembling Griffin iFM 4027 Central Button, Central Button: passo 5, immagine 2 di 2
    • The central button can easily be removed by using your fingers or tweezers to push the button out towards the left panel.

Conclusione

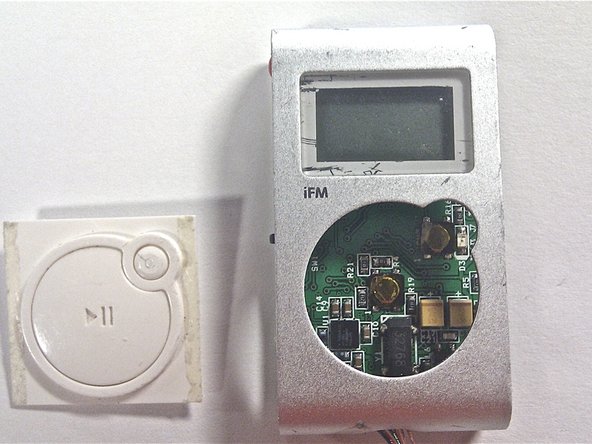
After disassembly, the device components should look similar to that which is depicted in the cover image (top right of page).

Alexander

Membro da: 03/09/12

101 Reputazione

6 Guide realizzate

Team

Clemson, Team 15-3, Benson Spring 2012 Membro di Clemson, Team 15-3, Benson Spring 2012

CLEM-BENSON-S12S15G3

3 Membri

6 Guide realizzate

0 Commenti

Aggiungi Commento

Visualizza Statistiche:

Ultime 24 Ore: 0

Ultimi 7 Giorni: 0

Ultimi 30 Giorni: 1

Tutti i Tempi: 1,044